Create Microsoft Entra ID Application based on a Self-Signed Certificate
This guide describes how to migrate SharePoint authentication from ACS to Microsoft Entra ID (S2S) by using a self-signed certificate.
Create a self-signed certificate
Option A: Export certificate with password (BC25 and later)
Use this option if your Business Central version supports password-protected PFX files (BC25 and later).
Run the following commands in PowerShell as Administrator:
# 1. Create certificate in local machine store (valid for 2 years)
$cert = New-SelfSignedCertificate -DnsName "BC-SharePoint-S2S" -CertStoreLocation "cert:\LocalMachine\My" -NotAfter (Get-Date).AddYears(2) -KeySpec Signature
# 2. Create folder
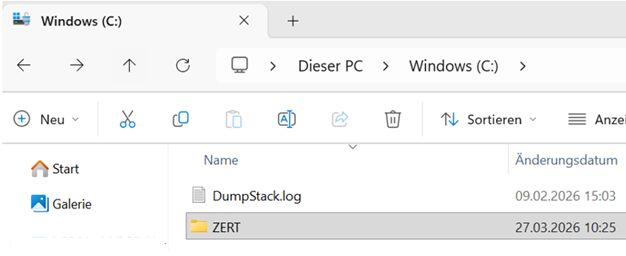
New-Item -ItemType Directory -Force -Path "C:\ZERT"
# 3. Export public part (.cer)
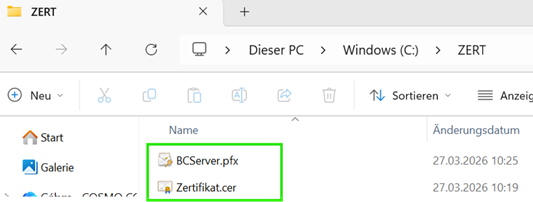
Export-Certificate -Cert $cert -FilePath "C:\ZERT\Zertifikat.cer"
# 4. Prepare password as SecureString
# Replace "CertPass#26" with your own strong password.
$pwd = ConvertTo-SecureString -String "CertPass#26" -Force -AsPlainText
# 5. Export private key (.pfx)
Export-PfxCertificate -Cert $cert -FilePath "C:\ZERT\BCServer.pfx" -Password $pwd
Option B: Export certificate without password (before BC25)
Important
In versions before Business Central 25, there is a limitation: certificates work only without a password. In this case, export the PFX file without a password.
# 1. Create certificate in local machine store (valid for 2 years)
# KeyExportPolicy is set to Exportable so that PFX export works.
$cert = New-SelfSignedCertificate -DnsName "BC-SharePoint-S2S" `
    -CertStoreLocation "cert:\LocalMachine\My" `
    -NotAfter (Get-Date).AddYears(2) `
    -KeySpec Signature `
    -KeyExportPolicy Exportable

# 2. Create folder if it does not exist
$exportPath = "C:\ZERT"
if (!(Test-Path $exportPath)) {
    New-Item -ItemType Directory -Force -Path $exportPath
}

# 3. Export public part (.cer)
Export-Certificate -Cert $cert -FilePath "$exportPath\Zertifikat.cer"

# 4. Prepare empty password
$emptyPwd = New-Object System.Security.SecureString

# 5. Export private key (.pfx) WITHOUT password
Export-PfxCertificate -Cert $cert -FilePath "$exportPath\BCServer.pfx" -Password $emptyPwd
Configure in Microsoft Azure portal (Microsoft Entra ID)
- Go to App registrations and select your app. If needed, create a new Microsoft Entra app registration. Record the Application (client) ID and store it securely.
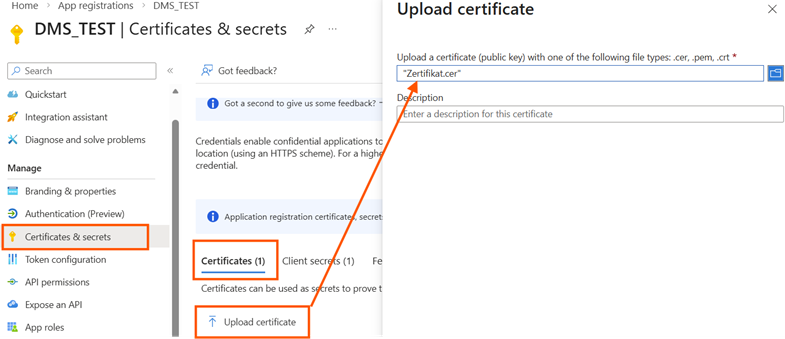
- Go to Certificates & secrets, select Upload certificate, and upload Zertifikat.cer.
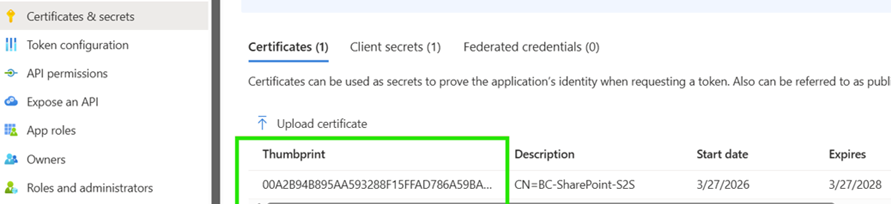
After confirmation, the certificate is successfully added:
- Configure API permissions:
- Add a permission -> SharePoint -> Application permissions
- Select Sites.FullControl.All
- Select Grant admin consent for [Tenant]

Tip
Instead of Sites.FullControl.All, you can also use Sites.Selected to restrict API permissions to specific SharePoint sites. The configuration of Sites.Selected is described in the guide Create Microsoft Entra ID Application based on Client Credentials.
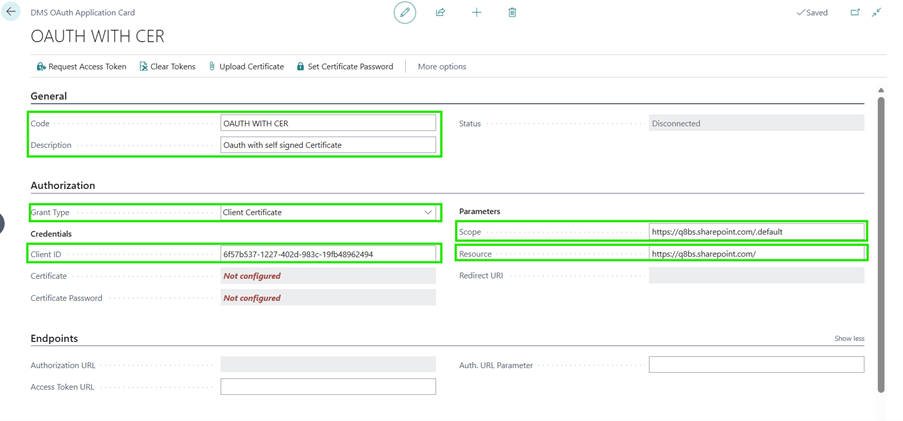
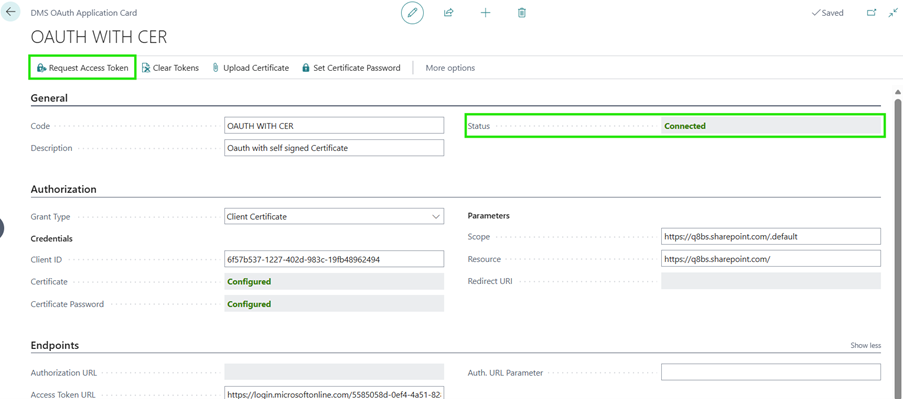
Configure the DMS OAuth application in Business Central
- Open the OAuth Applications - Document Management System page and create a new OAuth application.


- Set the following values:
- Authorization method: Client Certificate
- Client ID: Microsoft Entra application (client) ID
- Scope:
https://<Your Domain>.sharepoint.com/.default - Resource:
https://<Your Domain>.sharepoint.com/
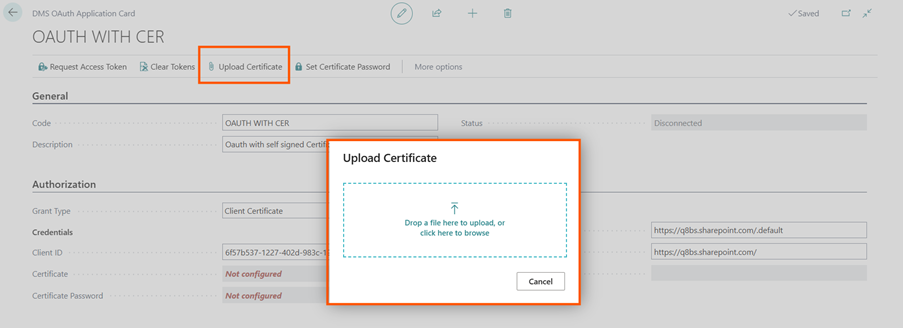
- Select Upload certificate and upload the .pfx file.
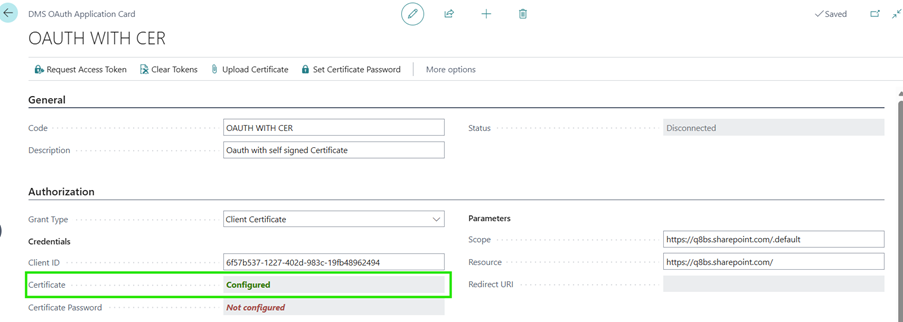
- After upload, the certificate is registered (status: Configured).
- Select Set Certificate Password and enter the password. If you exported the PFX file without a password (before BC25), skip this step.
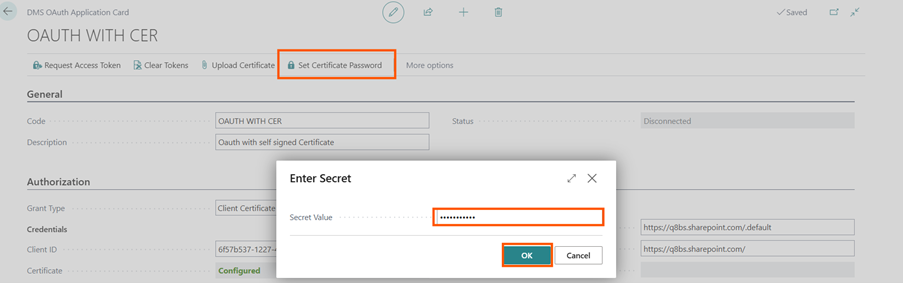
- The certificate password is set successfully (status: Configured).

Set the Access Token URL to:
https://login.microsoftonline.com/<Tenant ID>/oauth2/token

- Test the connection with Request Access Token.
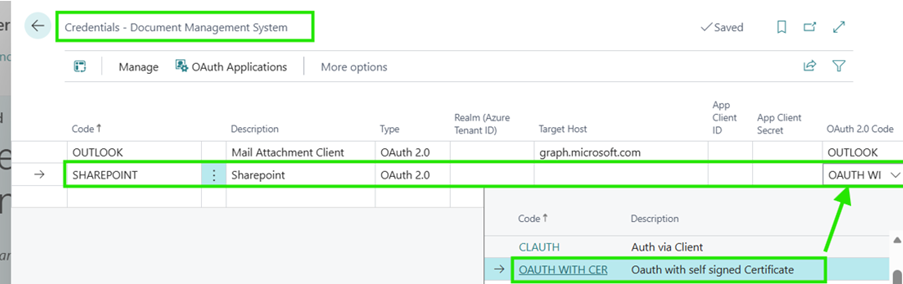
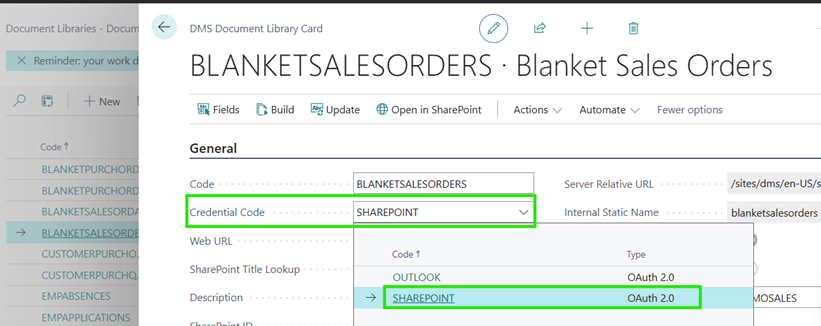
- Finally, configure the new authorization method on the Credentials - Document Management System page and then use it directly in your libraries.
Feedback
Submit feedback for this page.