VS Code Extension Setup
The client to access COSMO Alpaca is a Visual Studio Code Extension.
Installation
- Open Visual Studio Code. If you don't have it installed, you can get it for free here
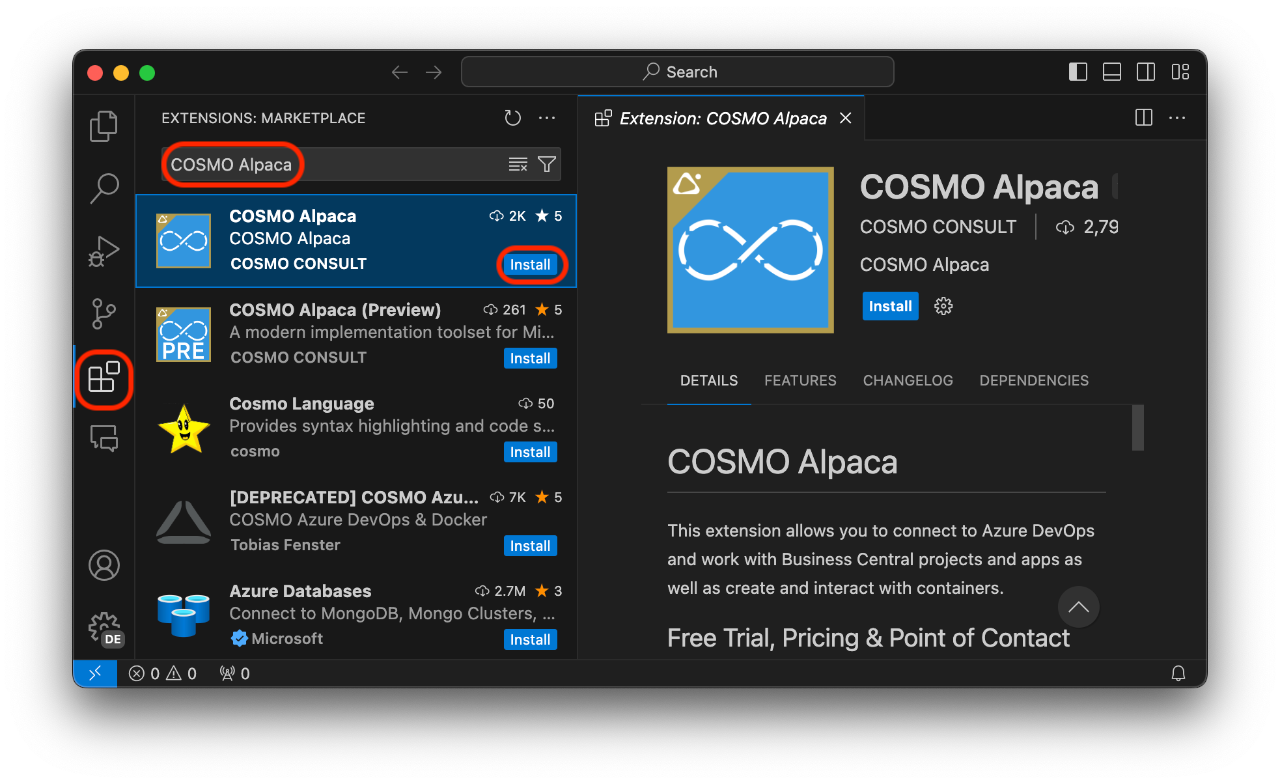
- Go to the "Extensions" view in the activity bar
- Search and install the COSMO Alpaca extension
- Wait until the installation has finished, you might have to reload the VS Code window
- Afterwards you should see the extension in the list of installed extensions
First Use
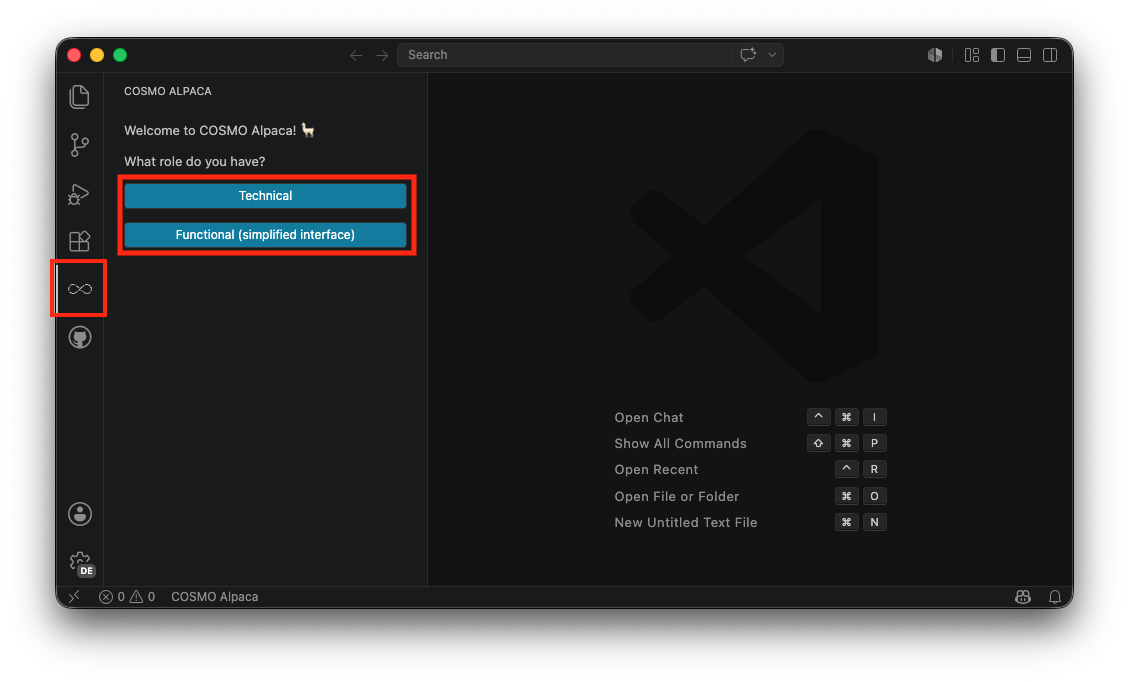
To open the COSMO Alpaca extension, click the respective icon in the activity bar. On first use you'll see a welcome screen, and before you can start you'll be asked for your role. The extension offers two view modes:
- technical: full interface with all features
- functional: simplified interface focused on core features (especially for non-technical users)
After selecting your role, you will be asked to select the platform you want to use COSMO Alpaca with: GitHub (AL-Go) or Azure DevOps. Depending on what platform you choose you'll be asked to sign in with your GitHub or Microsoft account.
Tip
You can switch between platforms and views at any time.
Now you can make yourself familiar with the interface:
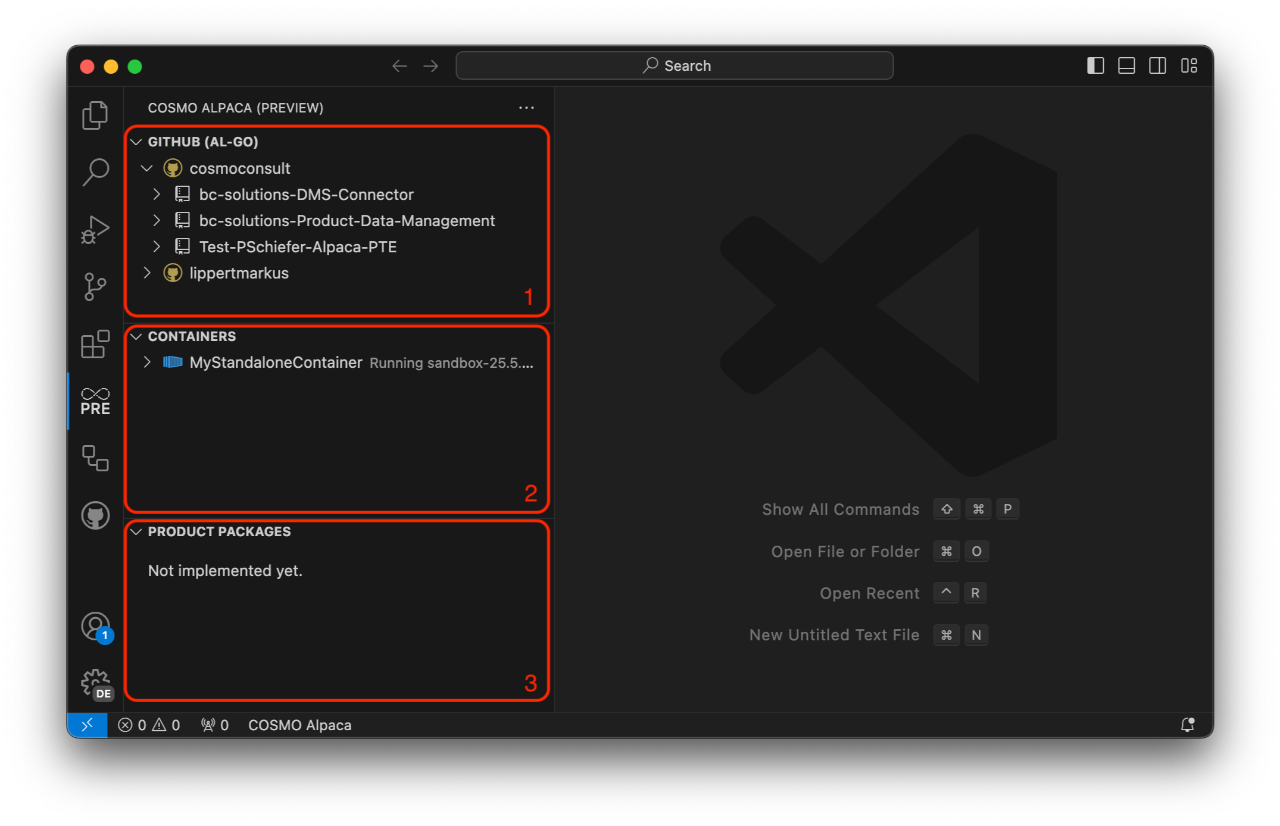
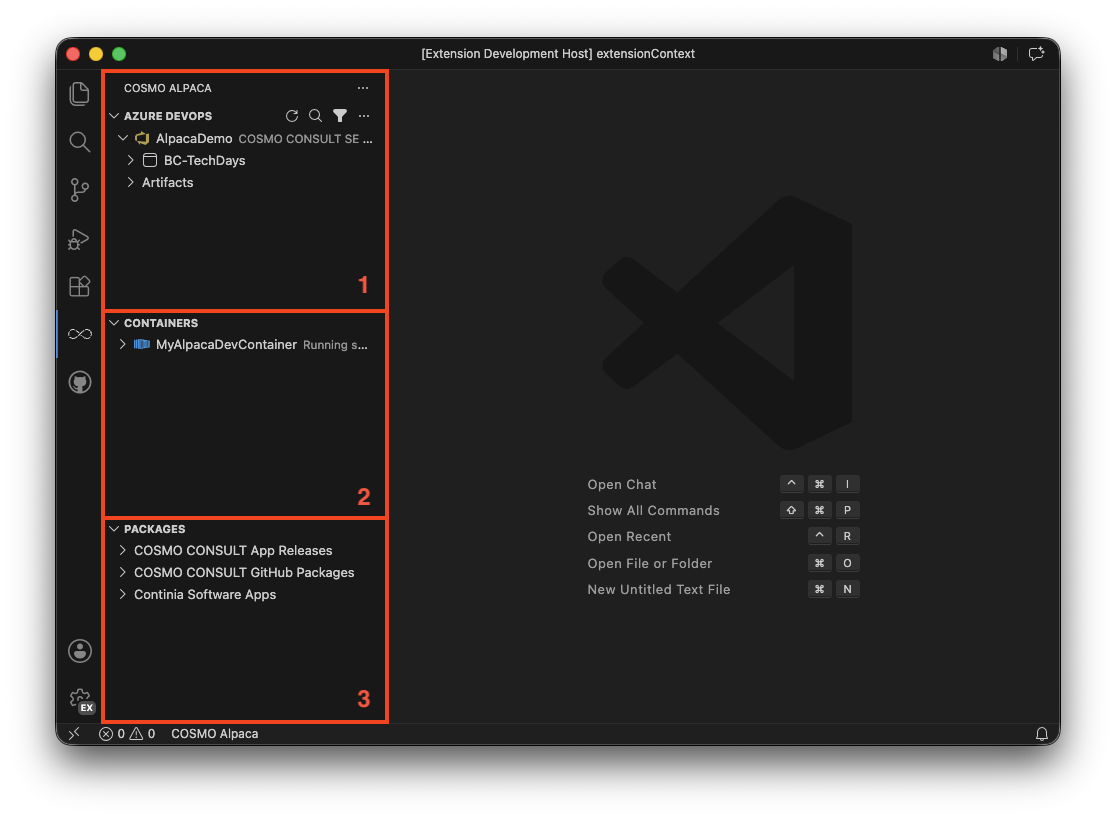
- The GitHub view lets you navigate through your GitHub organizations, accounts, repositories and more.
- The Containers view shows you all your containers across all your organizations and accounts along with their state and details.
- The Packages view allows you to browse Business Central NuGet feeds and view package and version information.
You now may want to get your first impressions of COSMO Alpaca: