Setup Next Major/-Minor, Localization, Minimum & other Pipelines/Workflows
WIP
When setting up Next Minor, Next Major, Localization, Minimum or other Pipelines using VS Code and Azure DevOps, you need an organization (see create org), a project (see create project) and an app repository see create app. To create the pipeline(s), you need to take the following steps:
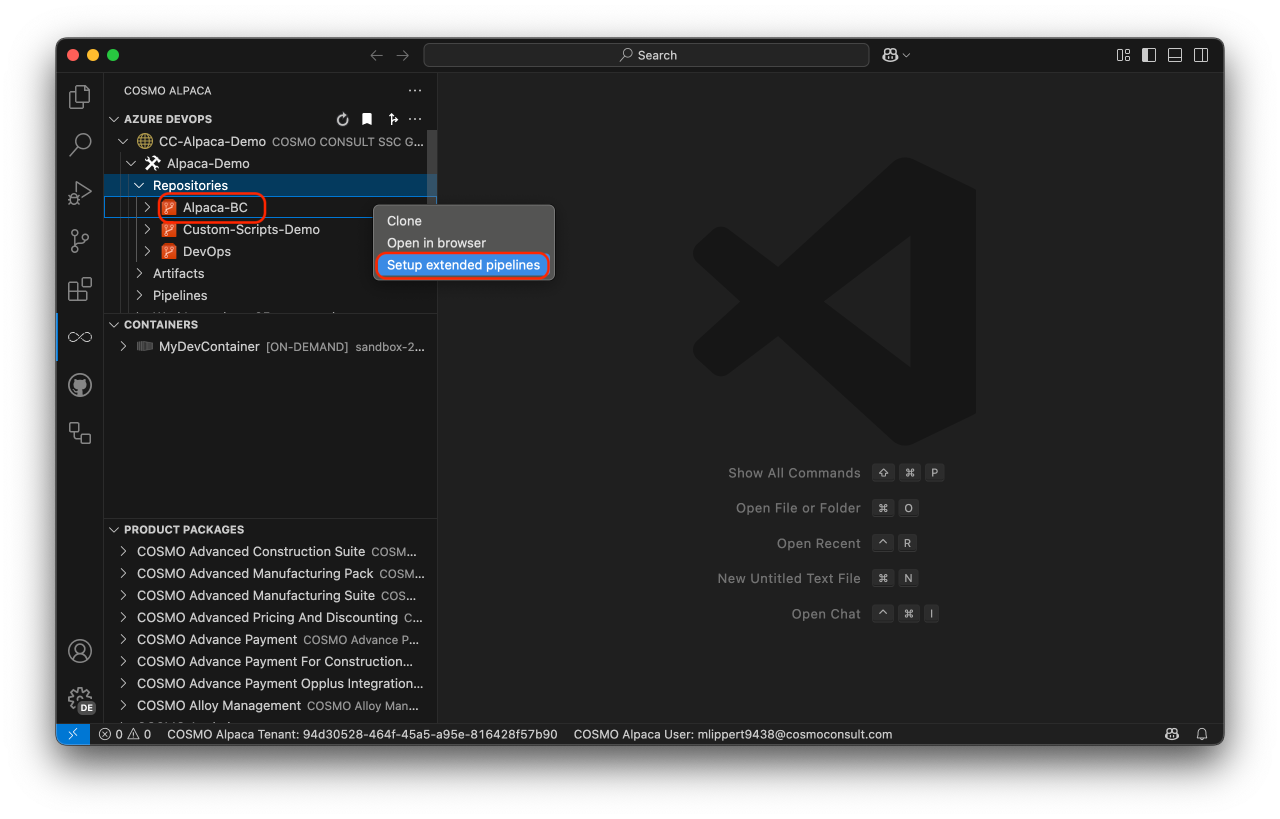
Right-click on the app-repository where you want to create the pipeline(s) and select "Setup extended pipelines"
Select the pipelines that you want to create and press "OK"
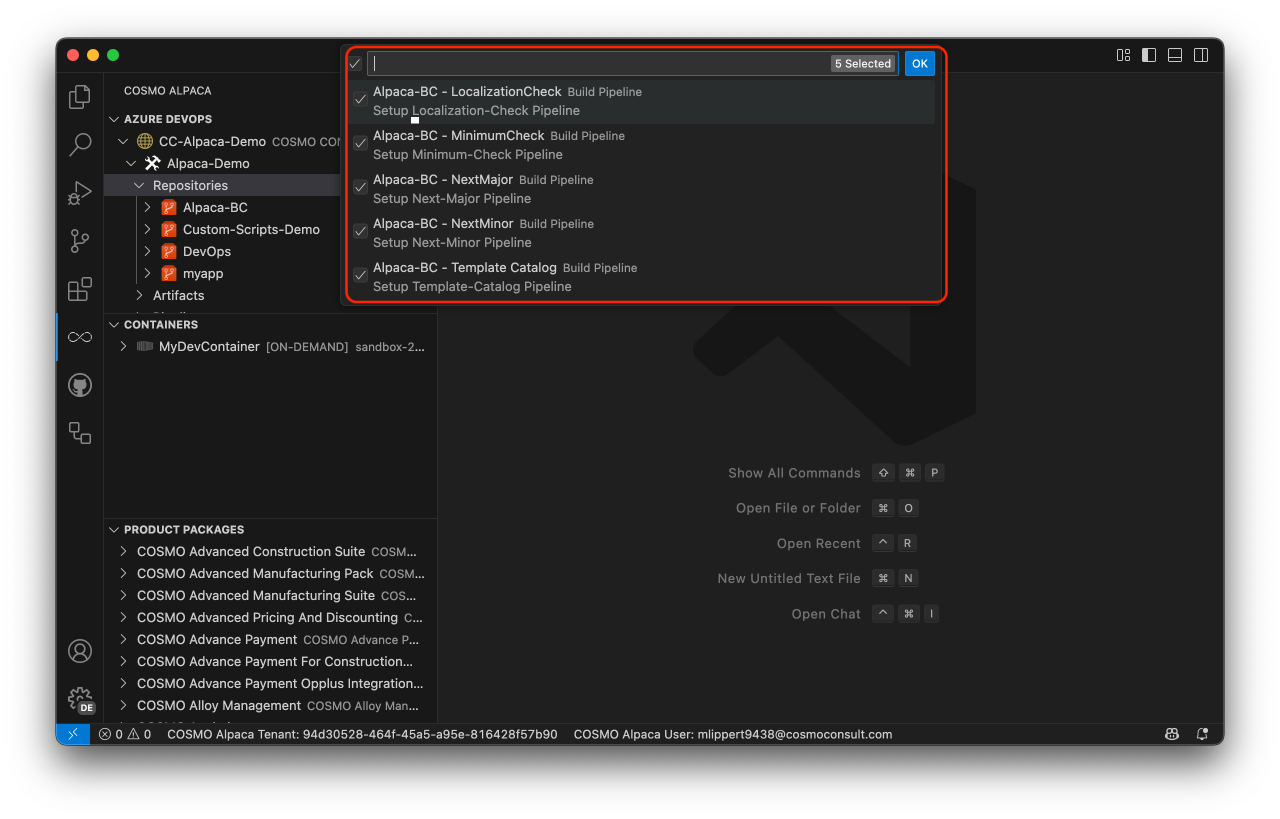
With that, the selected pipeline(s) will be created.
Template Catalog pipeline
The template catalog pipeline can upload the content of a directory within your repository to an Azure Blob Storage container.
After setting up the pipeline you need to configure some more settings before the pipeline will run:
In your app repository under
.devops/azure-pipeline-template-catalog.ymlverify ifTemplateCatalog.SourcePathandTemplateCatalog.TargetBaseUrlare correct and add a value forTemplateCatalog.AppIdwhich will be appended to the path inTemplateCatalog.TargetBaseUrl.In the variable group
CI Build Agentadd a secret variableTemplateCatalog.SasTokenwith a SAS Token (sp=...) for the Blob Storage container you set up inTemplateCatalog.TargetBaseUrl. The SAS token needs the following permissions:- Read
- Add
- Create
- Write
- Delete
- List
With this now every change on the main branch will trigger the Template Catalog Pipeline and uploads the contents of TemplateCatalog.SourcePath to your Blob storage container.