Create Microsoft Entra ID Application based on Client Credentials grant type
The OAuth 2.0 Client Credentials grant can be used in apps that are installed on a device to gain access to protected resources, such as web APIs. Using the Microsoft identity platform implementation of OAuth 2.0, you can add sign in and API access to your app.
Registering your application establishes a trust relationship between your app and the Microsoft identity platform. The trust is unidirectional: your app trusts the Microsoft identity platform, and not the other way around.
Benefits and Consequences of this Authentication
The use of this type of OAuth 2.0 authentication has various impacts on the behavior of COSMO Document Management System.
- Users from Business Central access the file structure in SharePoint Online using the Entra ID application. As a result, there is no differentiation in access permissions, and all users access with the same access permissions.
- This type of authentication allows for file uploads without user interaction. It supports automation and can be used in interfaces.
Prerequisites
- An Azure account that has an active subscription.
- The Azure account must have permission to manage applications in Microsoft Entra ID (formerly Azure AD). Any of the following Microsoft Entra ID roles include the required permissions:
- Application administrator
- Application developer
- Cloud application administrator
- Completion of the Set up a tenant quickstart.
Register an application
Follow these steps to create the app registration:
Sign in to the Microsoft Azure portal.
Search for and select Microsoft Entra ID.
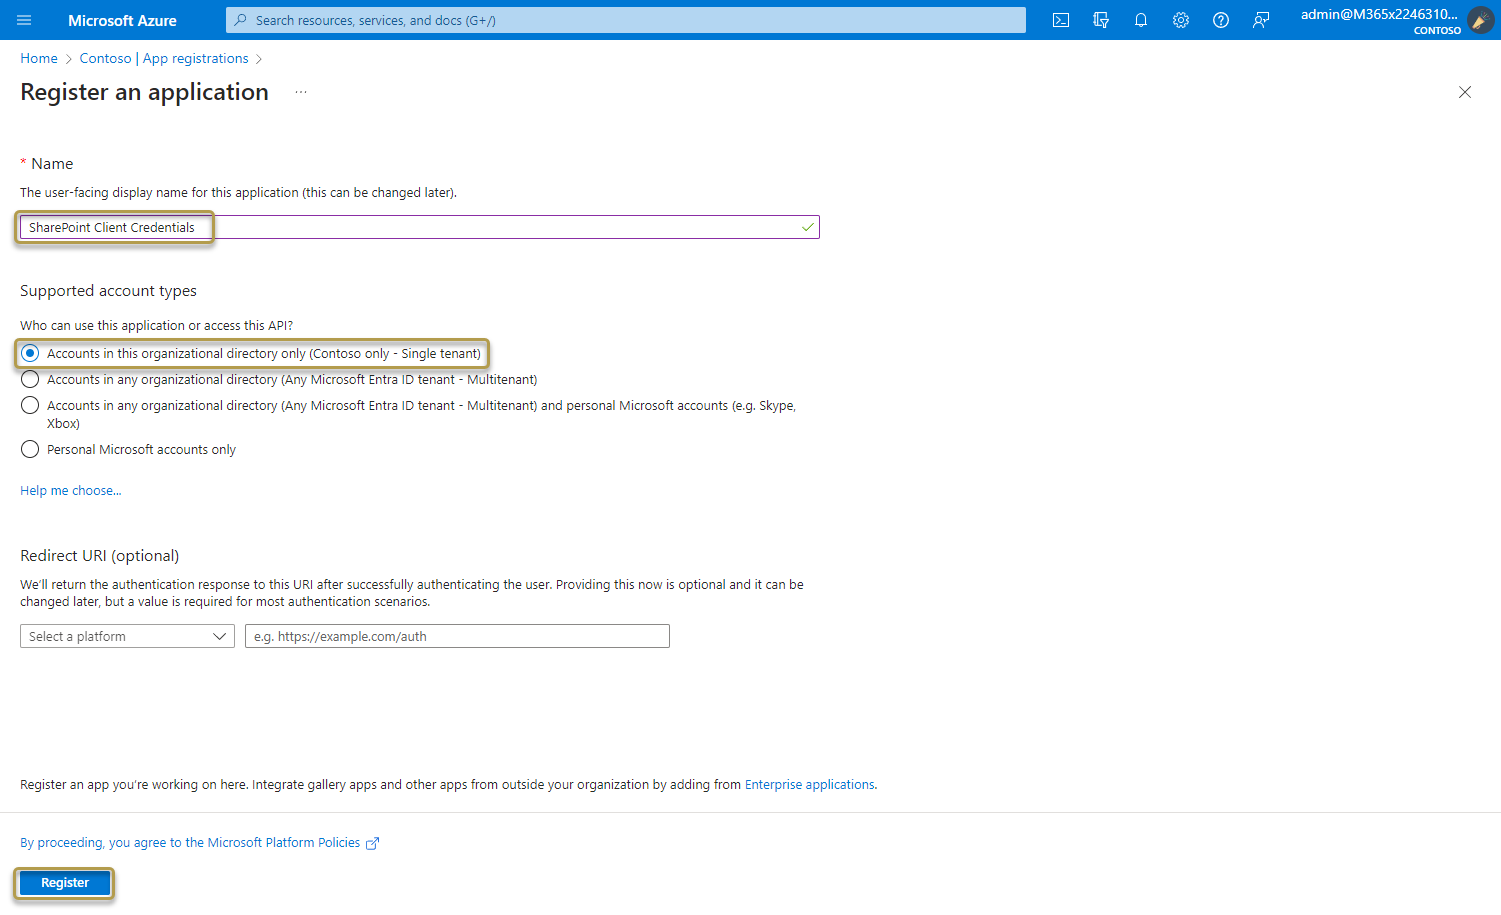
Under Manage, select App registrations > New registration.
a. Enter a display Name for your application.
b. Specify who can use the application. We recommend using the Accounts in this organizational directory only option.
c. Don't enter anything for Redirect URI (optional). No redirect URIs are necessary for the Client Credentials grant type.
d. Select Register to complete the initial app registration.
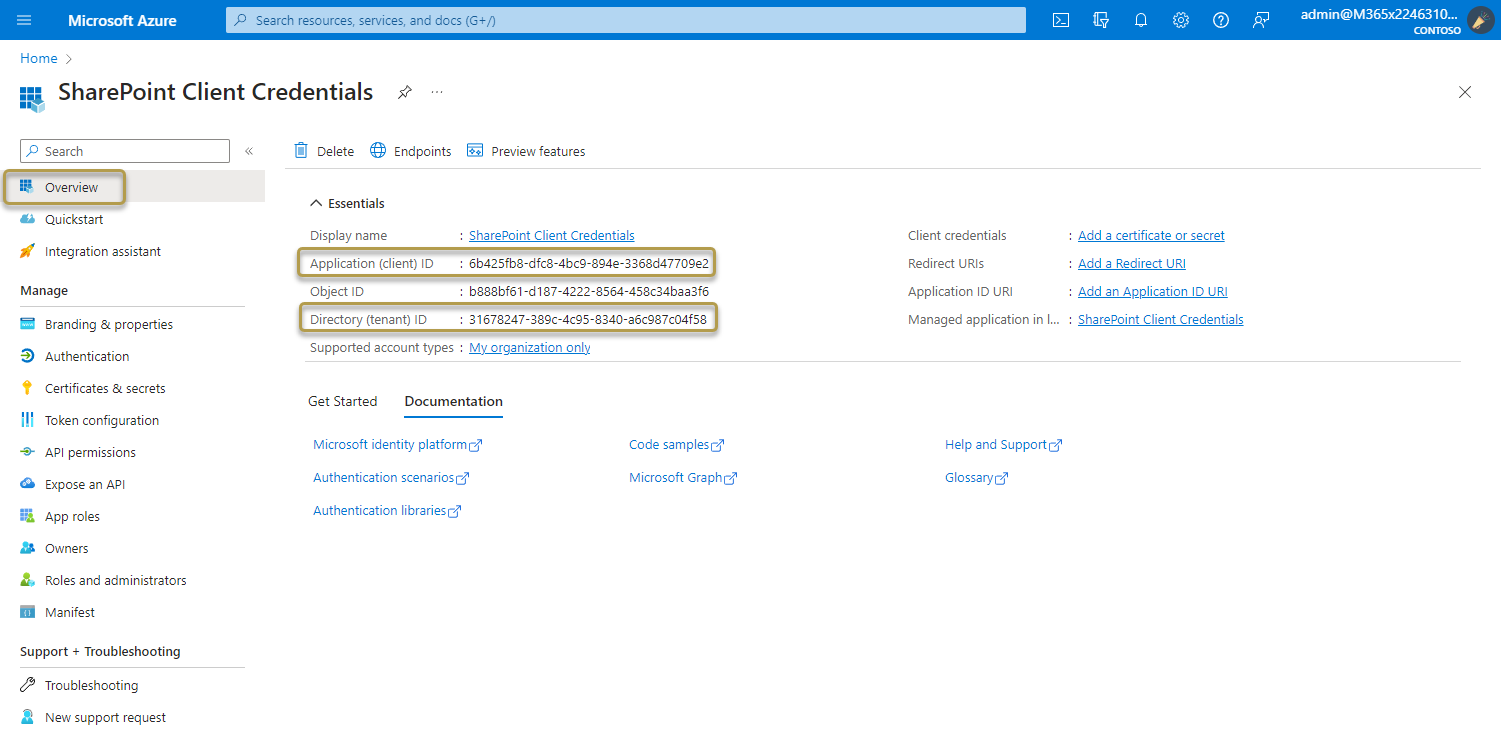
When registration finishes, the Azure portal displays the app registration's Overview pane.
Add credentials
Credentials allow your application to authenticate as itself, requiring no interaction from a user at runtime.
Add a client secret
To add client secrets (a string) as credentials to your confidential client app registration, follow these steps:
In the Azure portal, in App registrations, select your application.
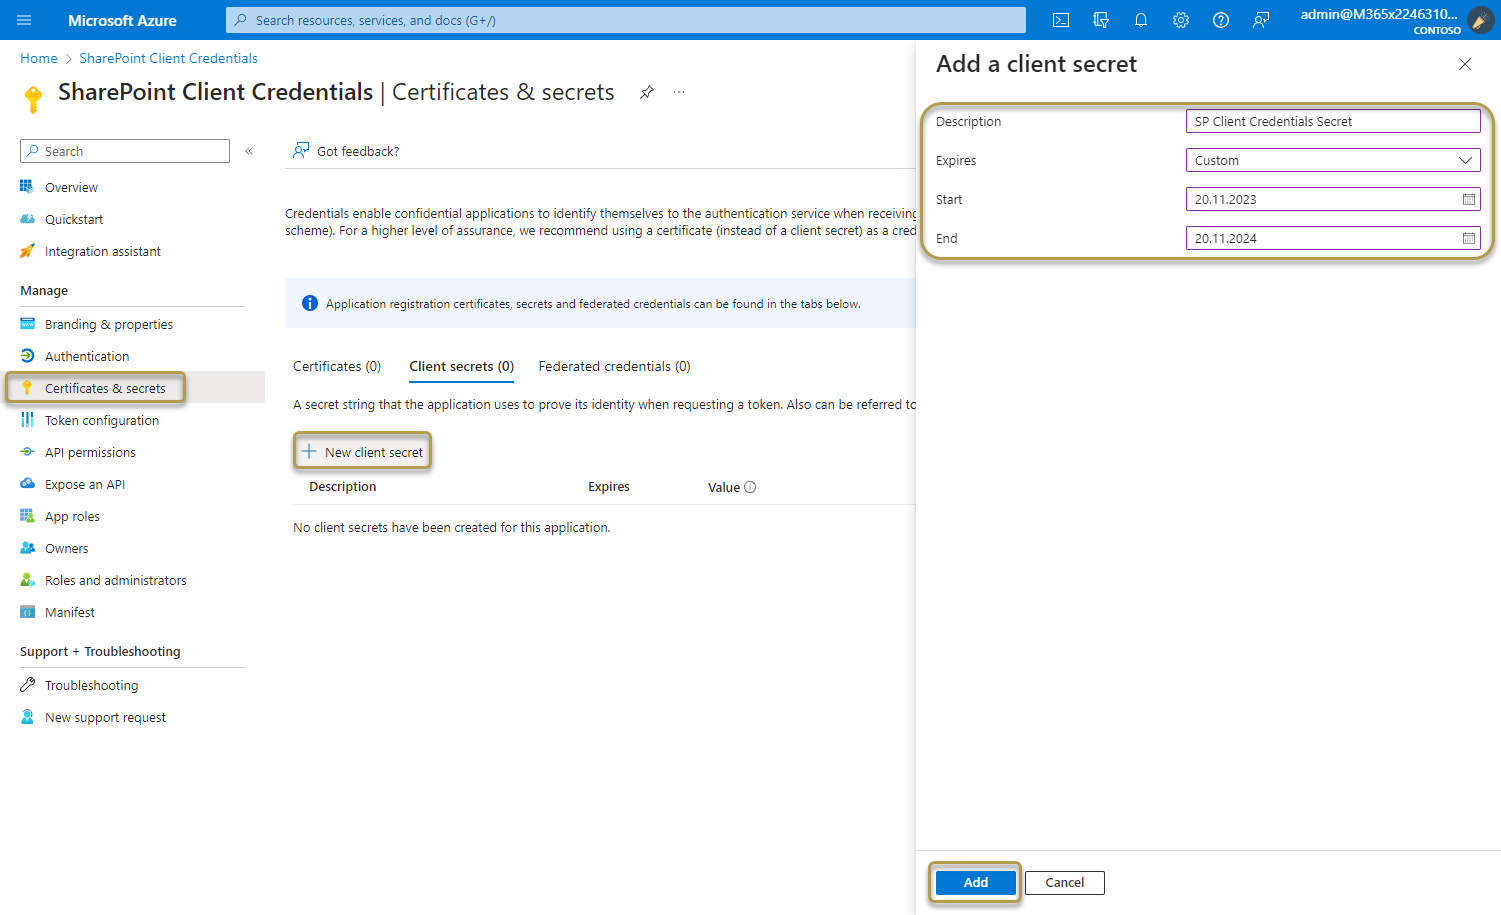
Select Certificates & secrets > Client secrets > New client secret.
a. Add a description for your client secret.
b. Select an expiration for the secret or specify a custom lifetime. Client secret lifetime is limited to two years (24 months) or less. You can't specify a custom lifetime longer than 24 months.
c. Select Add.
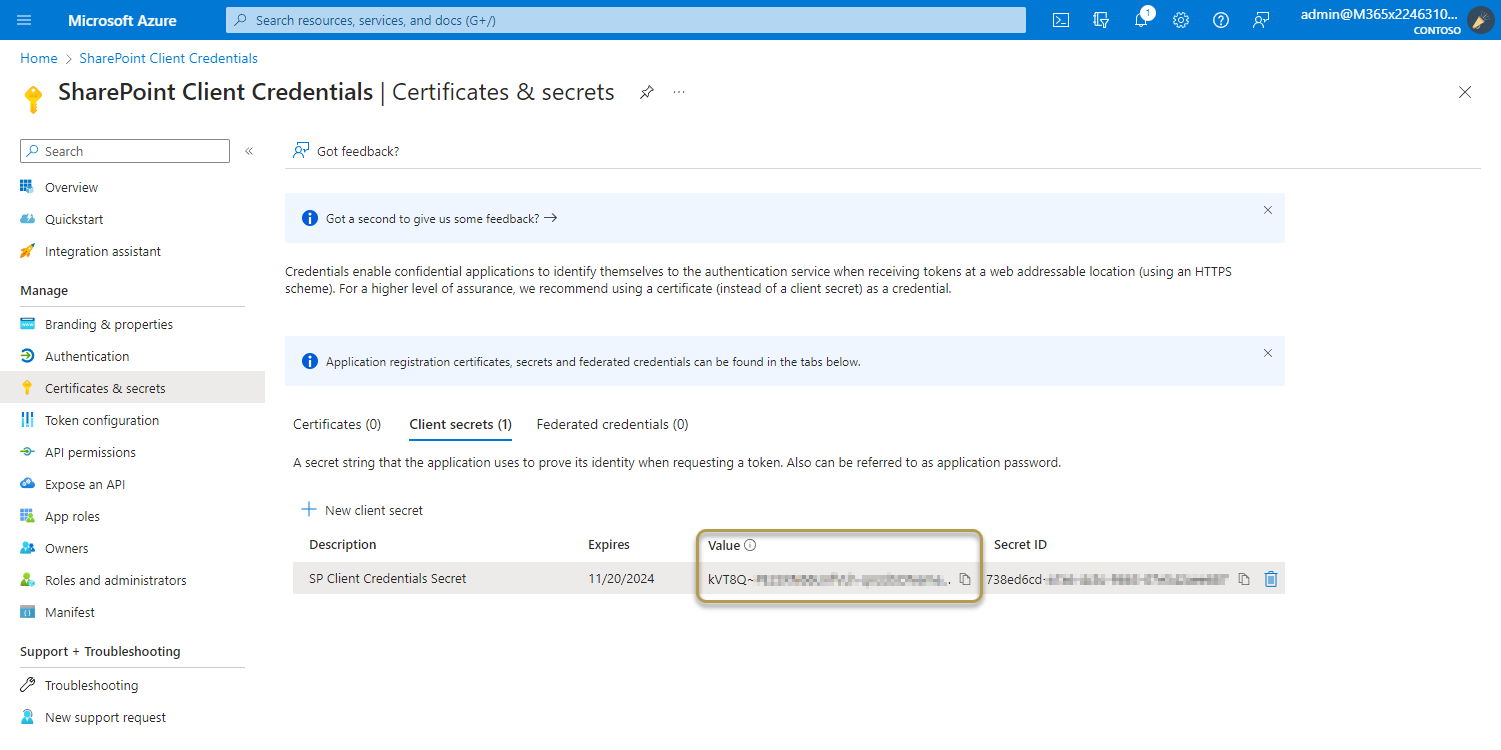
Important
Client secret values cannot be viewed again, except for immediately after creation. Be sure to record the secret's value before you leave the page.
For application security recommendations, see Microsoft identity platform best practices and recommendations.
Add API permissions
Permissions allow your application to perform basic operations.
Add permissions to access SharePoint
To configure the client's permissions to the SharePoint API, follow these steps:
In the Azure portal, in App registrations, select your application.
Select API permissions > Add a permission > Microsoft APIs, select SharePoint.
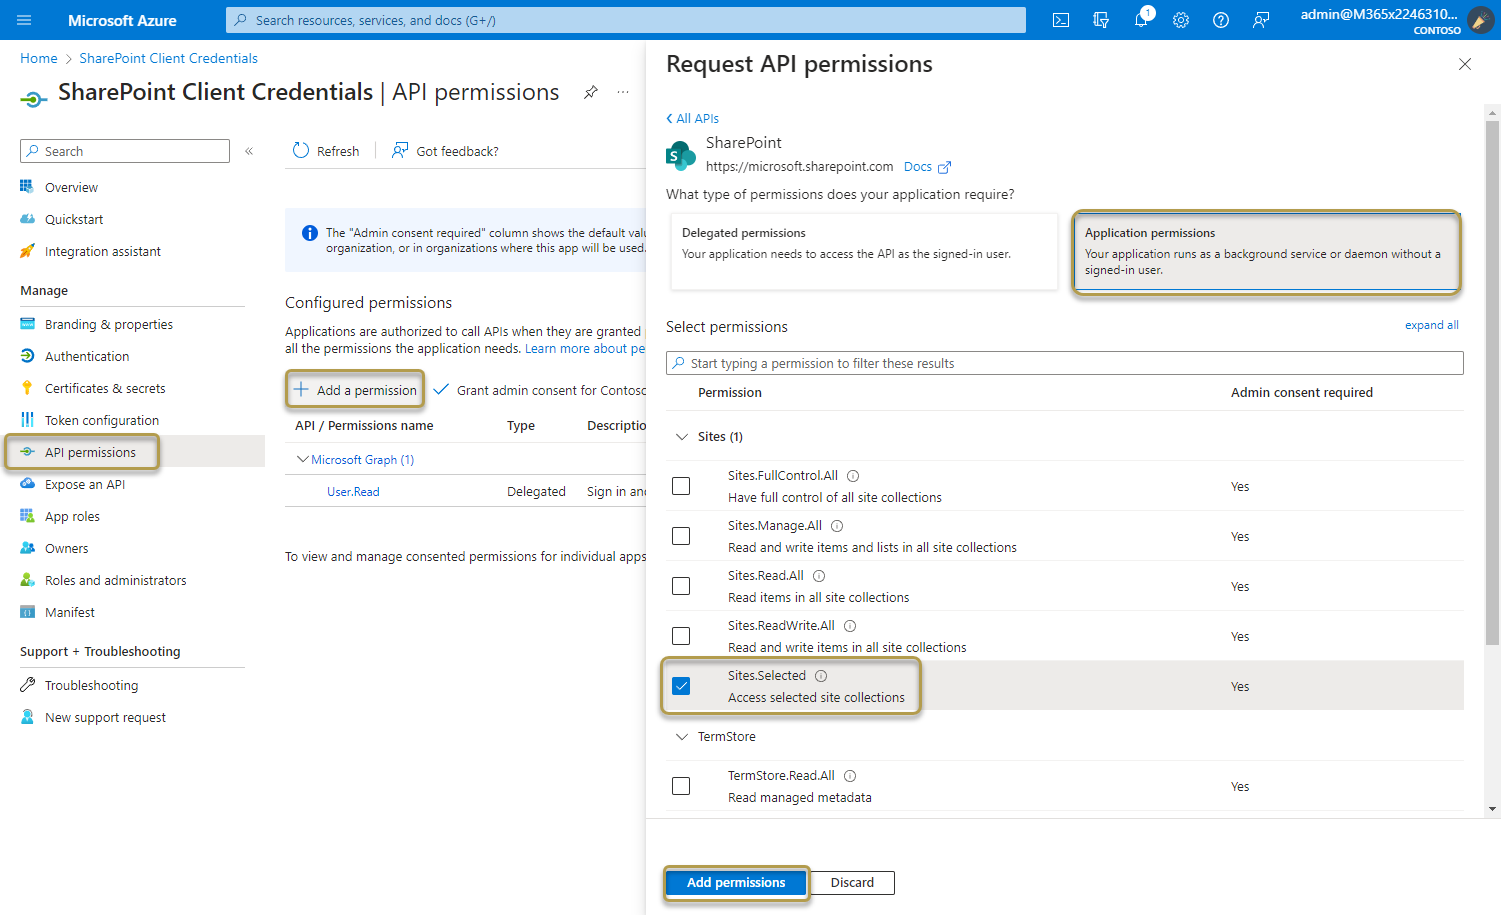
Select the required permission type for the web API.
Select Application permissions. Application permissions are suitable for scenarios where an application needs to access resources or APIs independently, without user interaction. Its access is restricted to the permissions granted by the administrator.
Under Select permissions, expand the resource whose scopes you defined for your web API, and select the permissions the client app should have on behalf of the signed-in user. We recommend using the Sites.Selected option.
Select Add permissions to complete the process.
The Configured permissions table on the API permissions pane shows the list of permissions that your application requires for basic operation.
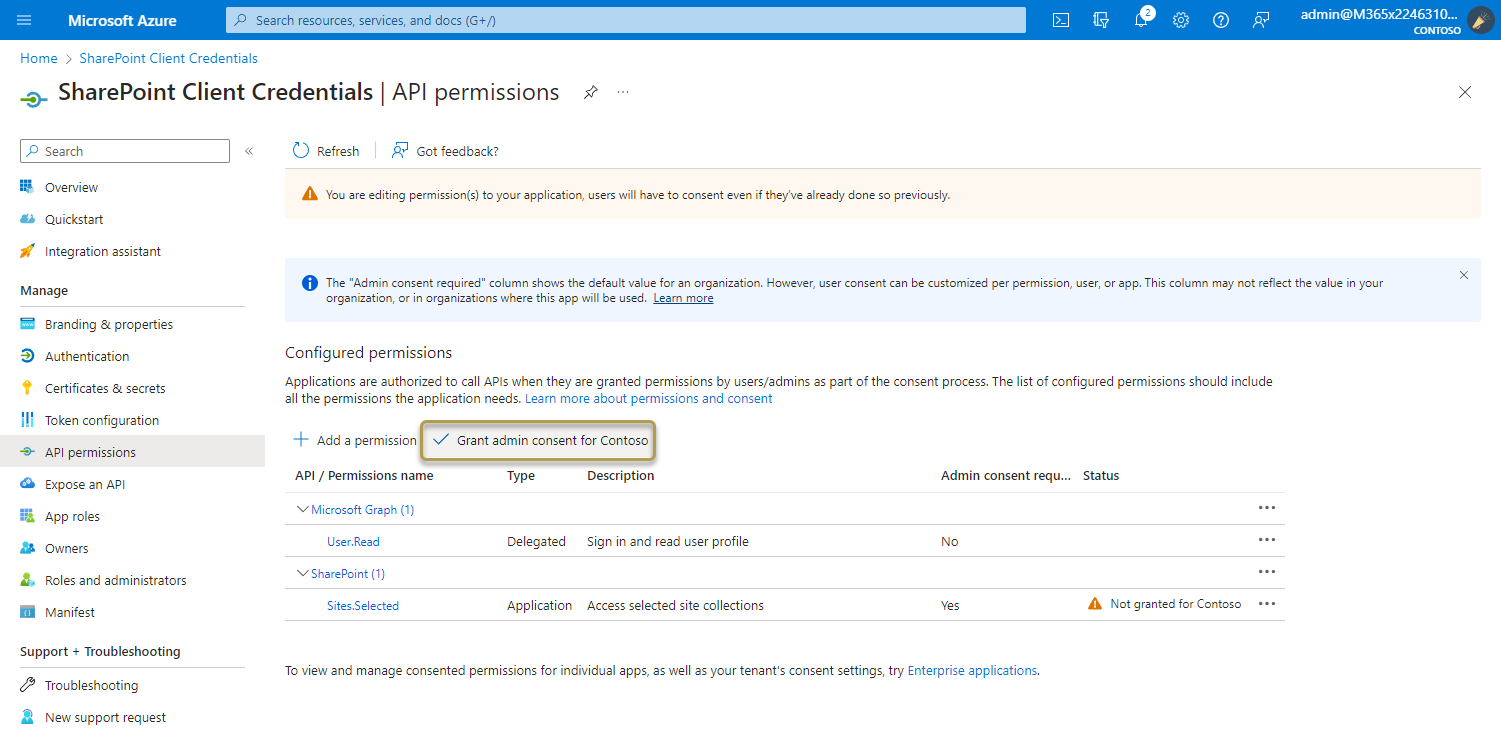
The Grant admin consent for {your tenant} button allows an admin to grant admin consent to the permissions configured for the application. When you select the button, a dialog is shown requesting that you confirm the consent action.
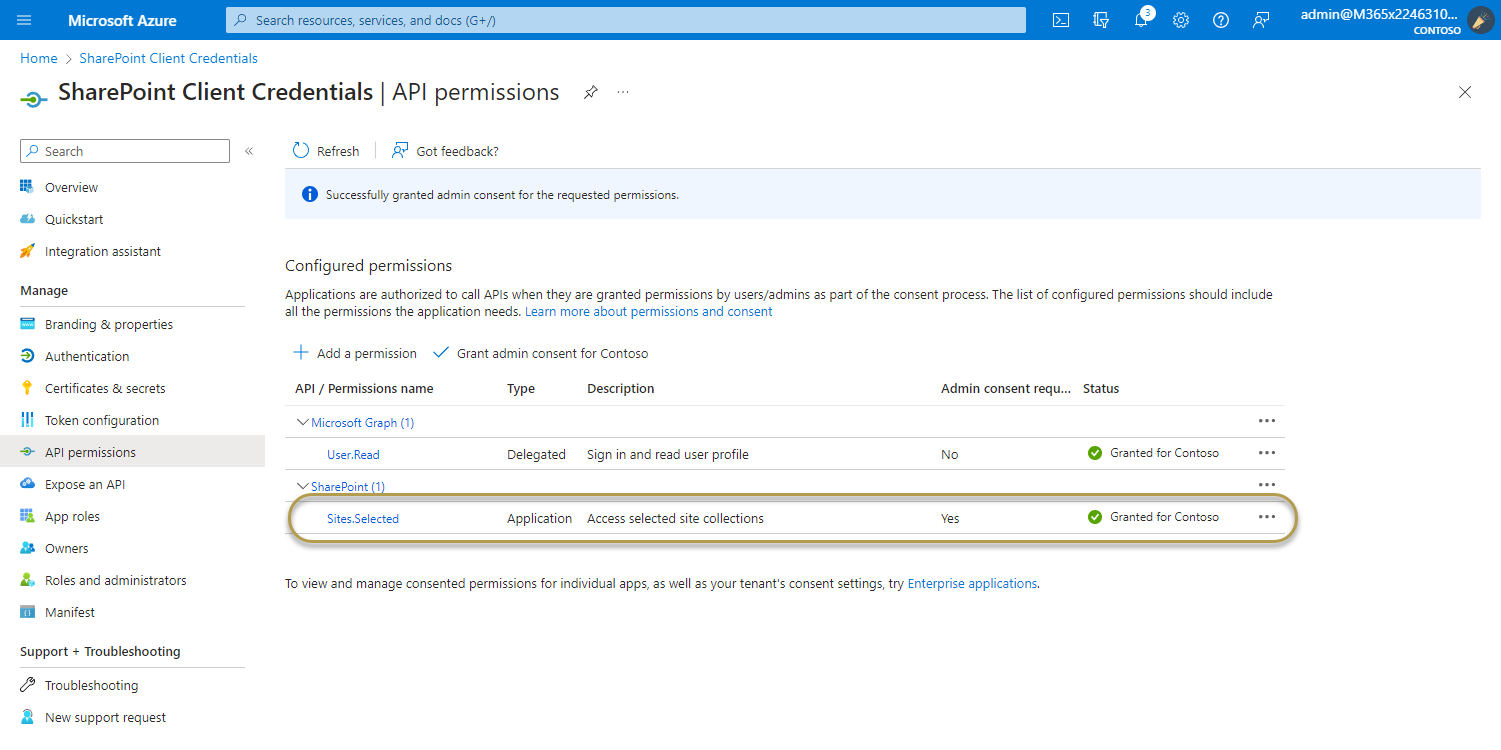
After granting consent, the permissions that required admin consent are shown as having consent granted:
To add permissions for app in SharePoint
The app needs permissions to perform actions in SharePoint. All actions from COSMO Document Management System are executed in app credential context (read, write, create etc.).
The Graph Explorer is used to authorize the Entra ID app. This requires that Graph Explorer be set up in your organization.
If you are using Graph Explorer for the first time in your organization, follow these steps:
- Open the SharePoint site where you want to roll out COSMO Document Management System
- Go to
https://[mytenant].sharepoint.com/sites/[mysite]/_api/site/id - Save the site ID between

- Go to the following page https://developer.microsoft.com/graph/graph-explorer
- Sign in with your Microsoft account in the upper right corner. Your account should have the role of Global Administrator
- Execute the following GET query:
https://graph.microsoft.com/v1.0/sites/{site-id}/permissions

- A 403 - Forbidden error means Graph Explorer lacks permissions. Grant Sites.FullControl.All permission in the Modify permissions tab.
- Repeat step 6.
After verifying that the Graph Explorer application possesses the necessary permissions, continue with the steps below to configure permissions for the Entra ID application.
- Change the request type to POST in Graph Explorer
- Paste the following JSON payload in the Request body section.
{
    "roles": ["FullControl"],
    "grantedToIdentities": [{
        "application": {
            "id": "<Entra ID App ID>",
            "displayName": "<Entra ID App Name>"
        }
    }]
}

- Update "Entra ID App ID" and "Entra ID App Name" with your app's details.
- Click Run query
A successful response (Success Code 201 Created) confirms that the application now has permission to access your specified SharePoint site.
Additional information for App Permissions
Alongside FullControl, you can also choose to grant Write or Read permissions. You have the flexibility to select which permission levels the app receives.
{
    "roles": ["Write"],
    "grantedToIdentities": [{
        "application": {
            "id": "<Entra ID App ID>",
            "displayName": "<Entra ID App Name>"
        }
    }]
}
{
    "roles": ["Read"],
    "grantedToIdentities": [{
        "application": {
            "id": "<Entra ID App ID>",
            "displayName": "<Entra ID App Name>"
        }
    }]
}
Important
Keep in mind that executing the Construction Plan requires FullControl rights.
Feedback
Submit feedback for this page.