Set Up Authentication Method = OAuth 2.0
If the Authentication Method is set to OAuth 2.0, then you must set up an app registration in the Microsoft Entra admin center or Azure Portal, which is a standard process of Microsoft authentications.
Notă
The app registration must be done in the Microsoft Entra/Azure account that manages the users who will use COSMO Graphical Extension. Therefore, in customer environments, registration must be done in the customer's Active Directory. Domain administrator rights are mandatory for completing the app registration.
This section provides step-by-step instructions for setting up the OAuth 2.0 authentication method for use with COSMO Graphical Extension. To gain further insight into the standard process of Microsoft authentications, see Get started developing Connect apps for Dynamics 365 Business Central in the Microsoft Dynamics 365 Business Central Help.
To set up an app registration
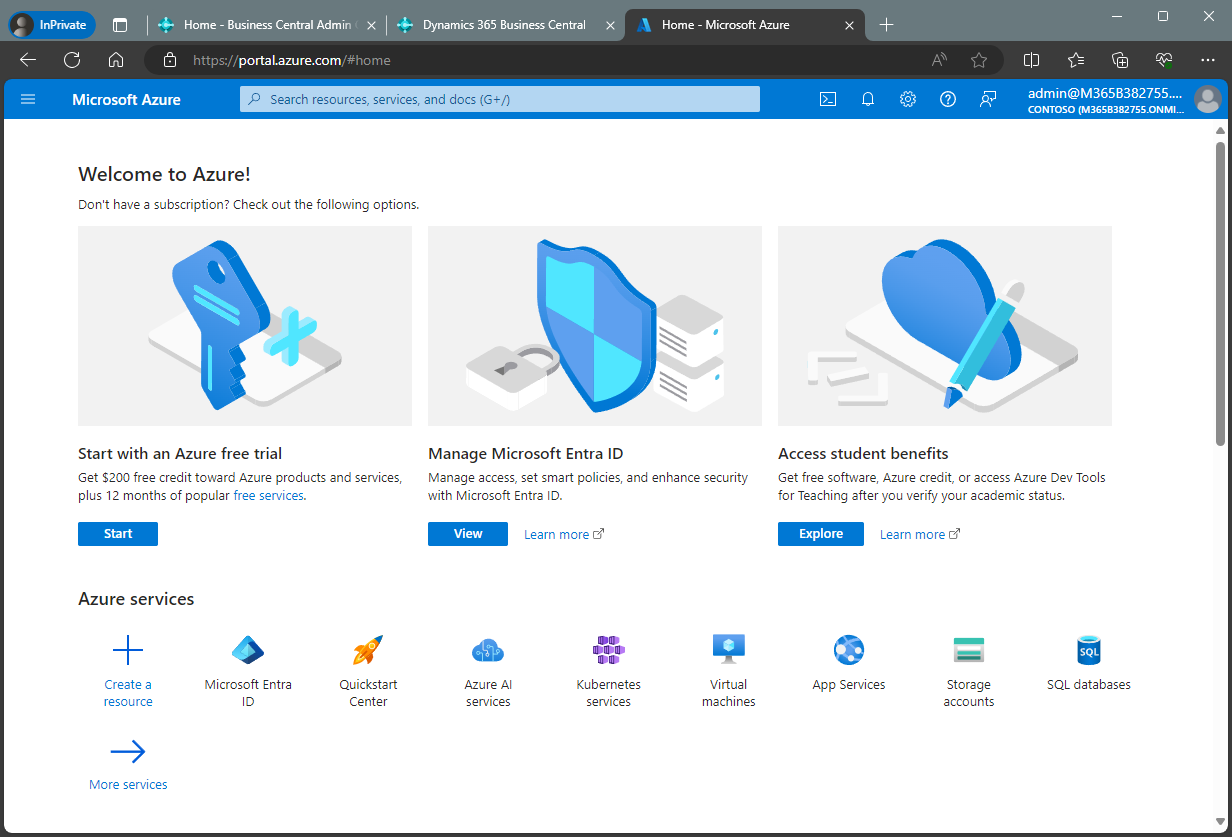
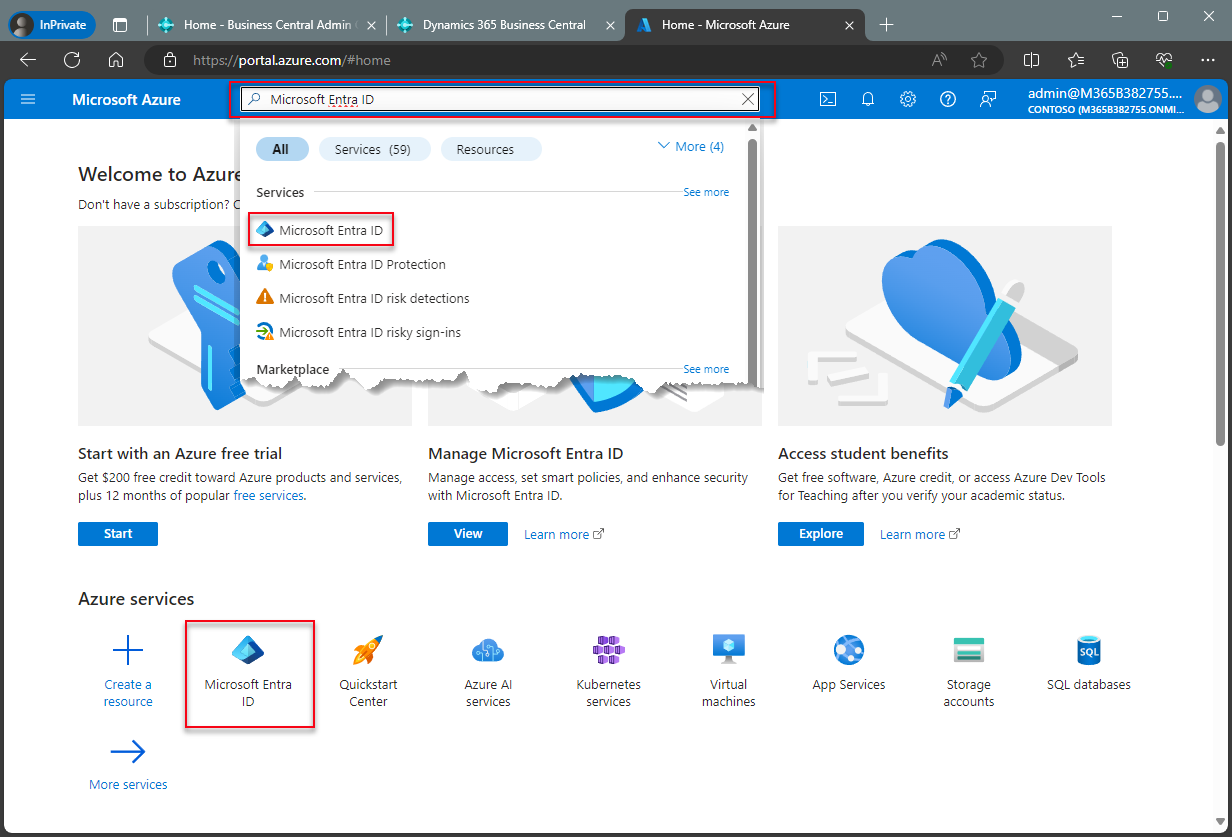
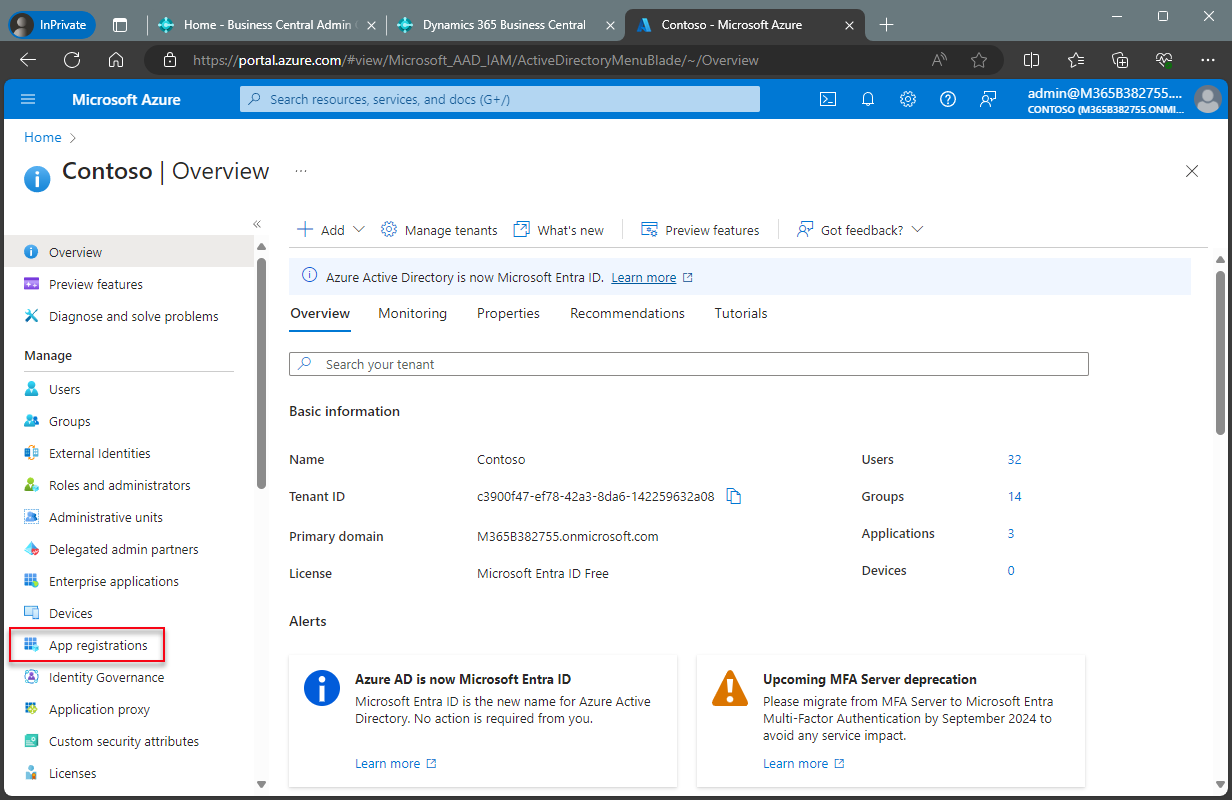
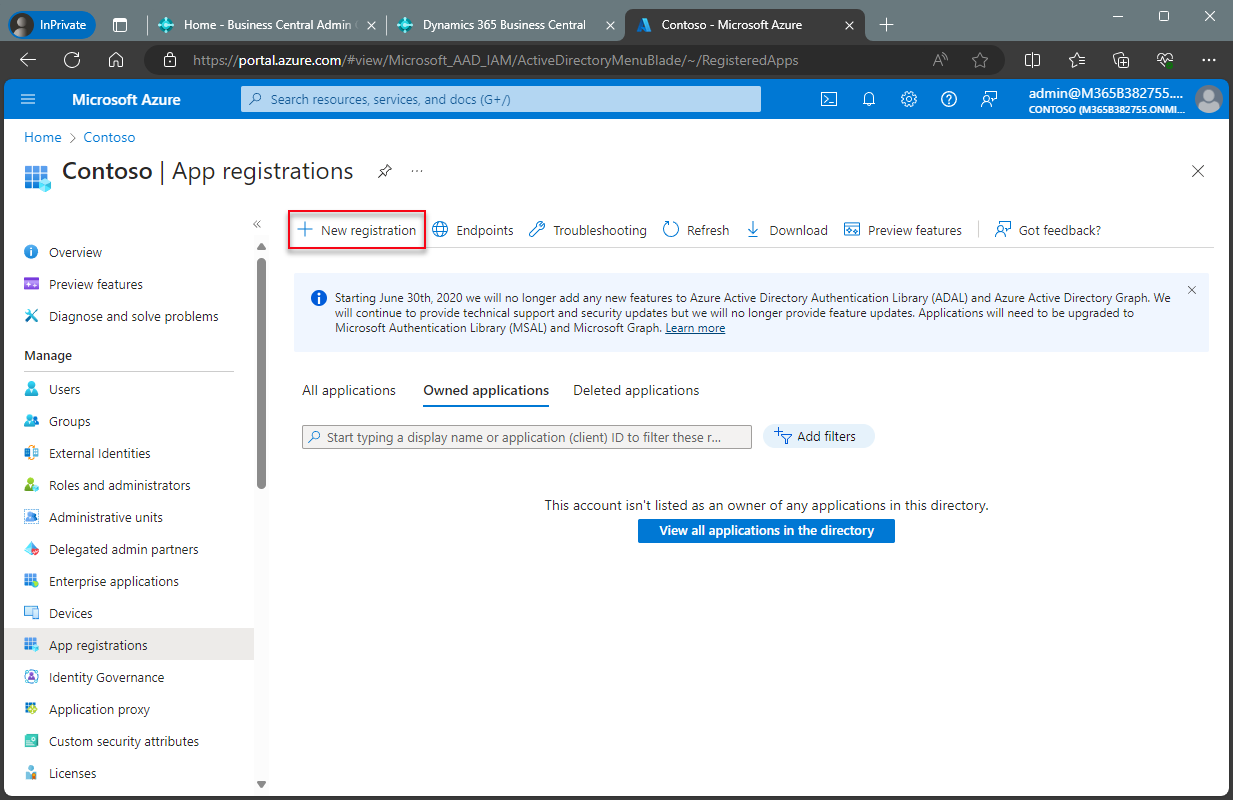
The steps for setting up an app registration differ depending on whether you are using the Microsoft Entra admin center or the Azure Portal. Additionally, some steps are different based on whether you are using a SaaS or On-Premises environment.
Sign into Microsoft Entra admin center.
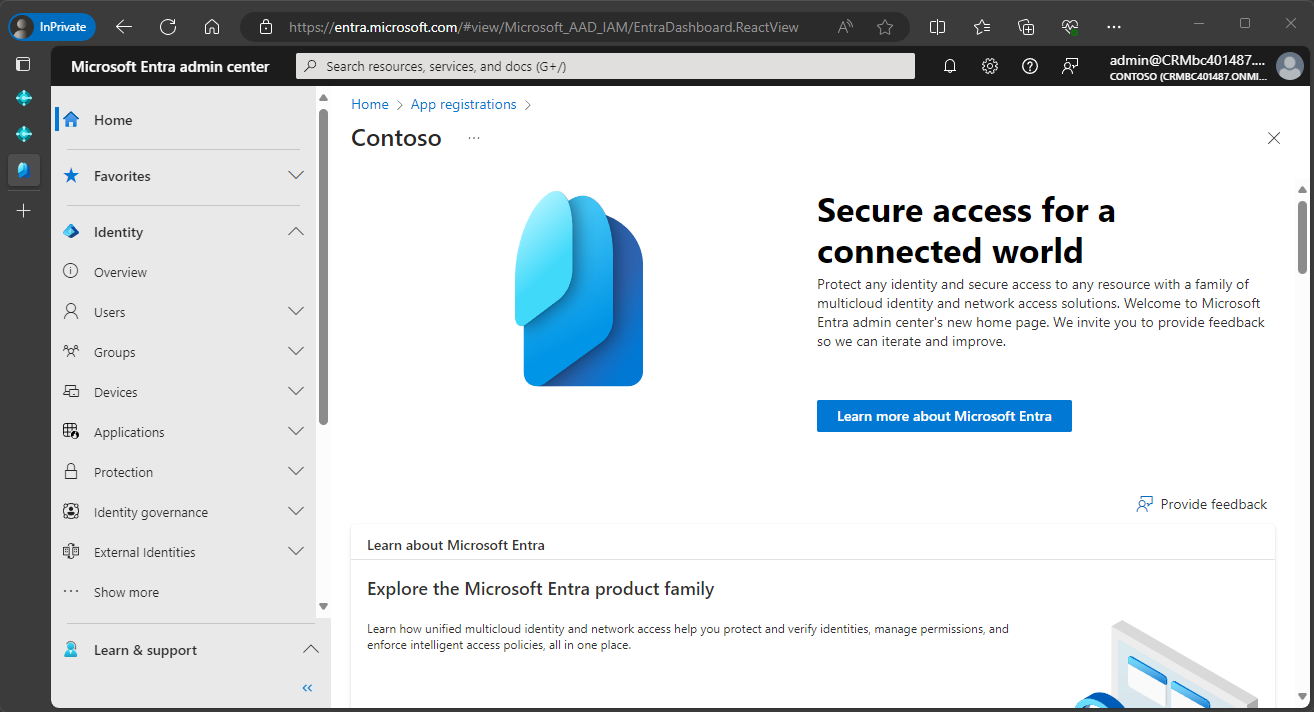
Log into your Microsoft Entra account if not already logged in.
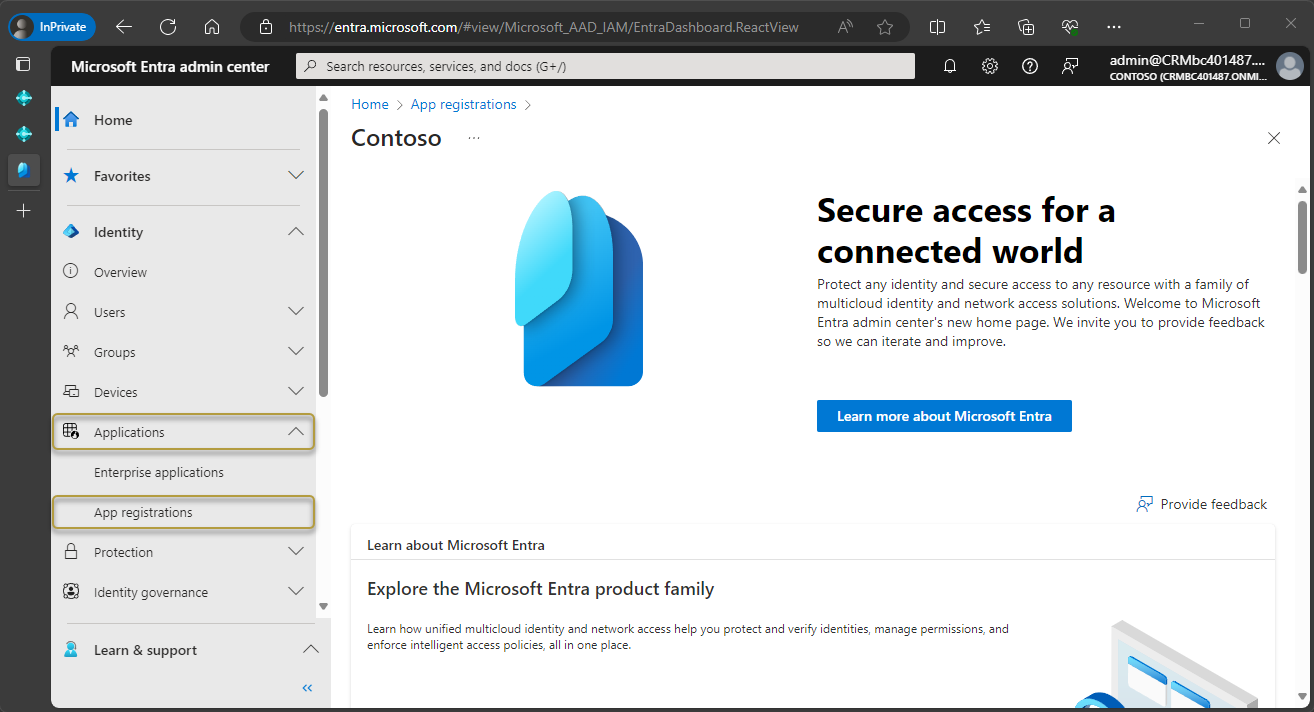
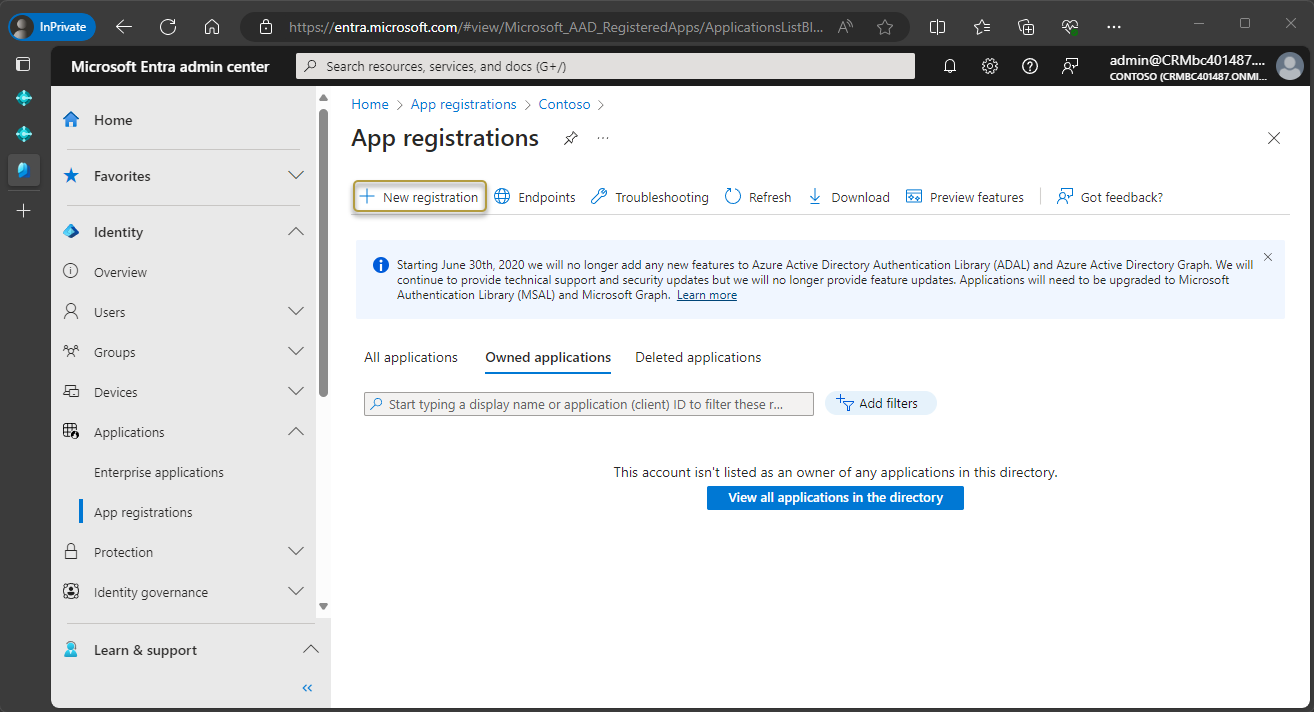
In the navigation pane, choose Applications > App registrations.
On the action bar, choose New registration.
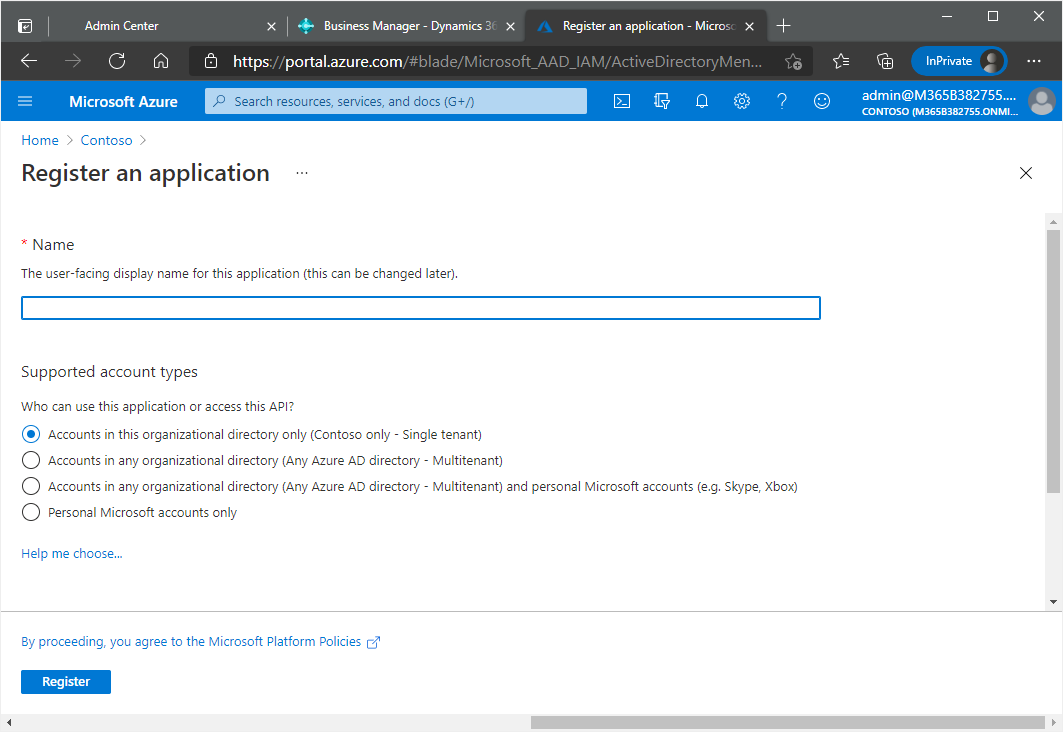
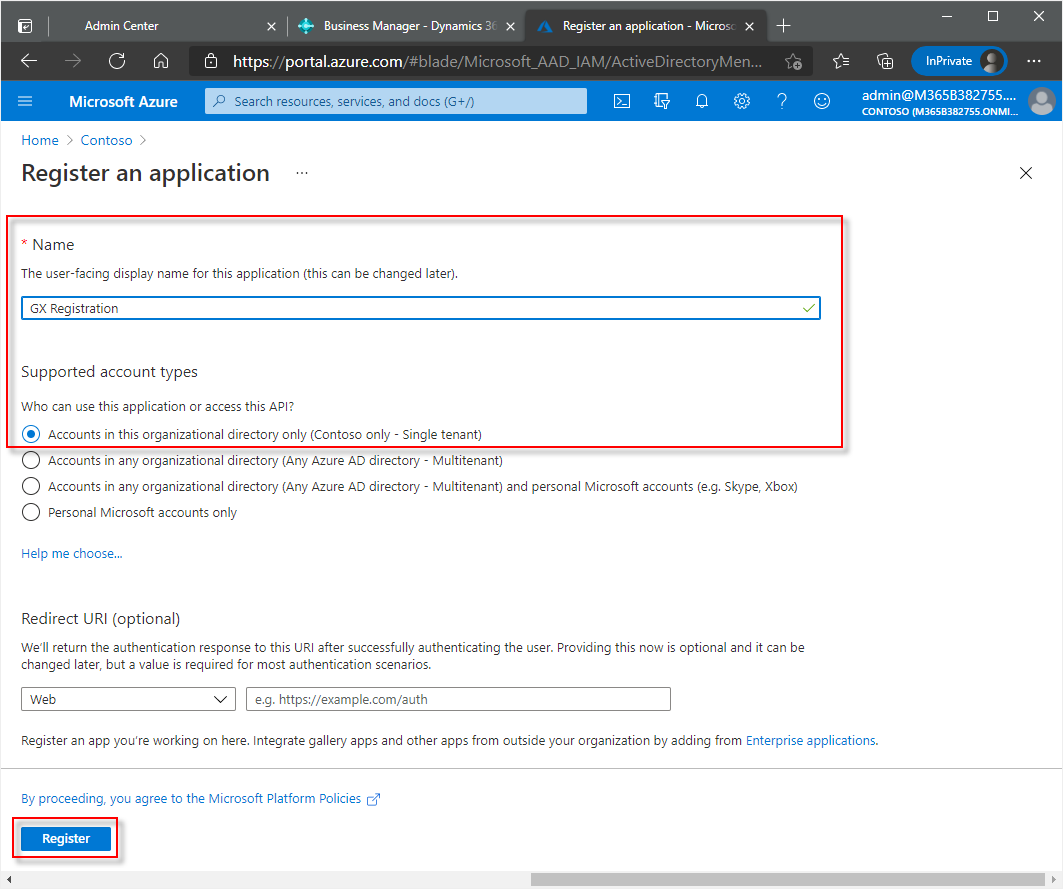
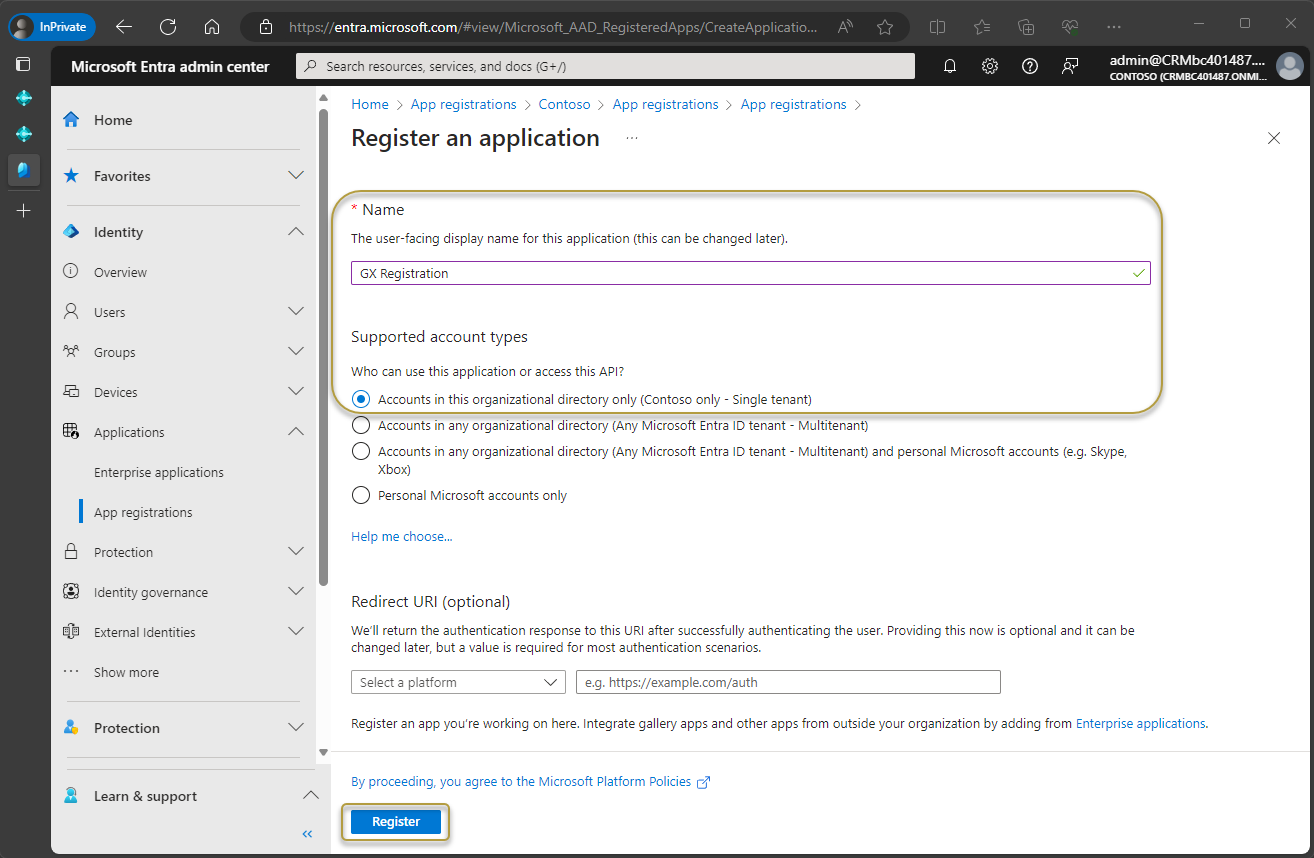
In the Register an application window, enter a display name for the application. Users might be able to see this name during sign in.
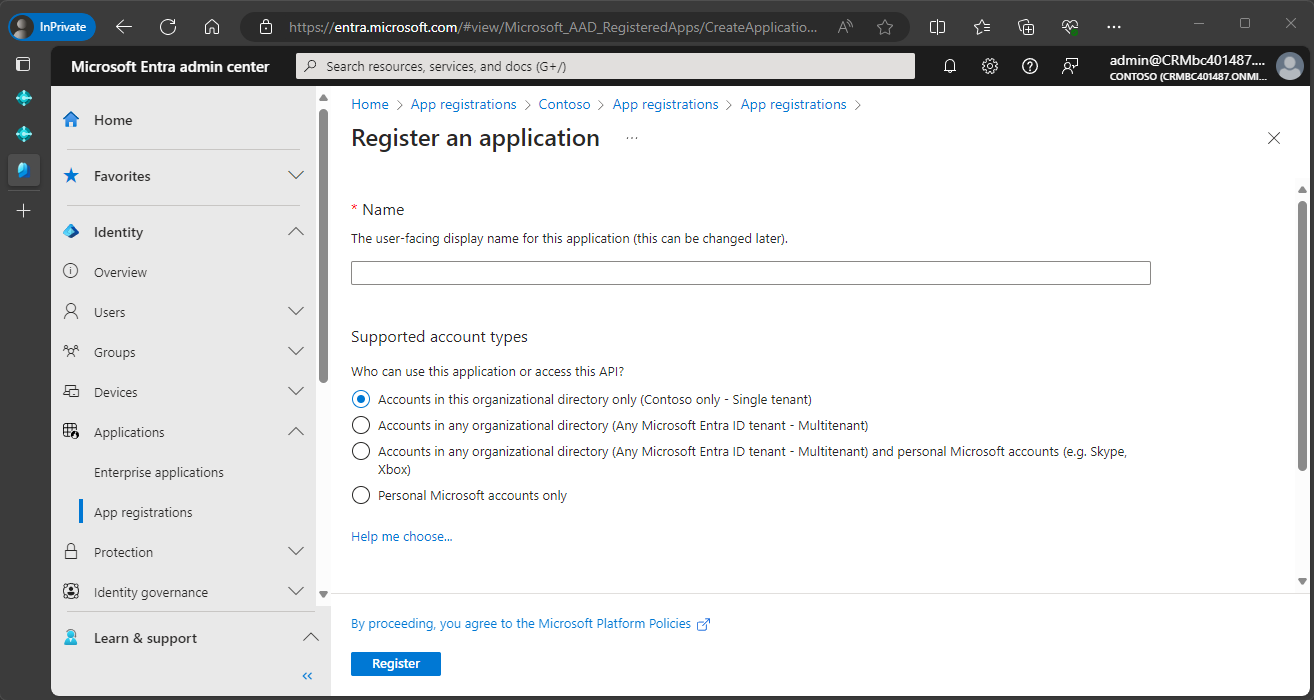
The options in the Supported account types section determine who will have access to the registered application. Choose Help me choose for help with selecting the best option.
Due to the nature of this application, we recommend using the default Accounts in this organizational directory only ... option.
Ignore the Redirect URI section.
Choose the Register button.
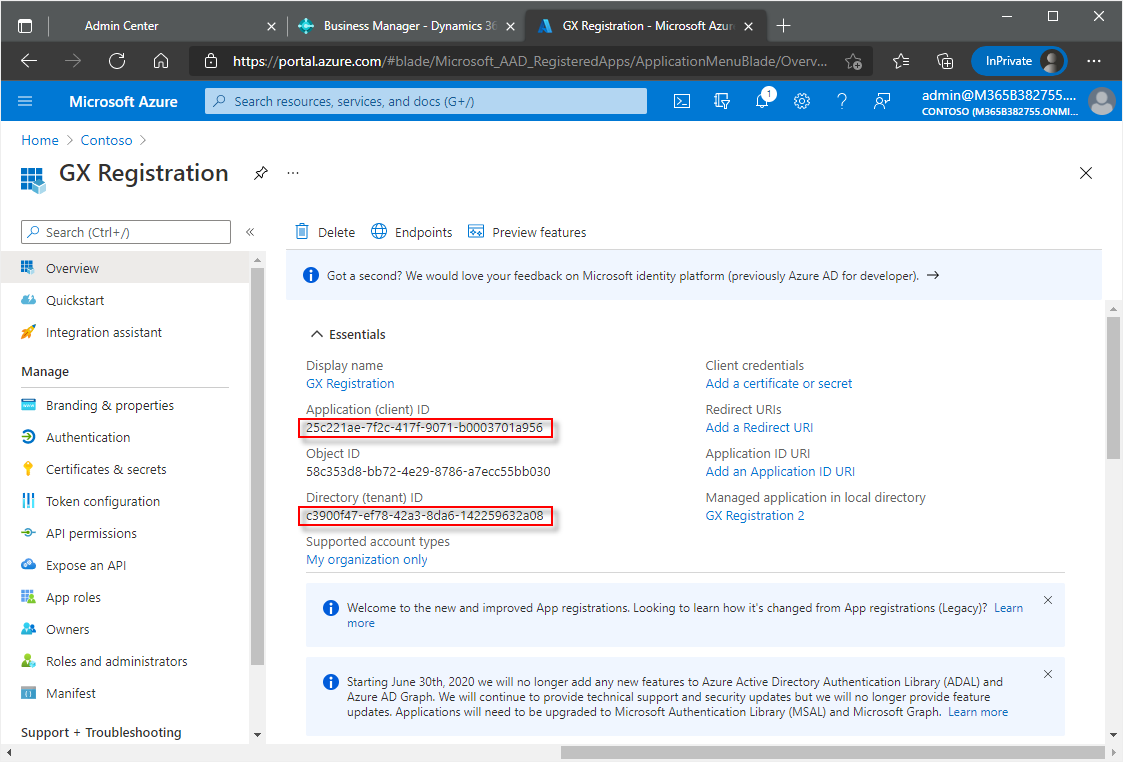
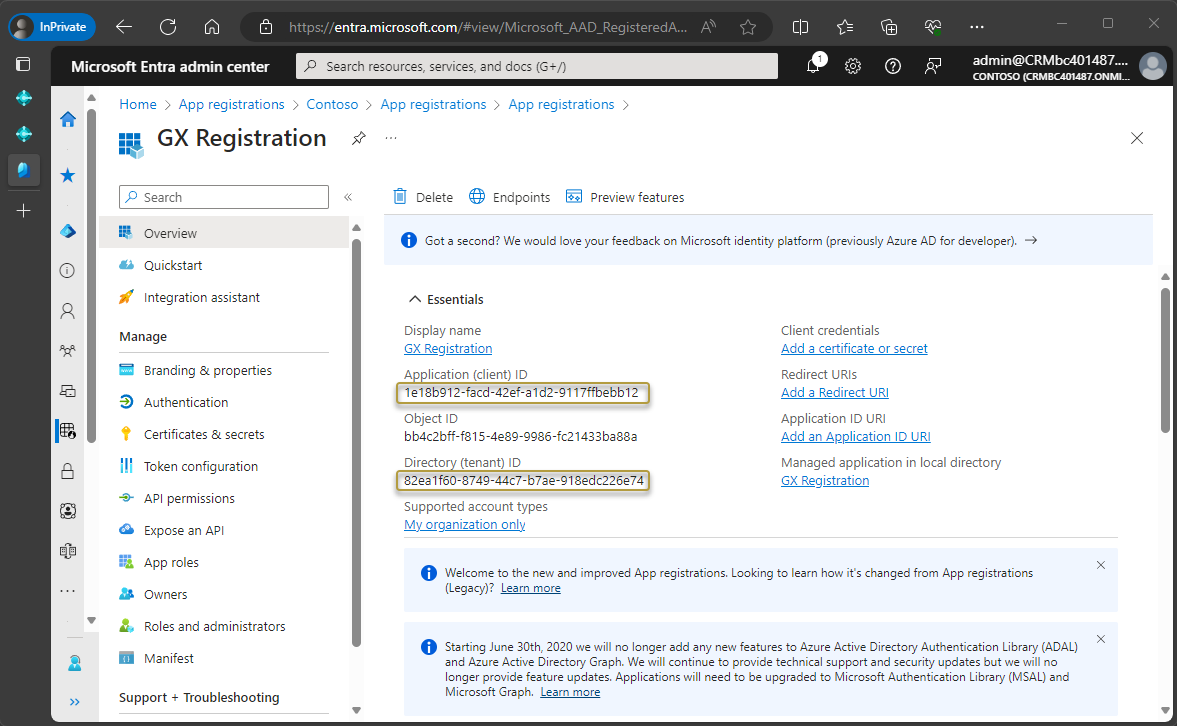
The registered application window opens and the Essentials section shows various IDs for the application.
Use the
 icon at the end of the following IDs to copy and then paste the IDs somewhere (like Notepad) for easy retrieval later in the process:
- Application (client) ID
- Directory (tenant) ID
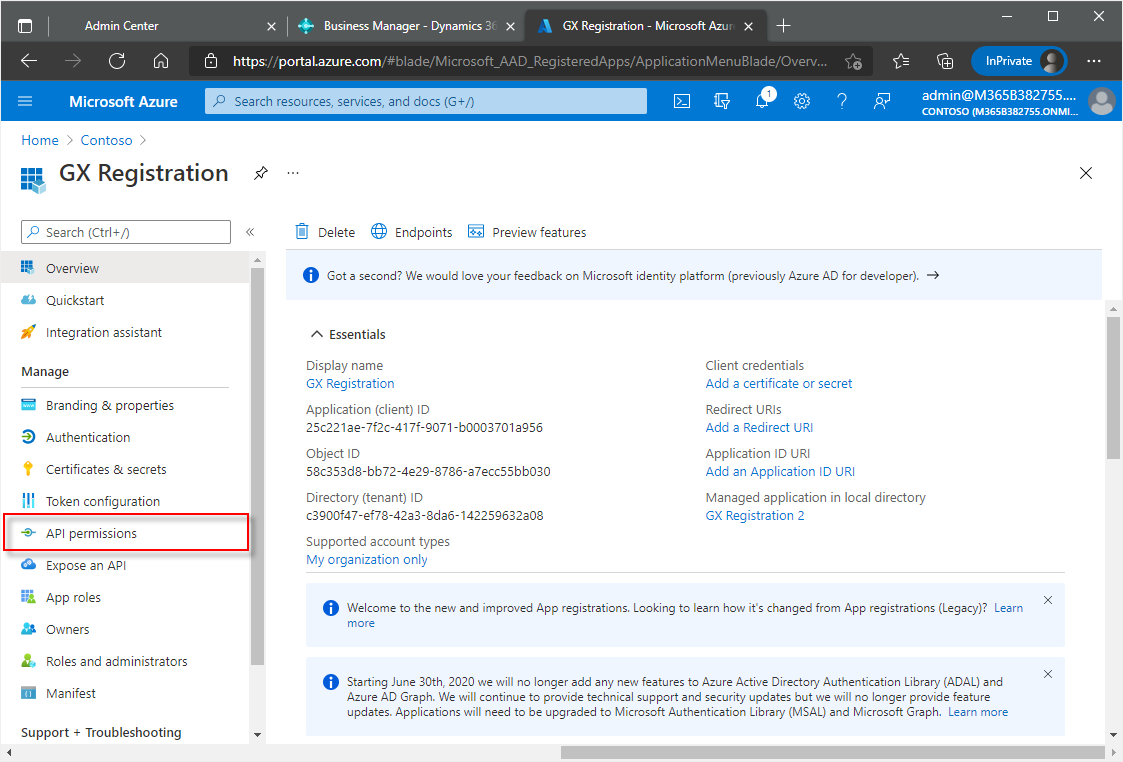
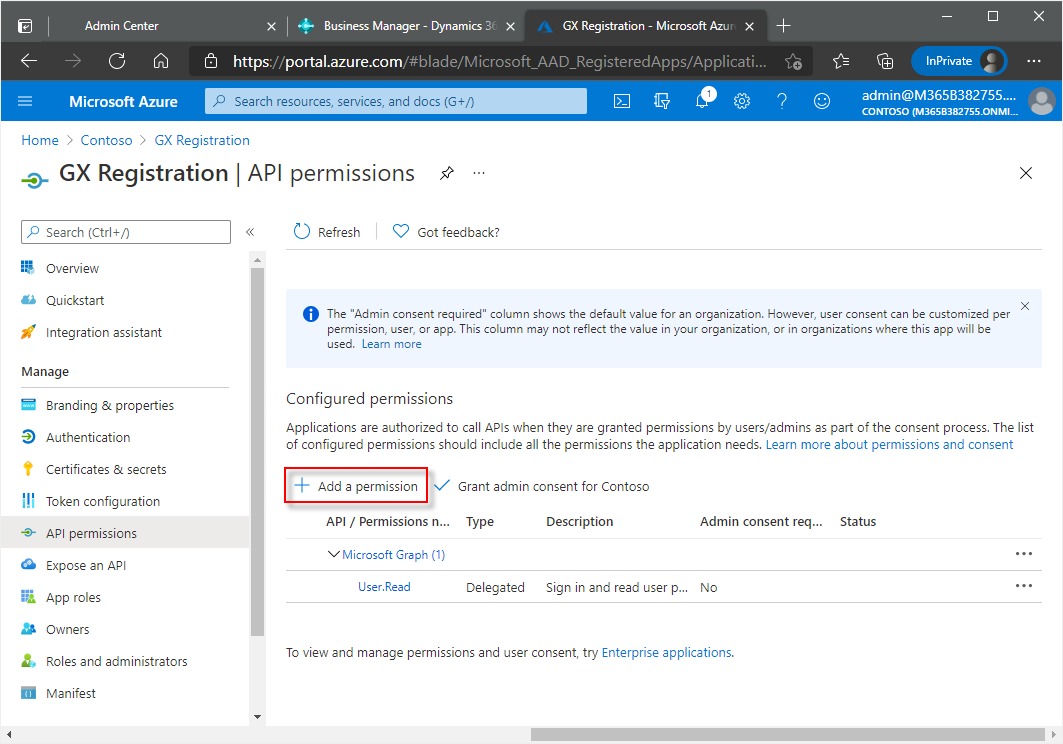
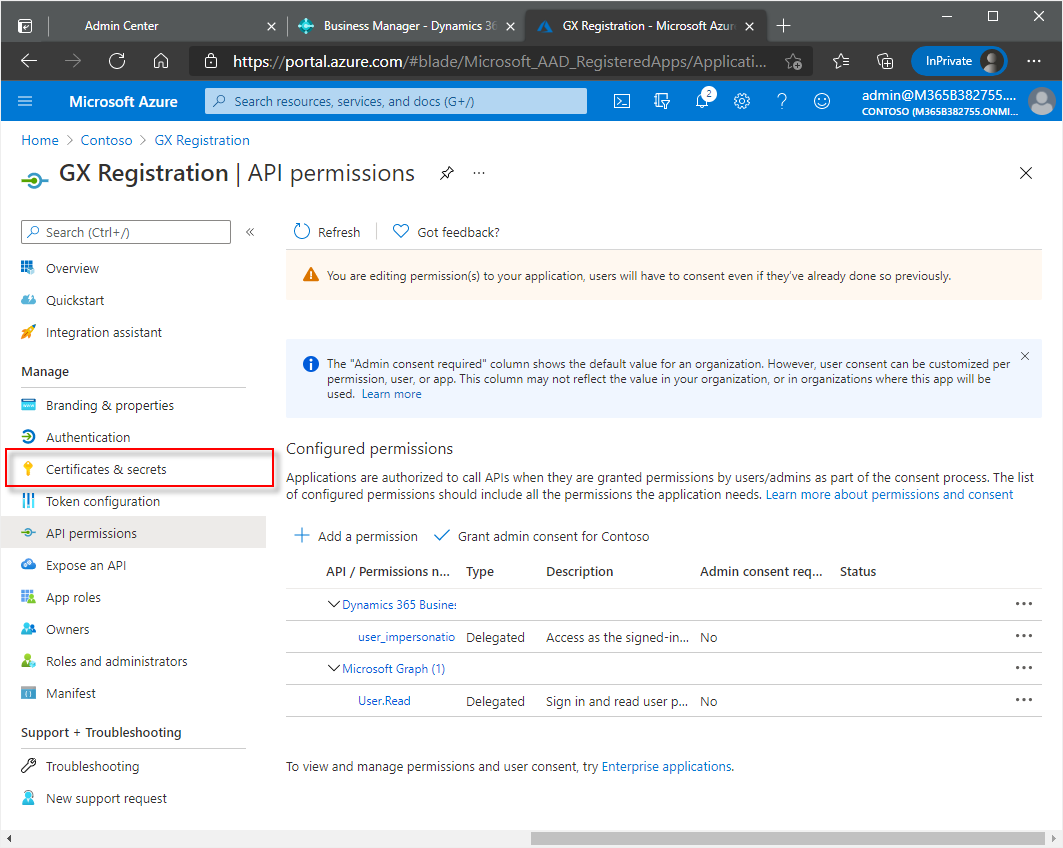
In the navigation pane, choose API permissions.
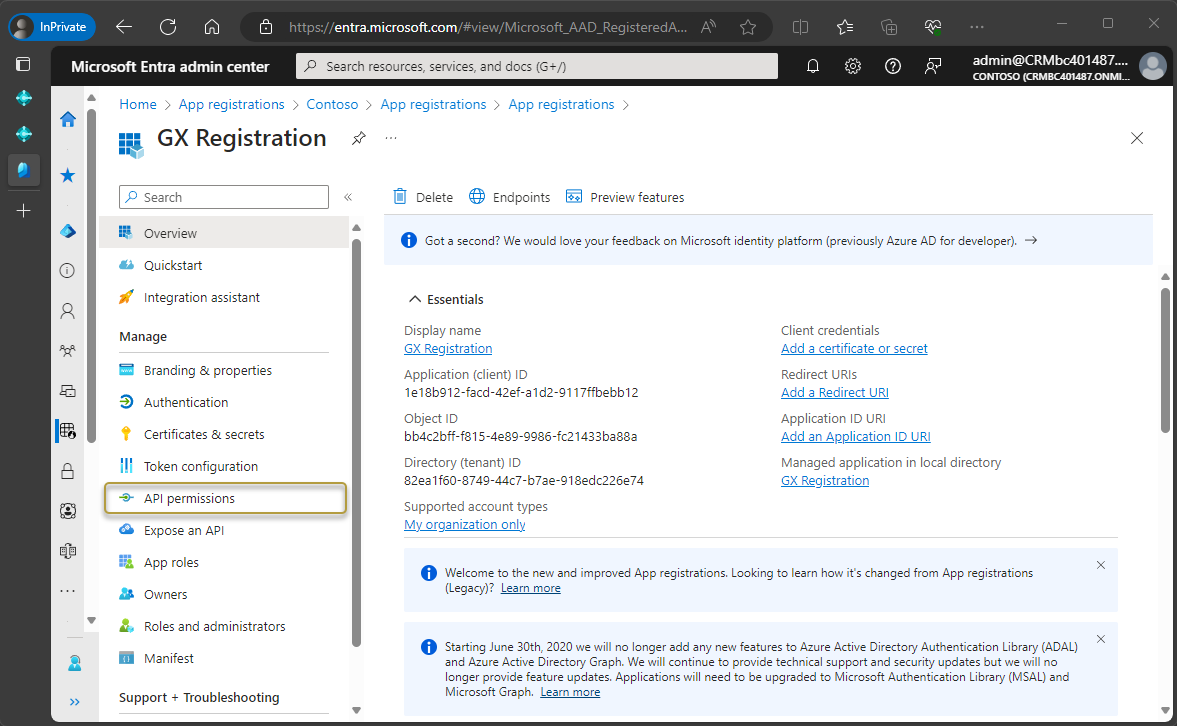
In the API Permissions window, choose Add a permission.
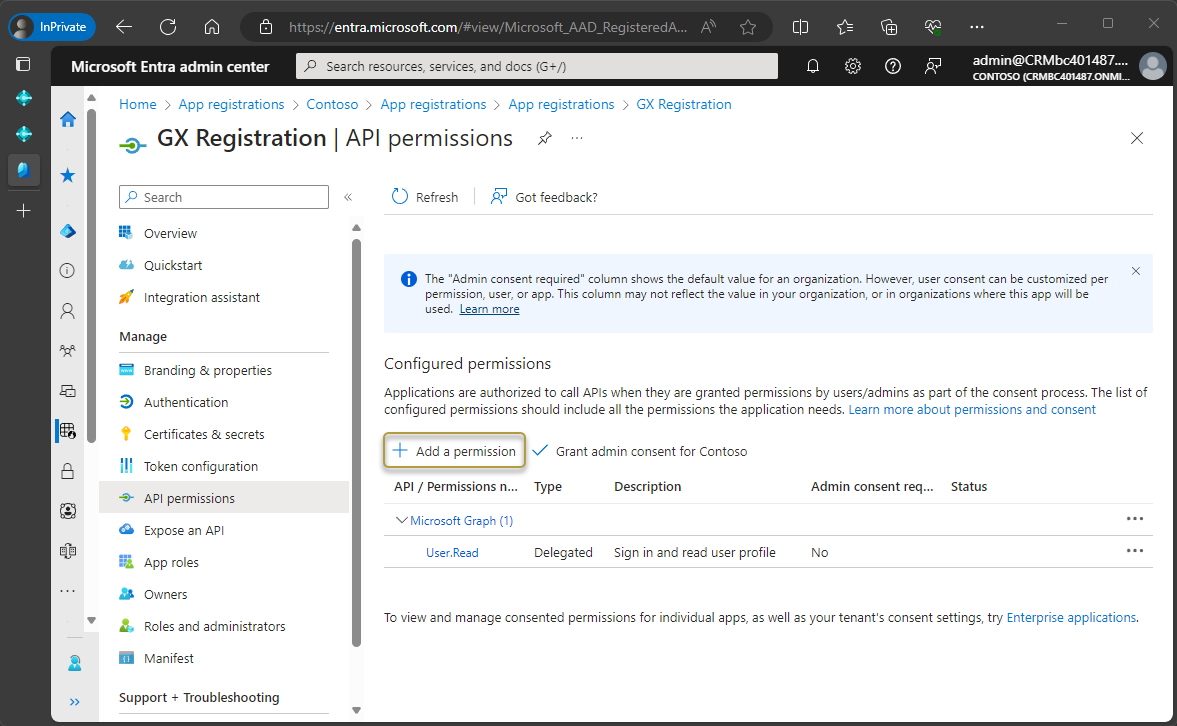
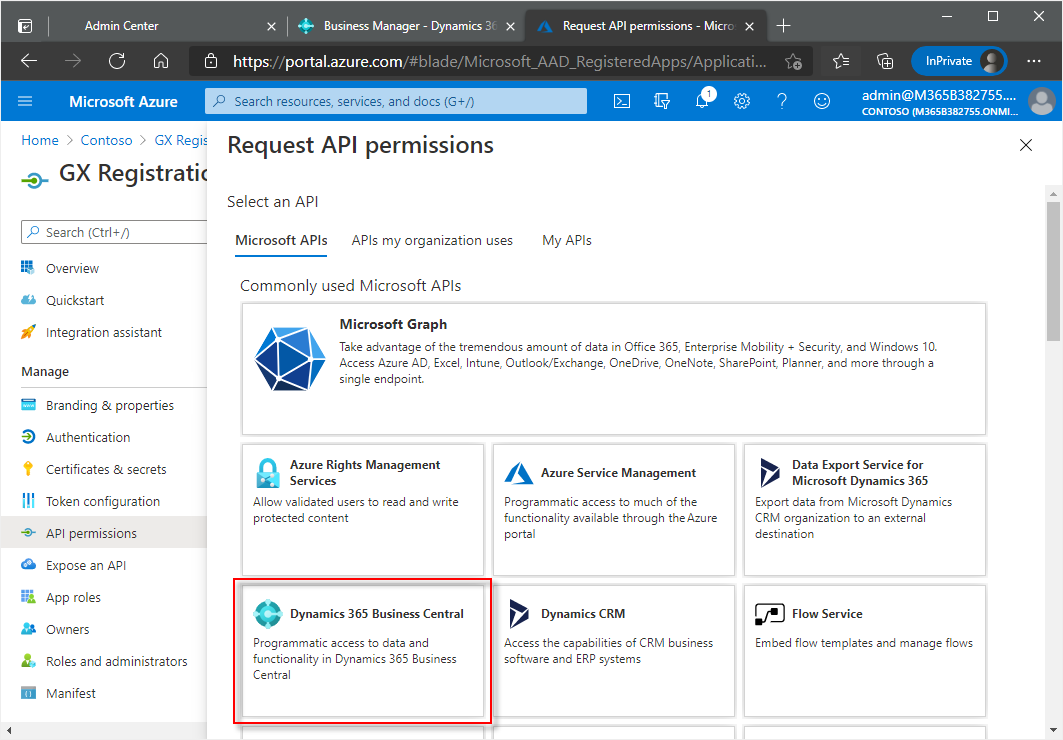
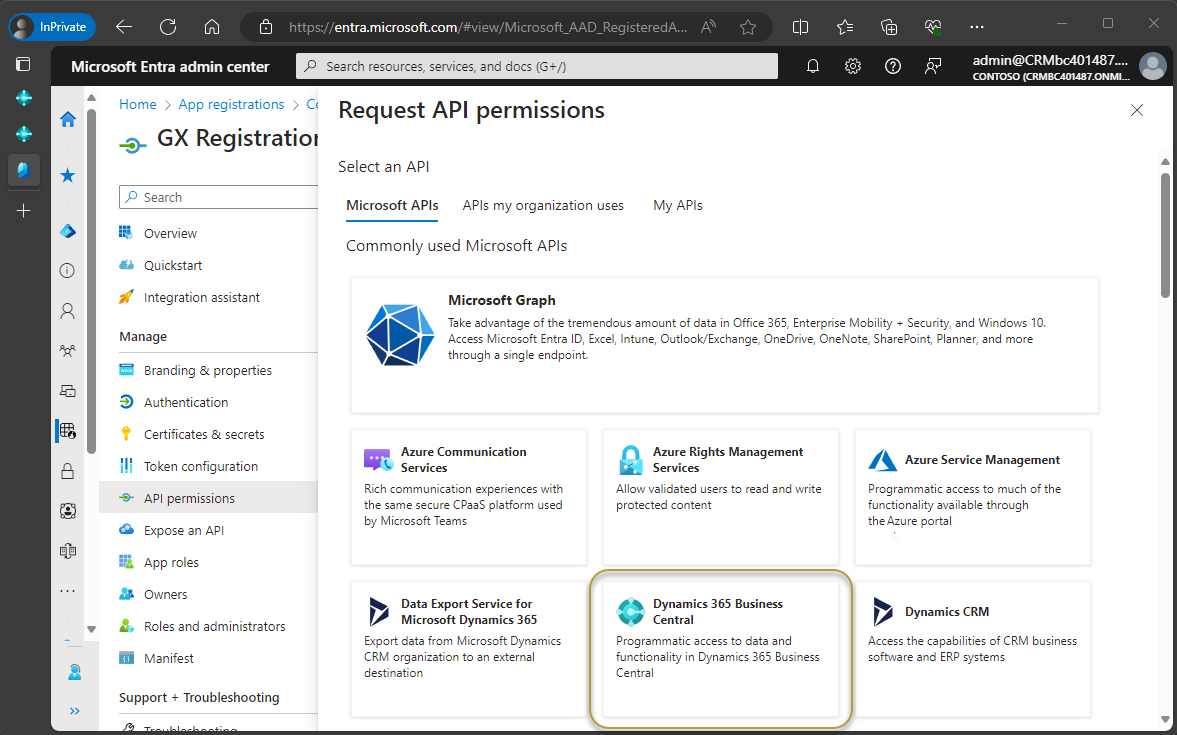
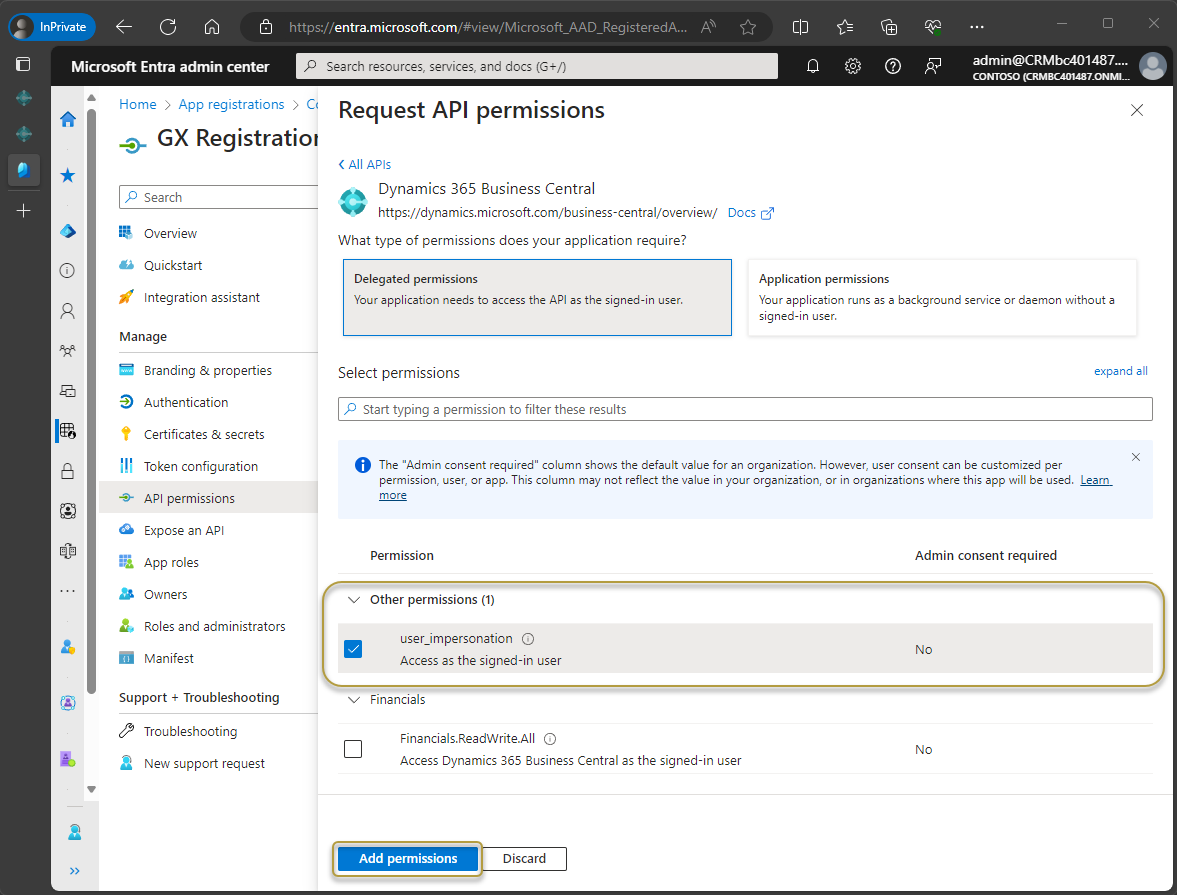
In the Request API permissions window, choose the Dynamics 365 Business Central tile.
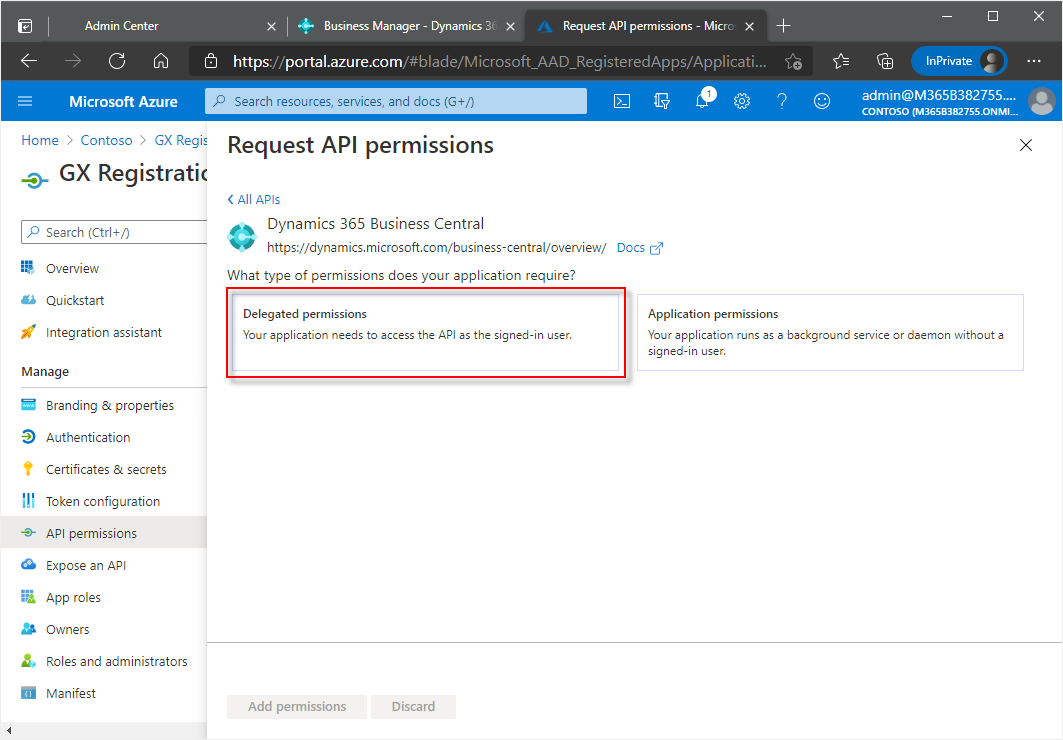
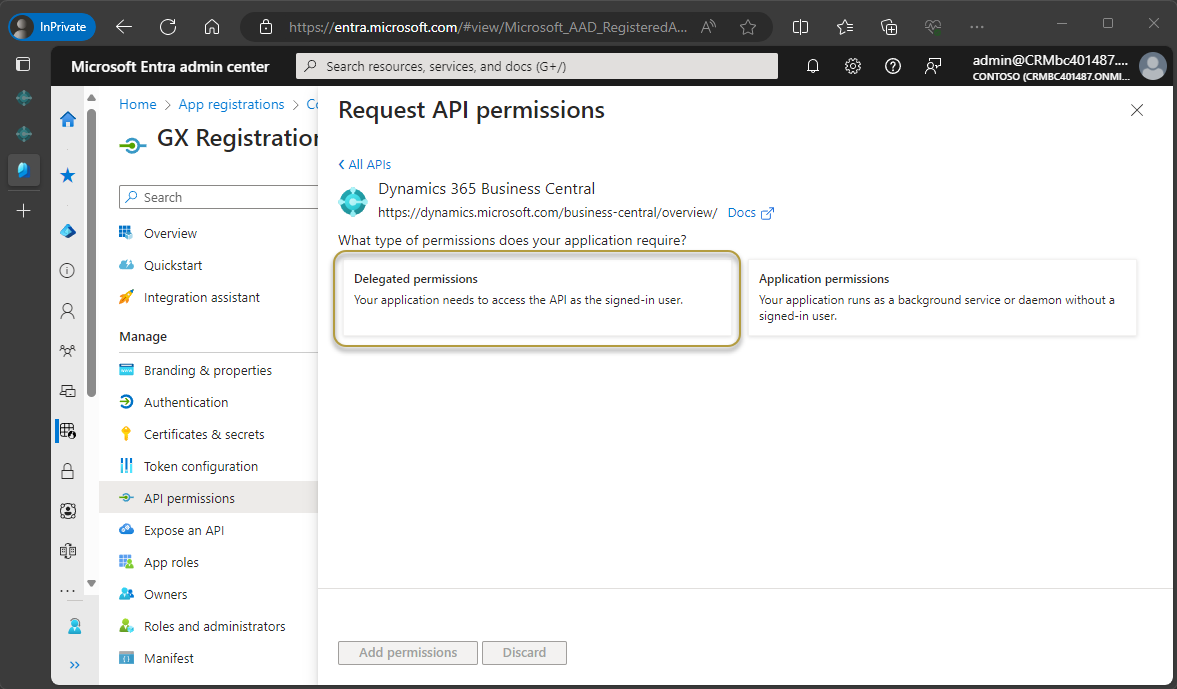
In the next window, choose the Delegated permissions tile.
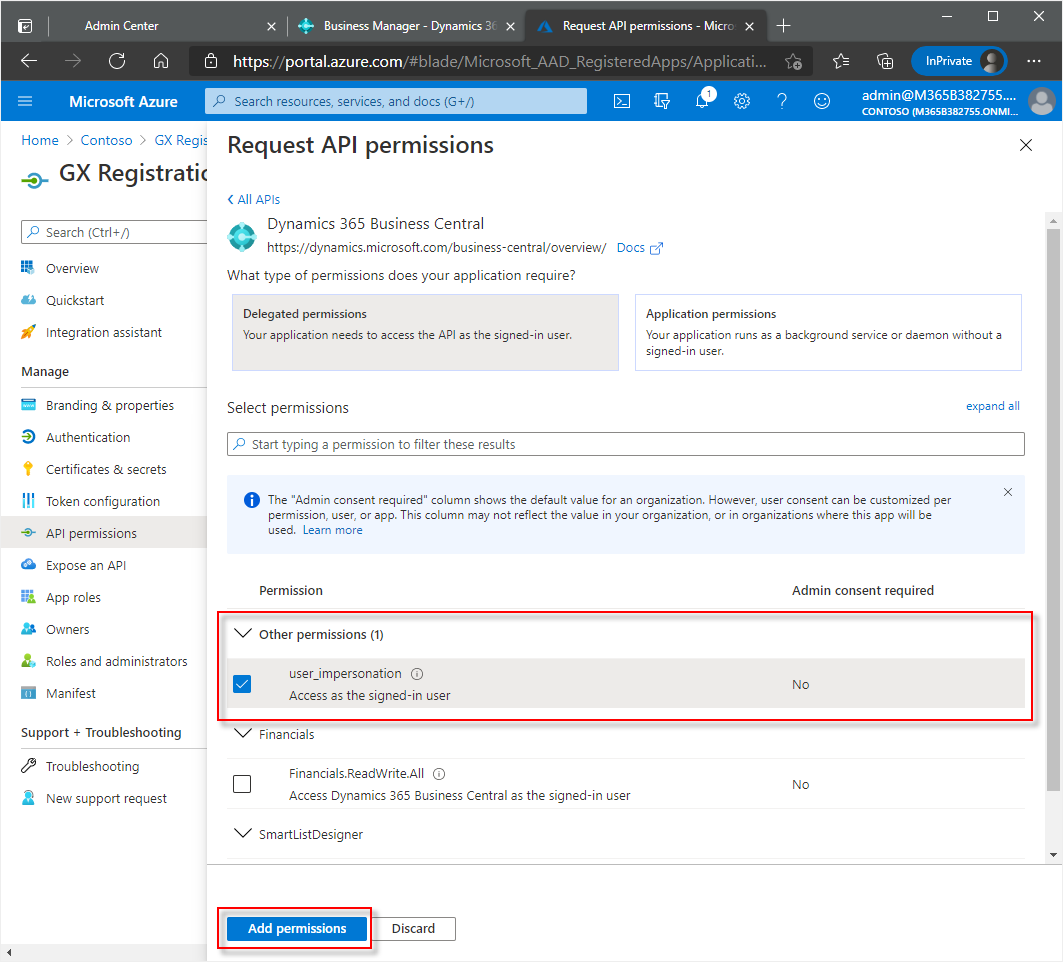
In the Select permissions section, under Other permissions, select the check box for user_impersonation.
Choose the Add permissions button.
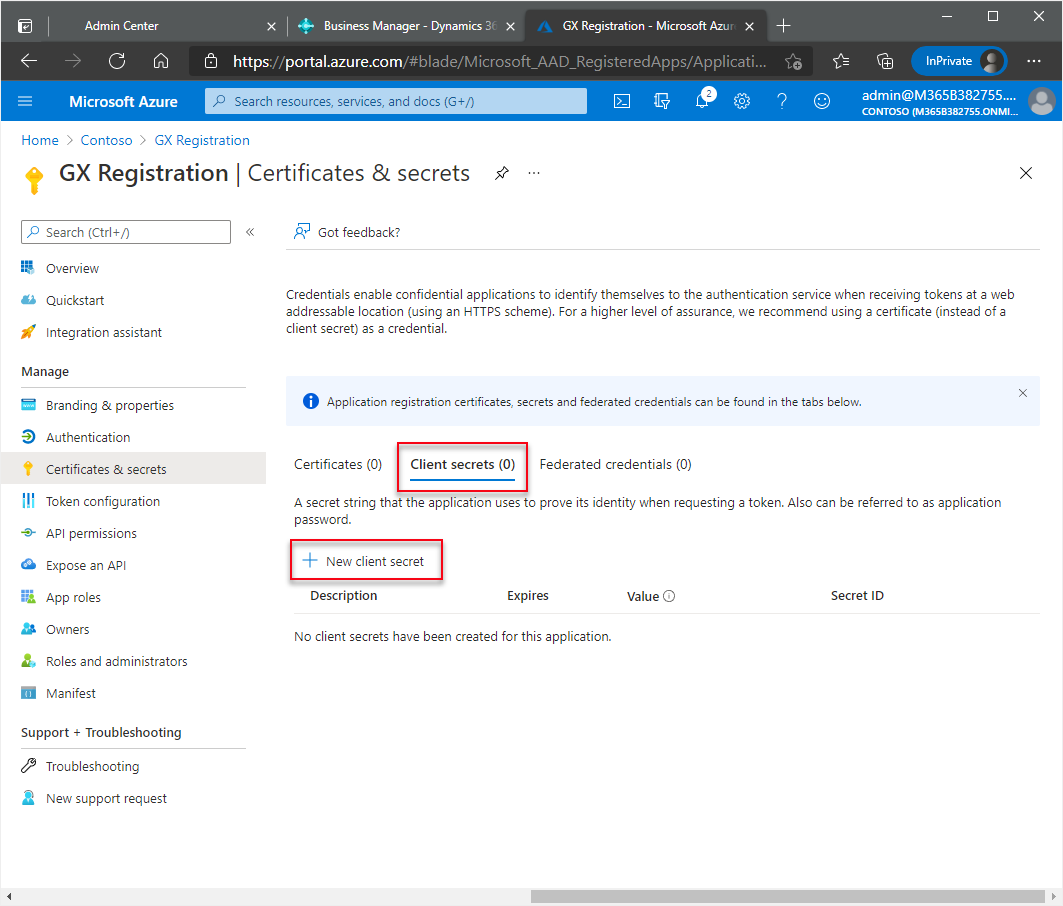
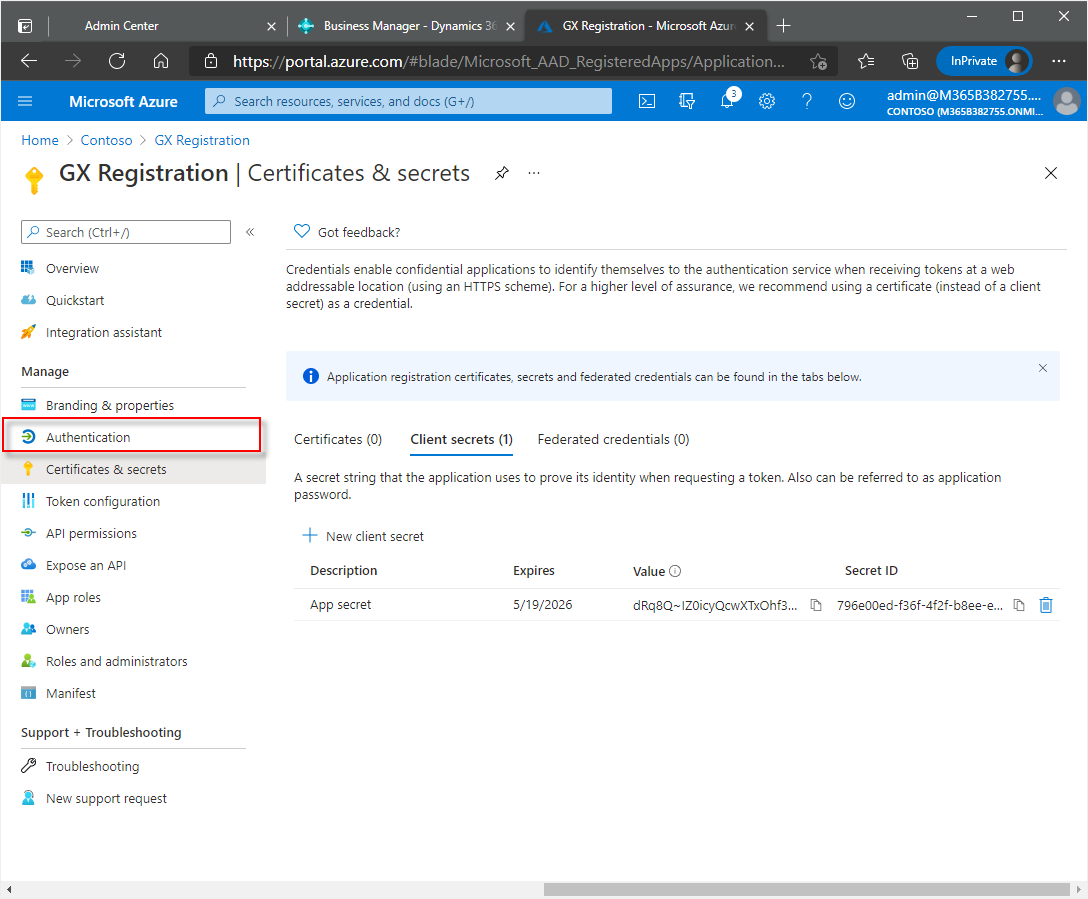
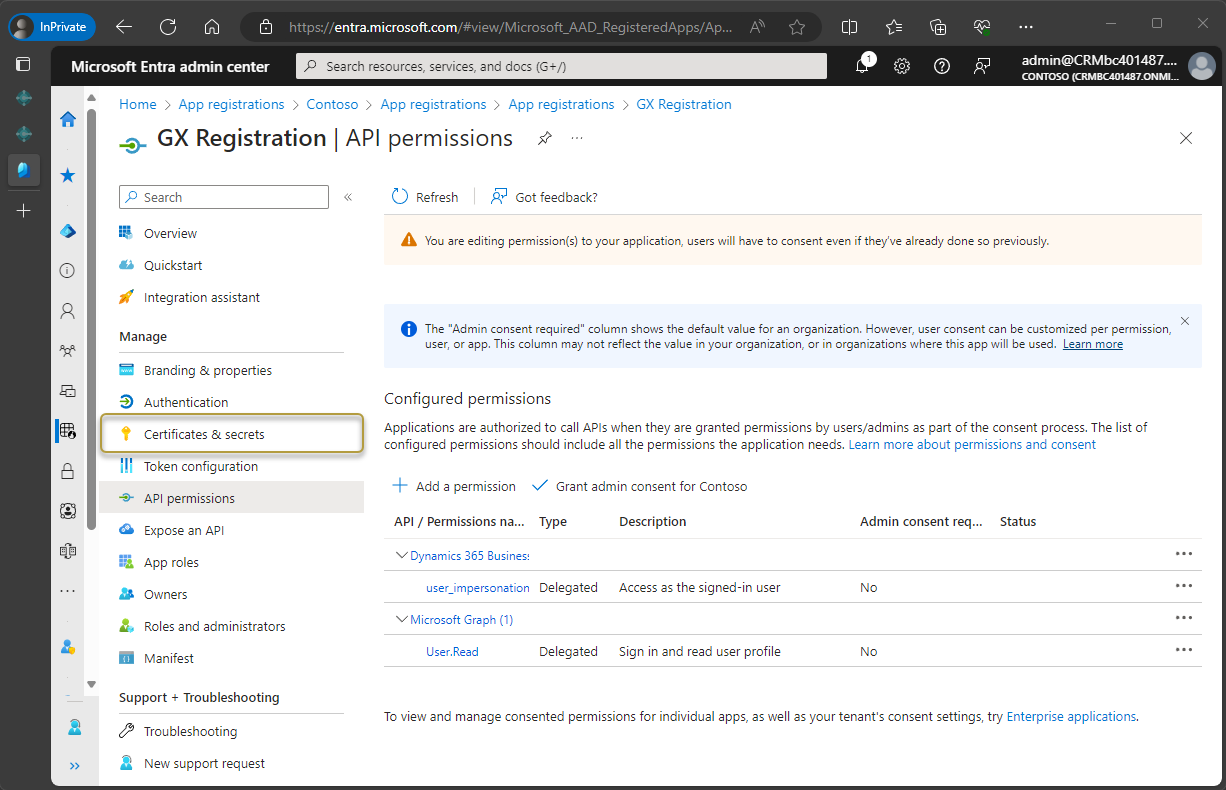
In the navigation pane, choose Certificates & secrets.
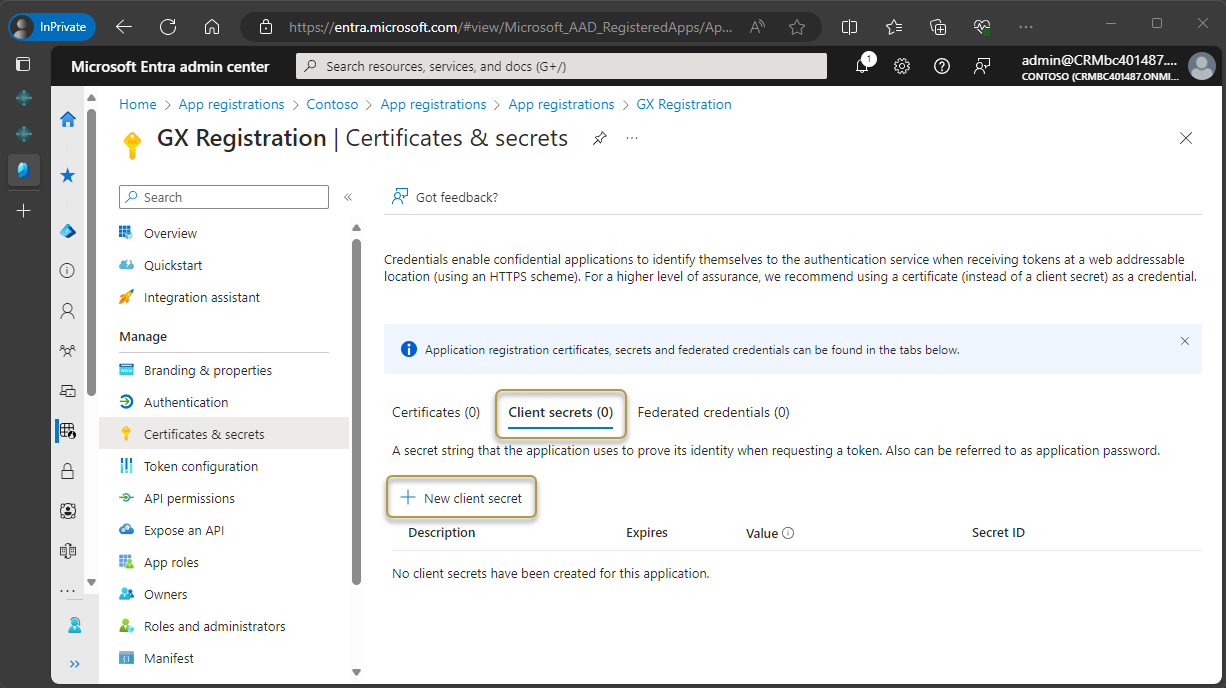
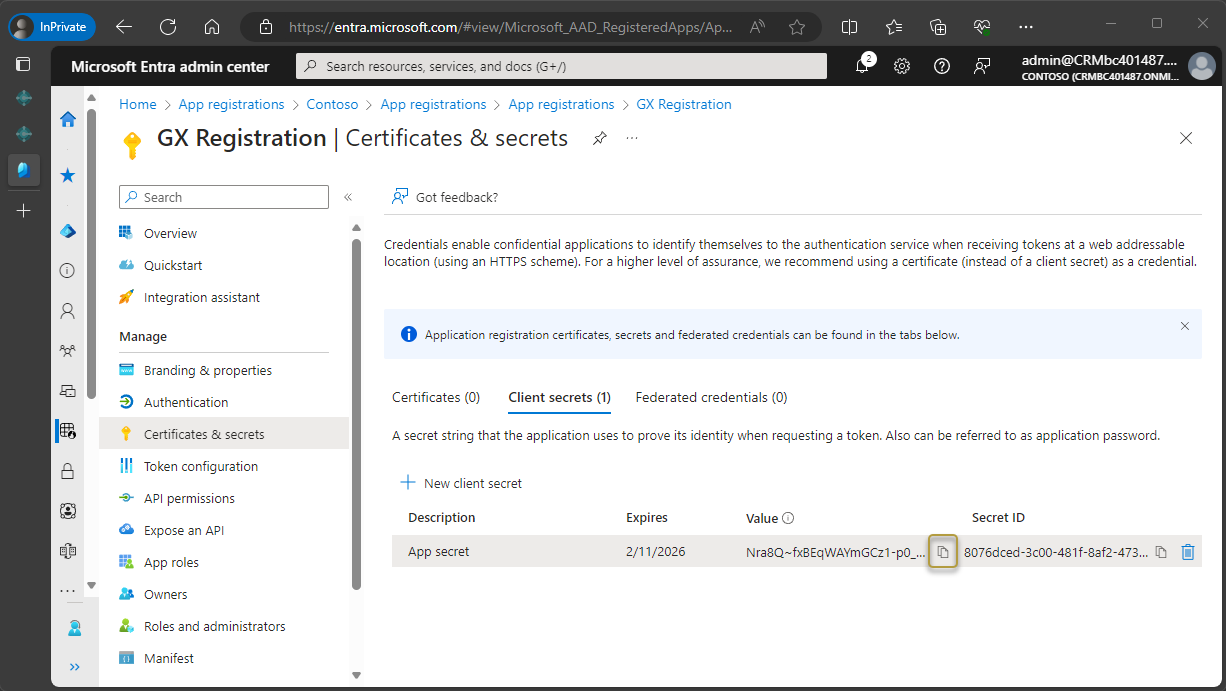
The Certificates & secrets window opens. In the Client secrets section, choose New client secret.
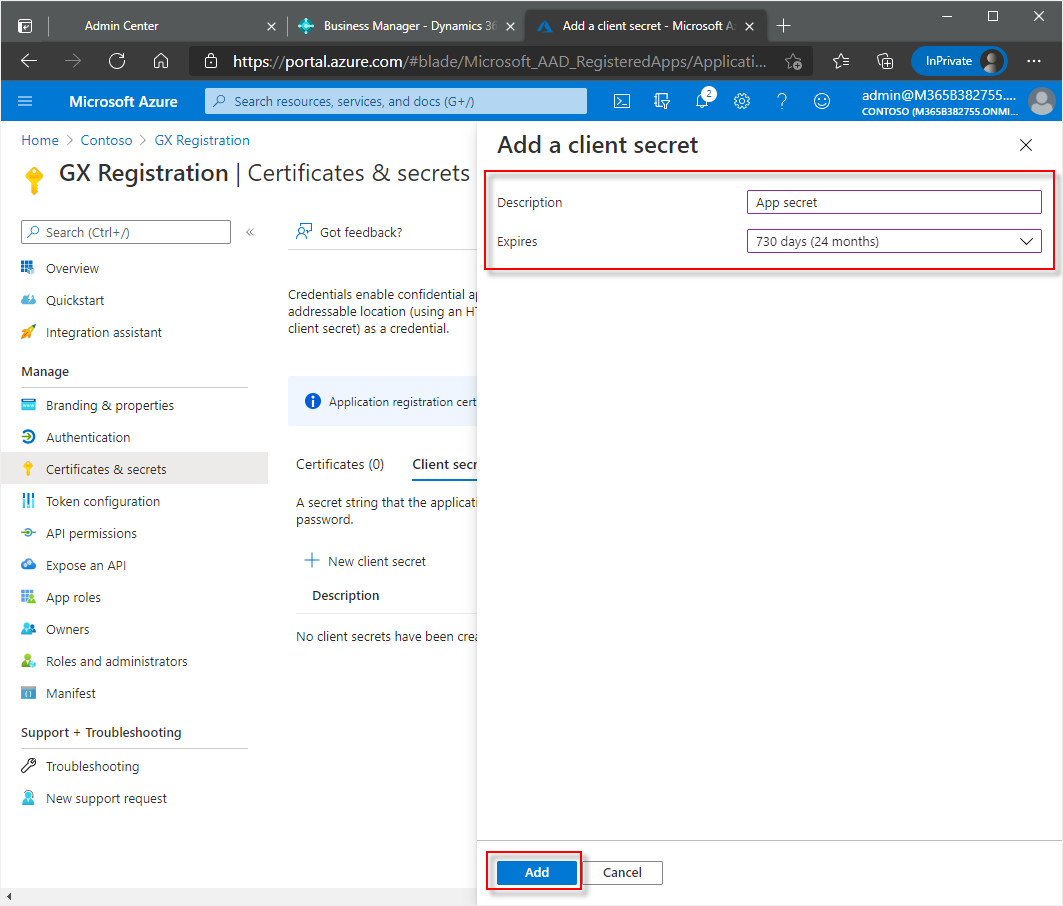
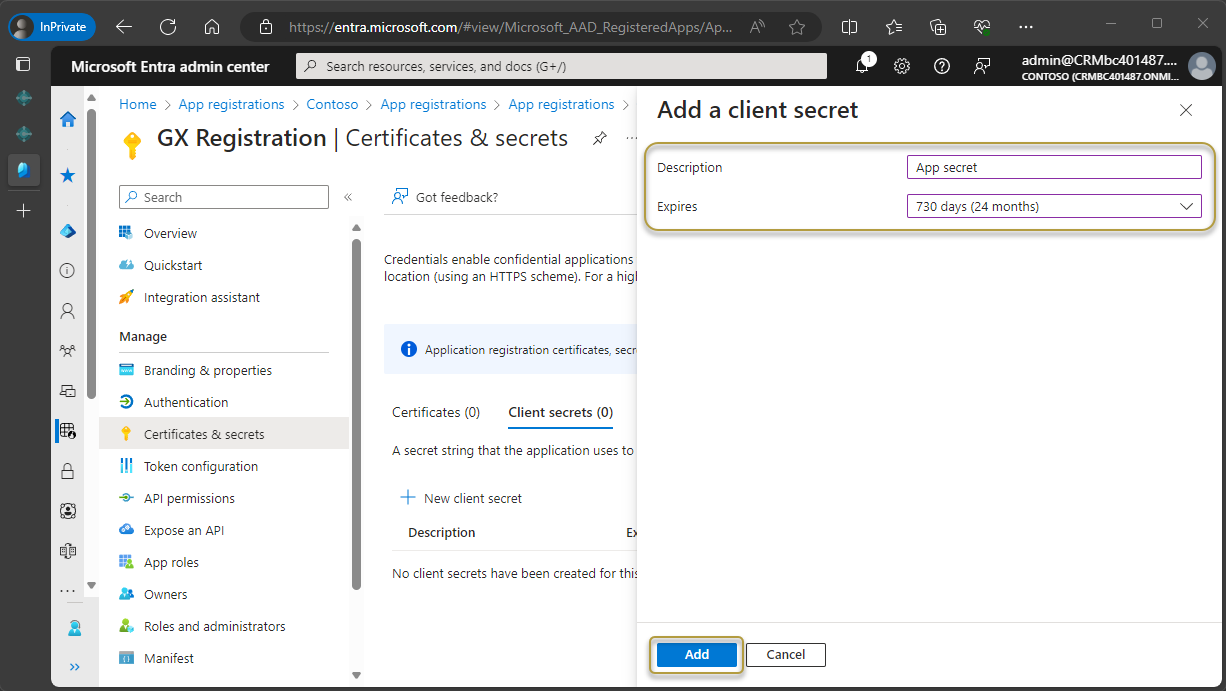
Enter a description, such as App secret.
Set the expiration of the client secret. Set the expiration of the client secret. The longest period possible is two years from the current date.
Choose the Add button.
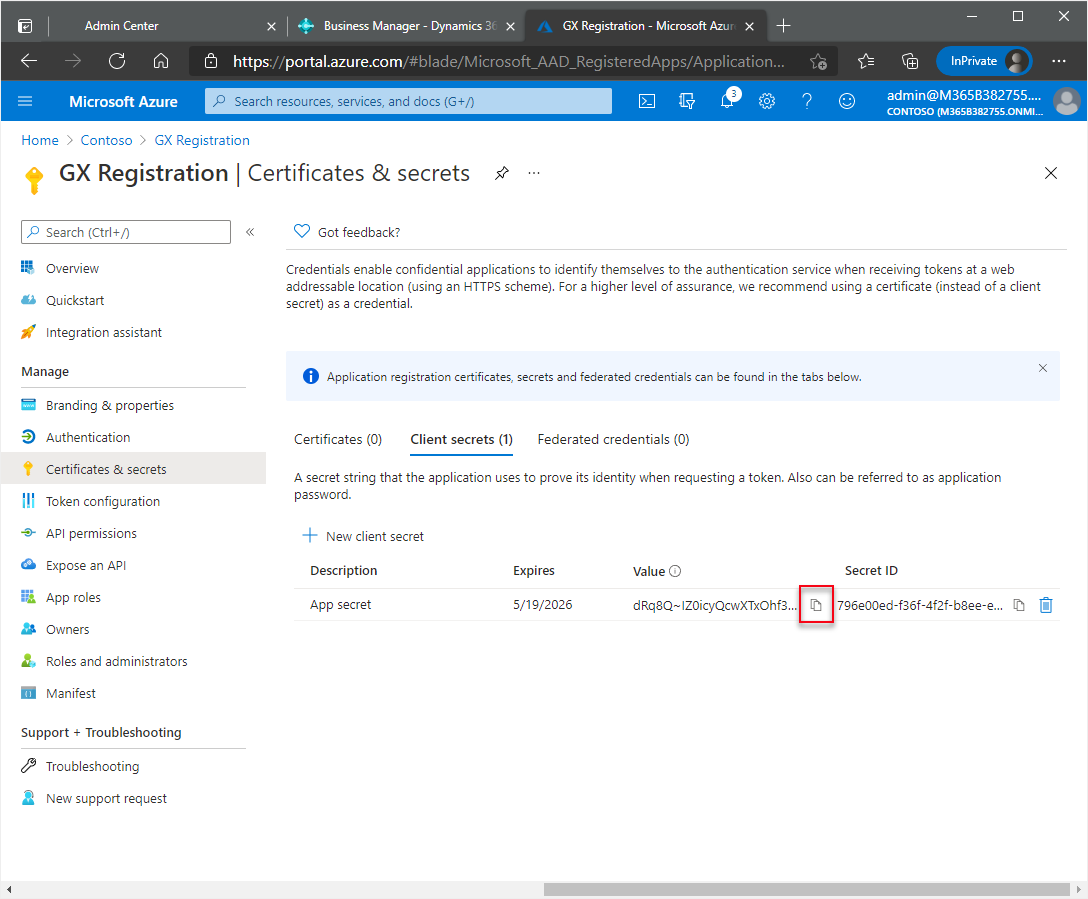
At the end of the Value field, choose the
 icon and paste the key to the same location as the IDs in step 7.
Important
Copy the key for the Client Secret as soon as it is shown and paste it to a safe place. It will not be shown again after it is generated.
Before moving to the next step, ENSURE that you have copied and saved the Client Secret to a safe location.
Now you must enter the Redirect URL, which is a Business Central URL.
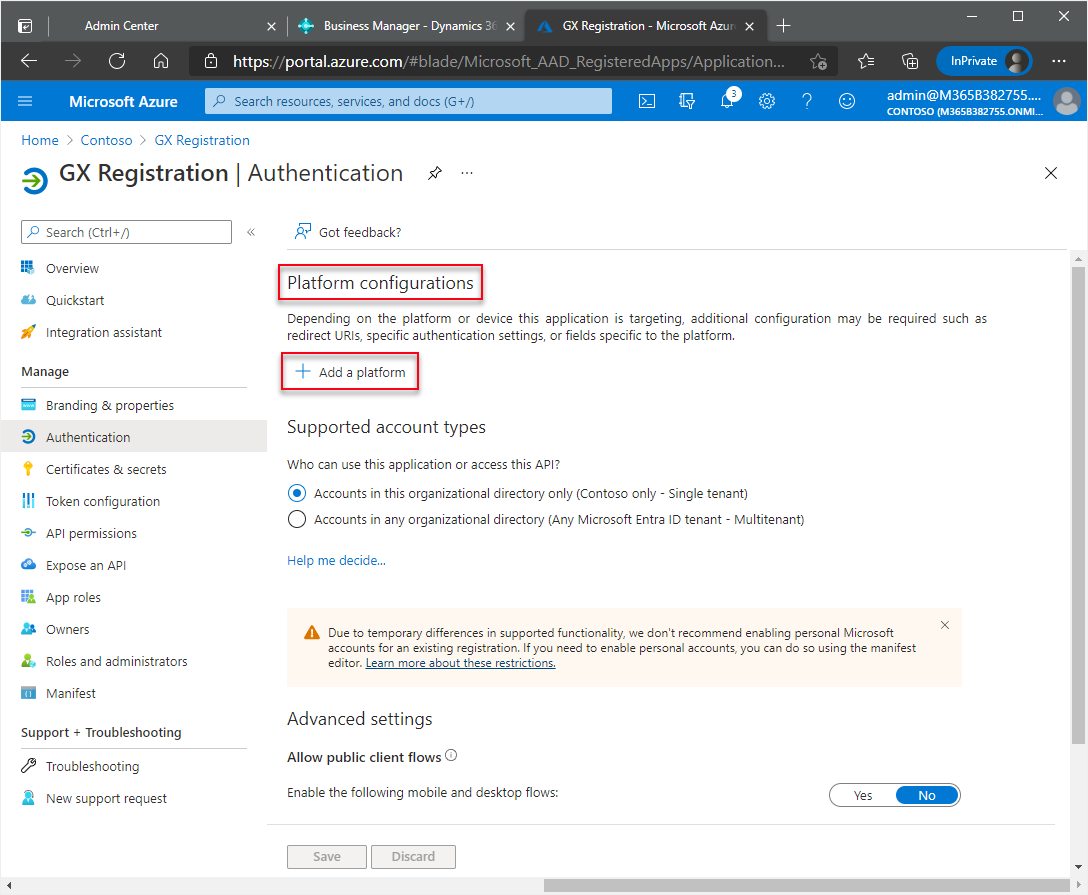
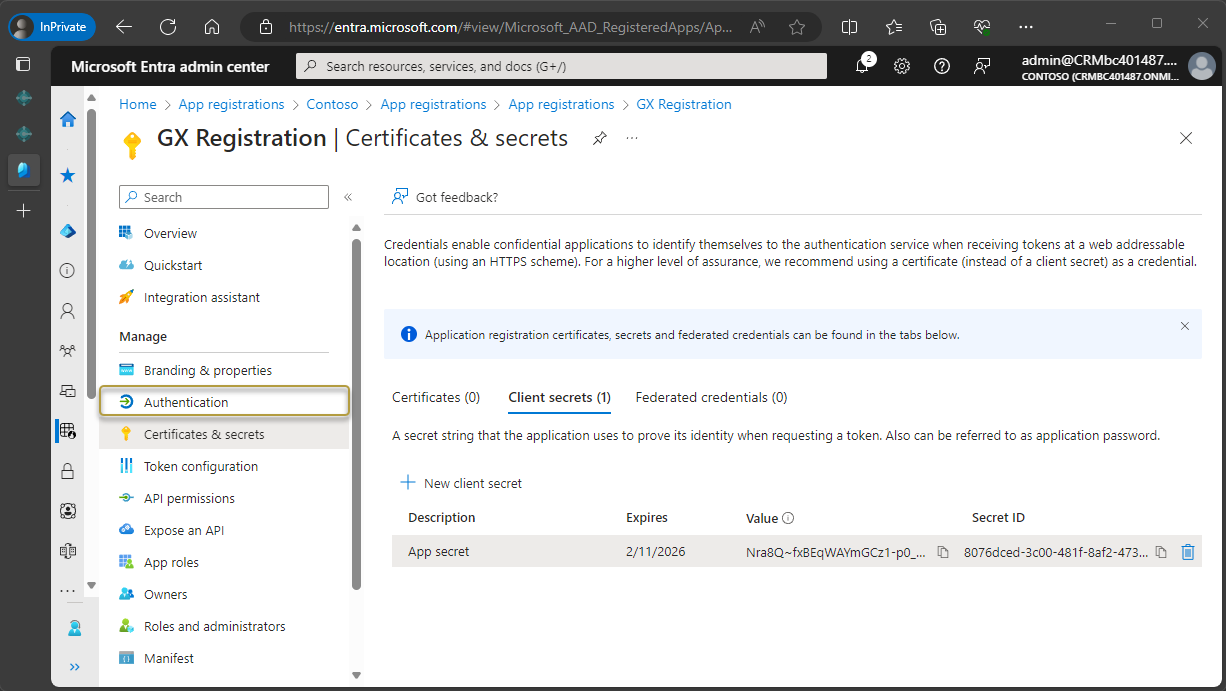
In the navigation pane, choose Authentication.
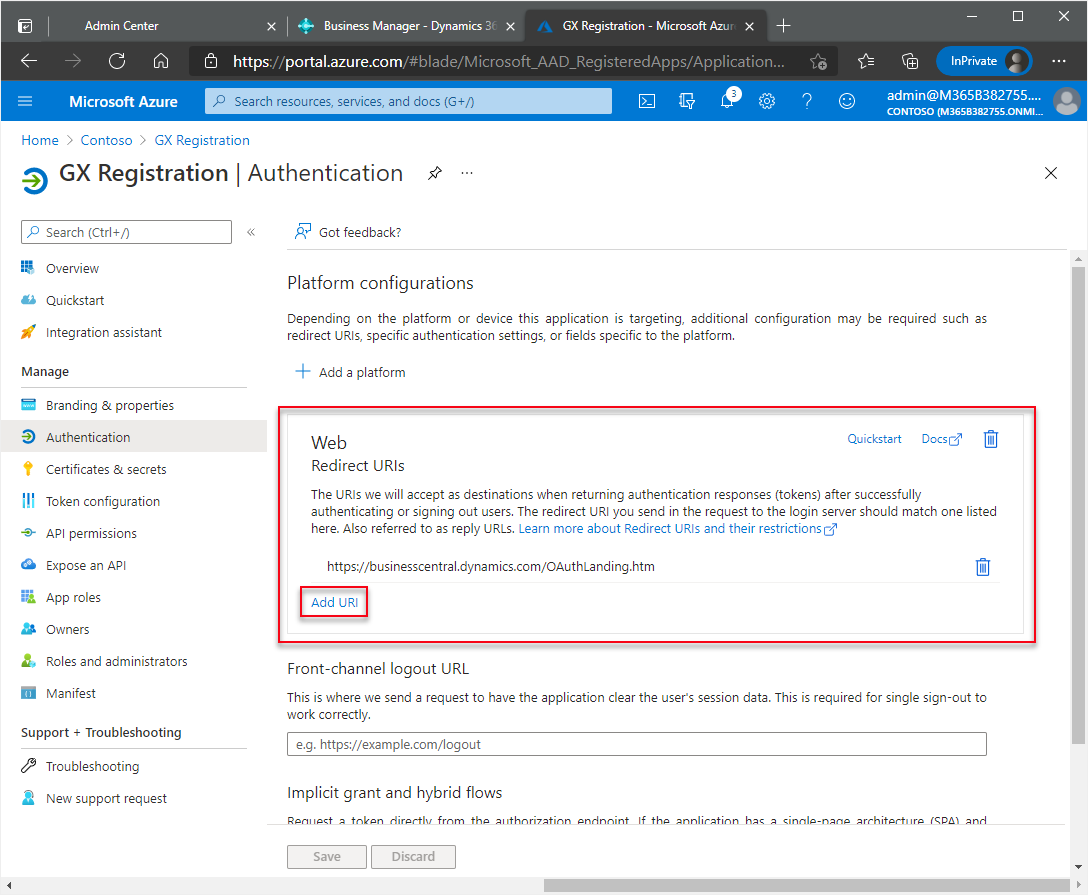
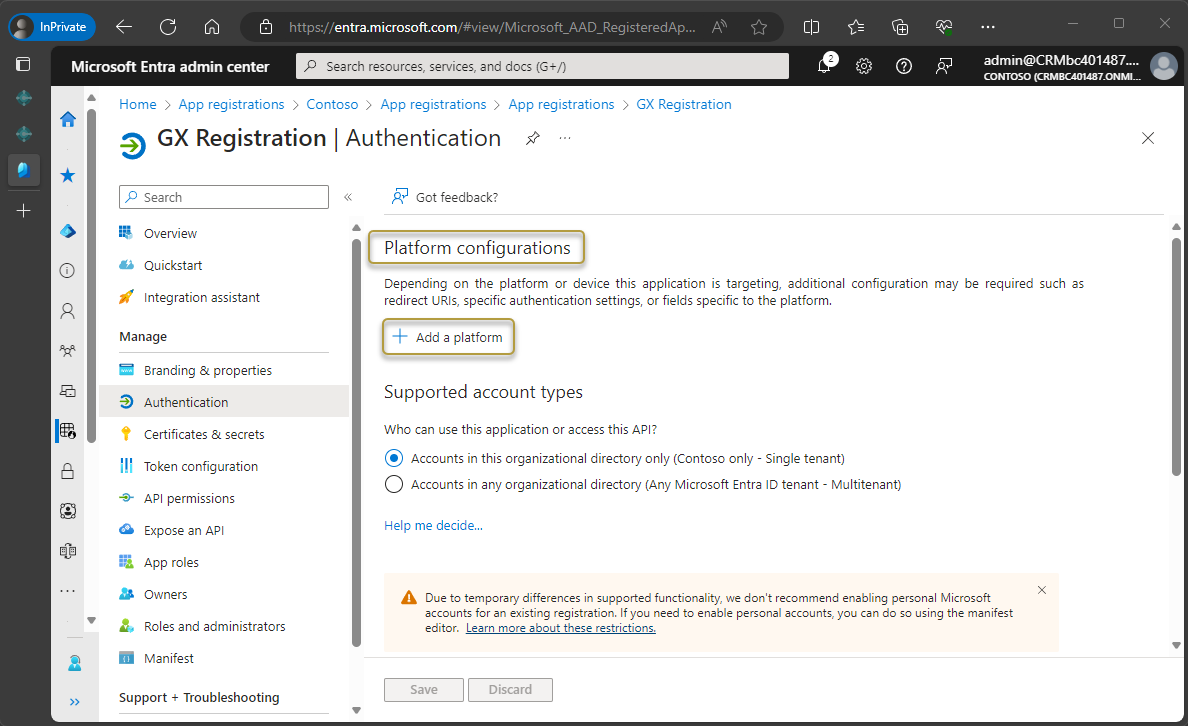
In the Authentication window, under Platform configurations, choose Add a platform.
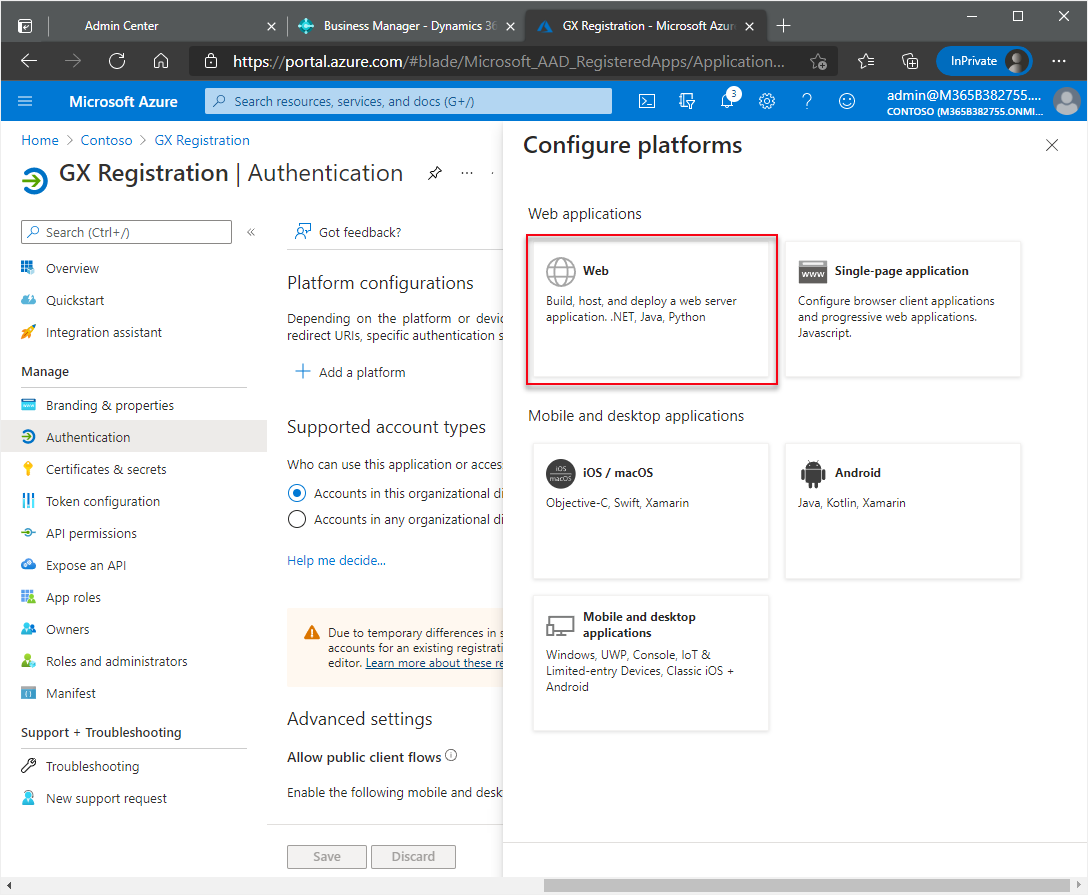
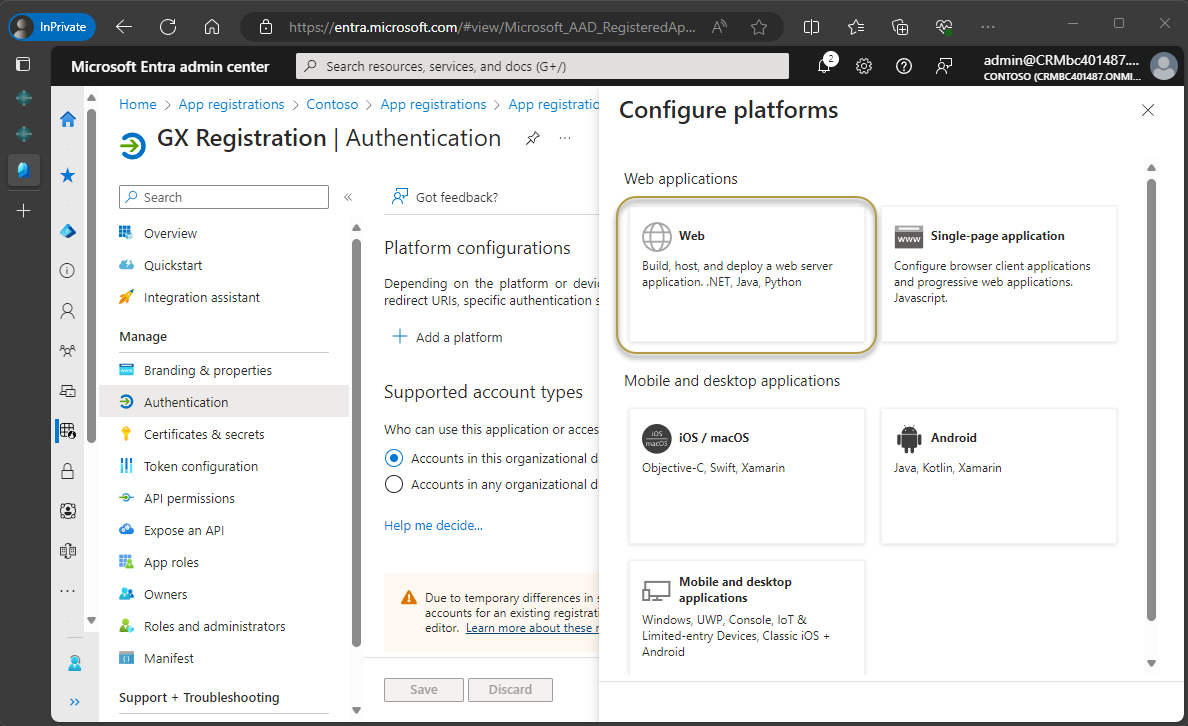
In the Configure platforms window, choose the Web tile.
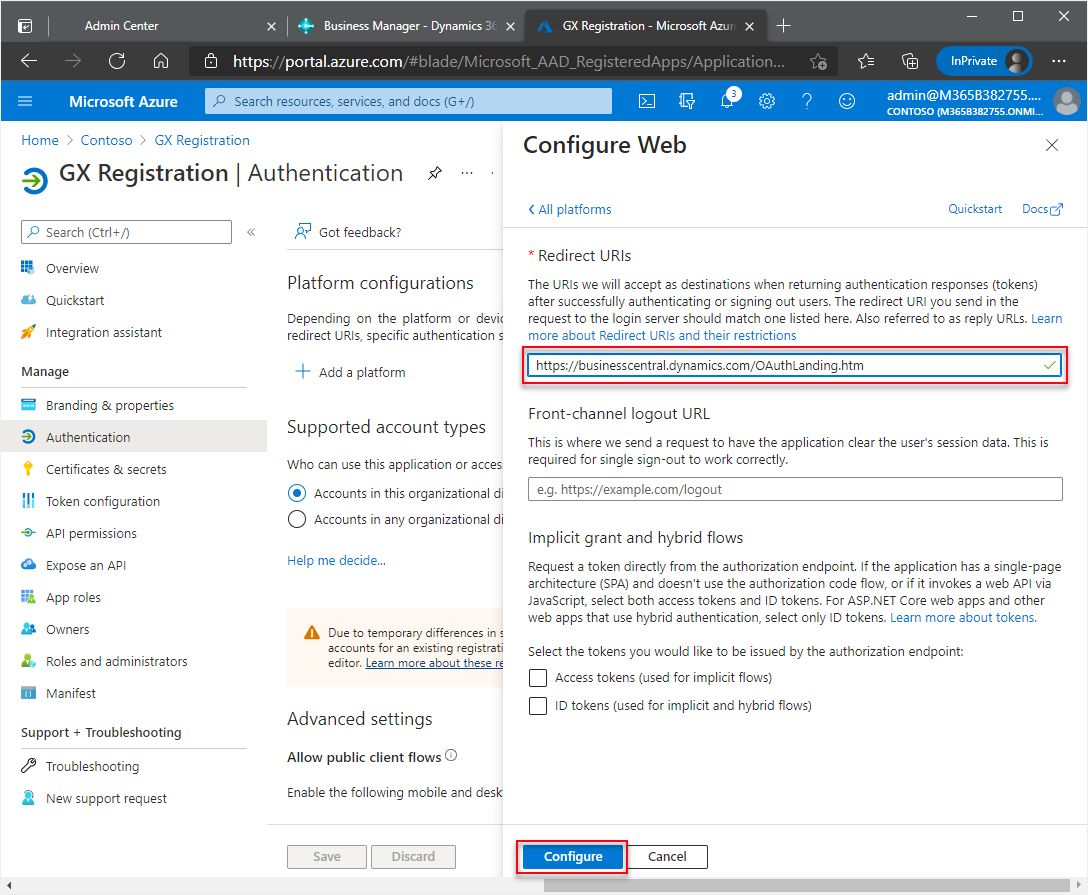
In the Redirect URIs section, enter this URL:
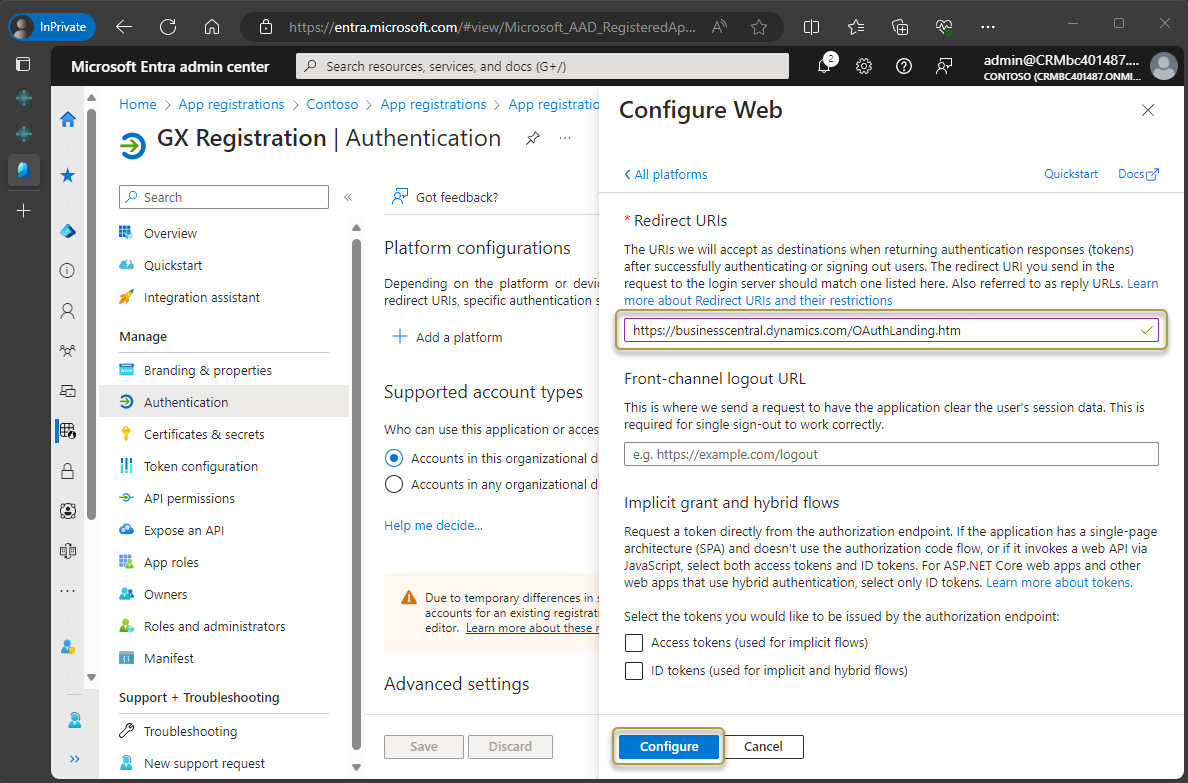
https://businesscentral.dynamics.com/OAuthLanding.htmfor SaaS environments orhttp[s]://<hostname>/<instance>/OAuthLanding.htmfor On-Premises environments. Ensure thatOAuthLandingis written using this syntax.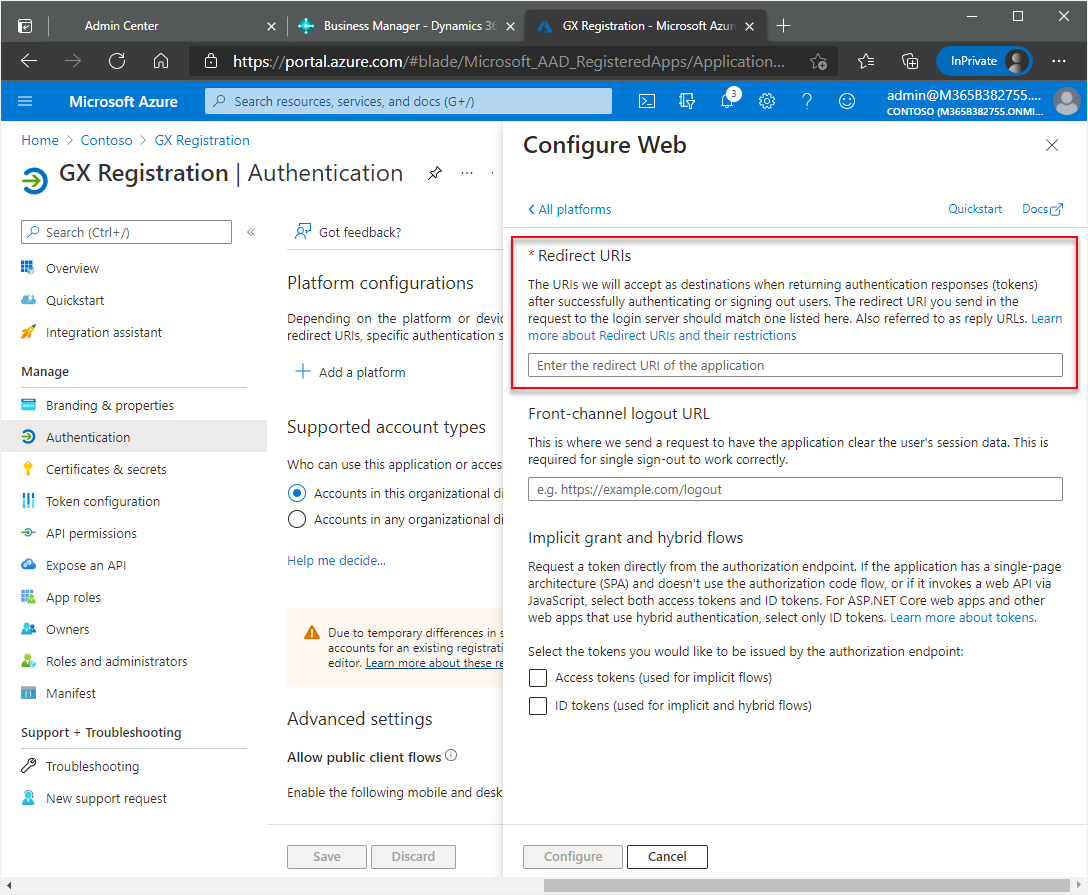
After entering the URL, choose the Configure button.
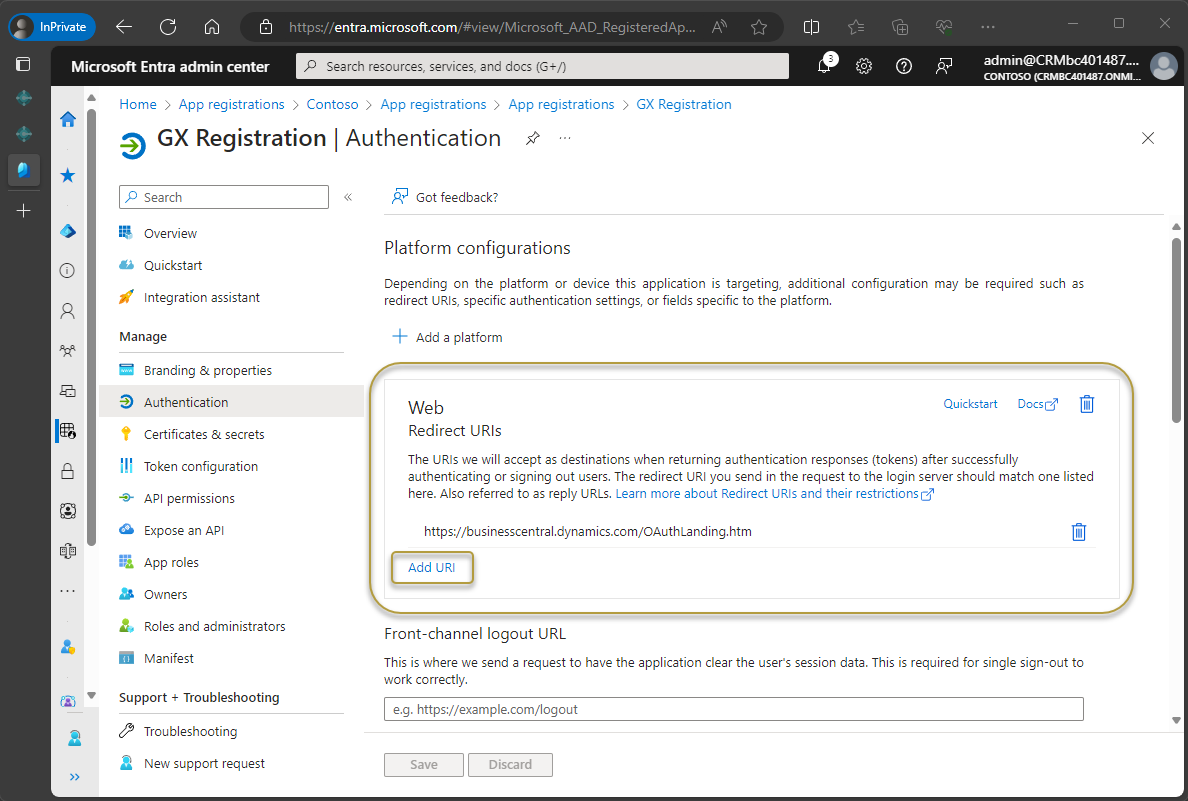
In the Web section, choose Add URI.
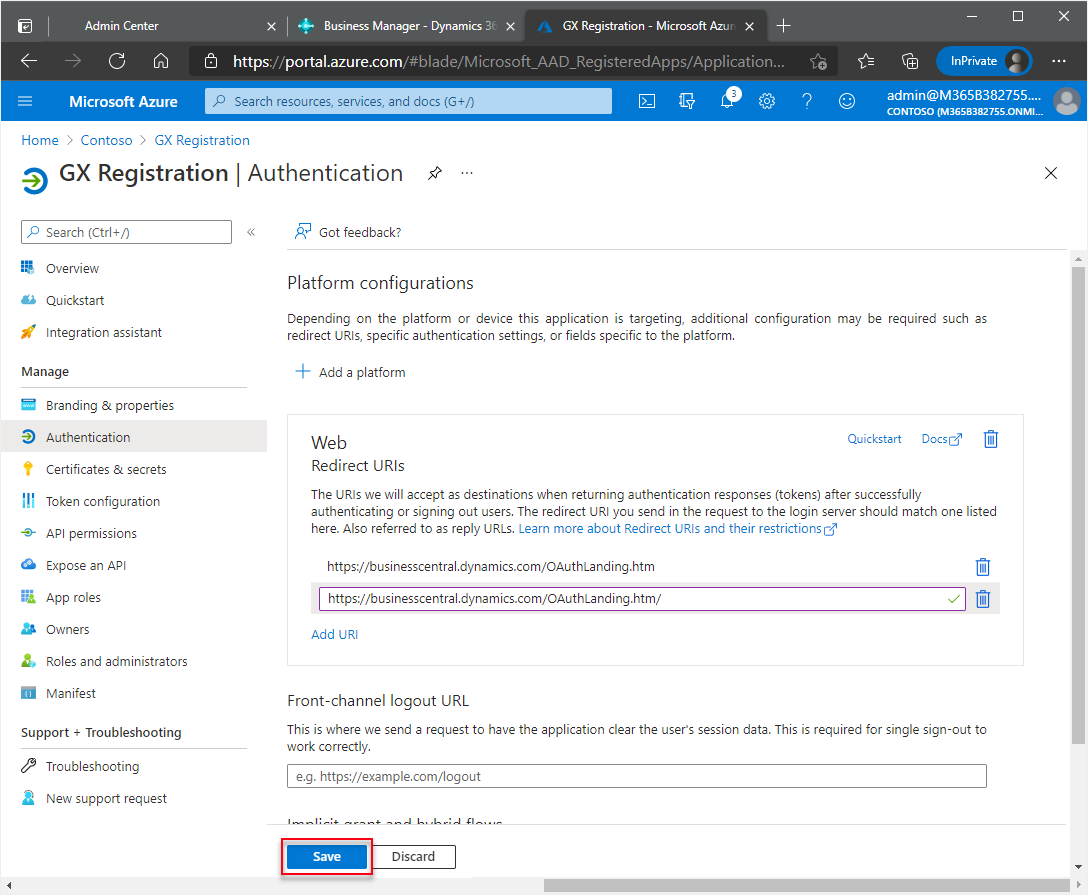
In the new field, enter the same URL as above but add a forward slash to the end:
https://businesscentral.dynamics.com/OAuthLanding.htm/for SaaS environments orhttp[s]://<hostname>/<instance>/OAuthLanding.htm/for On-Premises environments. Ensure thatOAuthLandingis written using this syntax.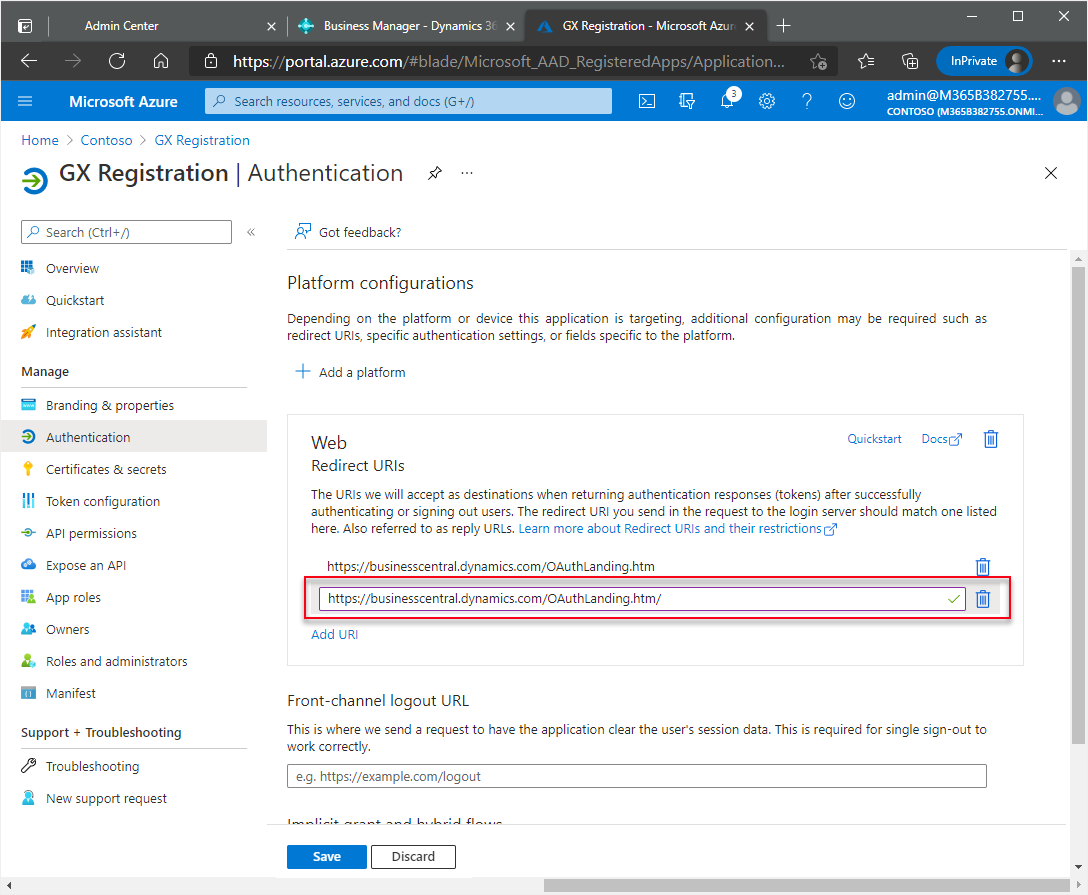
Notă
The slash is optional on the internet but it is not optional for the Redirect URL. An error message is shown later in the process if the slash is not entered correctly so both are entered here to avoid the error from occurring.
Choose the Save action.
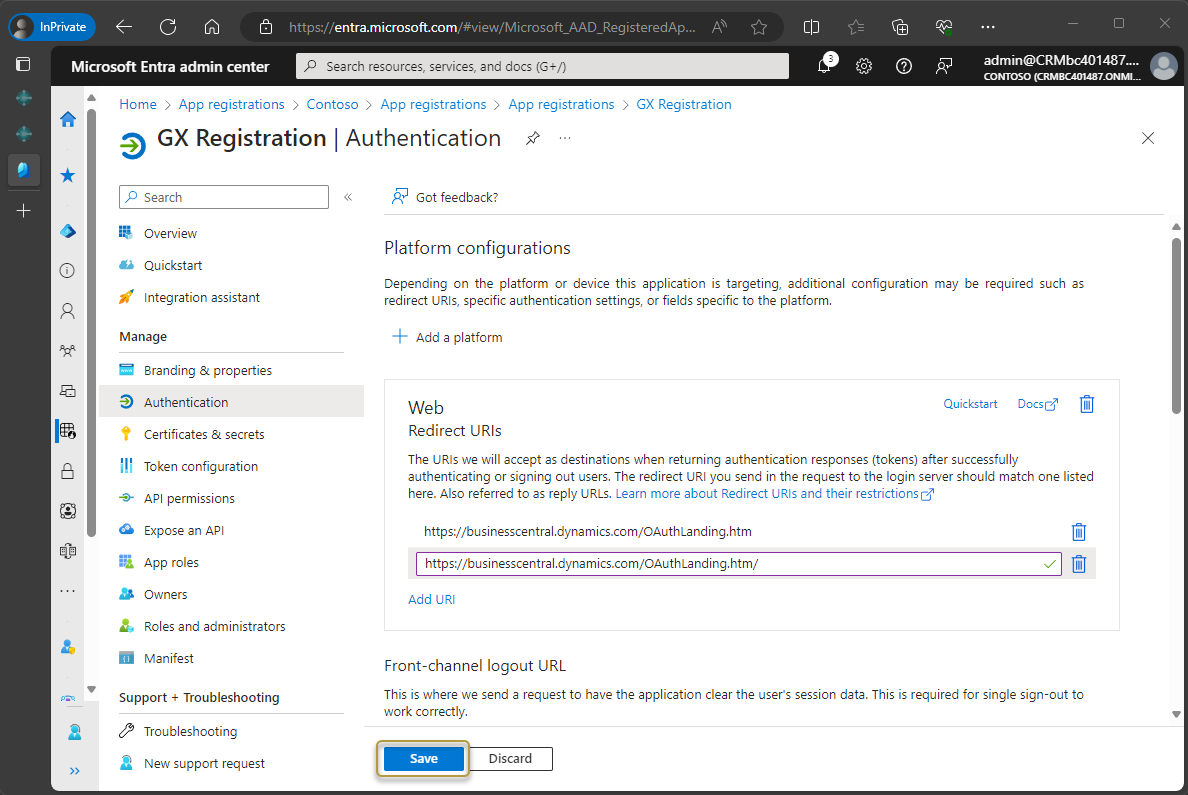
The application registration process is complete.
Gather authentication URLs
The following URLs are added to the Graphical Extension Setup page in Business Central:
- Callback URL –
https://businesscentral.dynamics.com/OAuthLanding.htmfor SaaS environments orhttp[s]://<hostname>/<instance>/OAuthLanding.htmfor On-Premises environments - Authorization URL –
https://login.microsoftonline.com/<Your Tenant ID>/oauth2/v2.0/authorize - Resource URL –
https://api.businesscentral.dynamics.com
You will need to replace the <Your Tenant ID> placeholder in the URL with the Directory (tenant) ID that you saved in step 10 or 11 above, depending on which environment you are using. It may help to paste the URL to the same place and update the placeholders with the tenant ID before starting the next section.
To update OAuth 2.0 information in Business Central
Open Microsoft Dynamics 365 Business Central.
Choose the
 icon, enter Graphical Extension Setup, and then choose the related link.
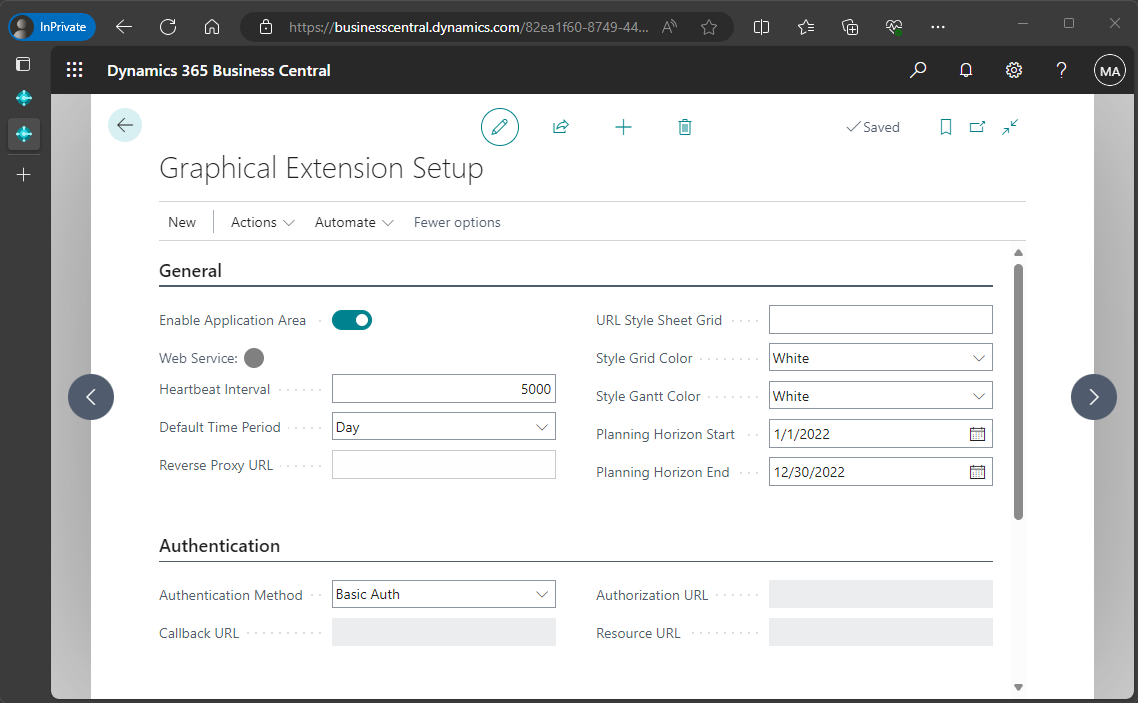
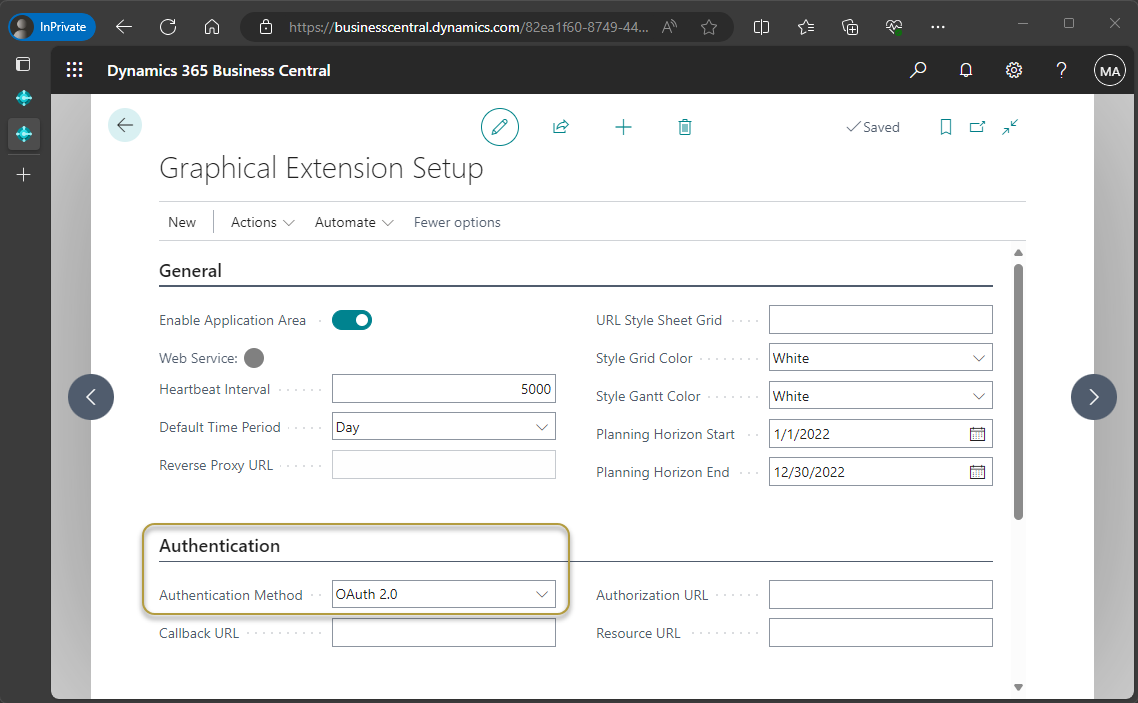
In the Authentication FastTab, choose OAuth 2.0 in the Authentication Method field.
In the Callback URL field, paste in the following URL:
https://businesscentral.dynamics.com/OAuthLanding.htmfor SaaS environments orhttp[s]://<hostname>/<instance>/OAuthLanding.htmfor On-Premises environments.In the Authorization URL field, paste in the URL using your tenant ID in the placeholder:
https://login.microsoftonline.com/<Your Tenant ID>/oauth2/v2.0/authorizeIn the Resource URL field, paste in the following URL:
https://api.businesscentral.dynamics.com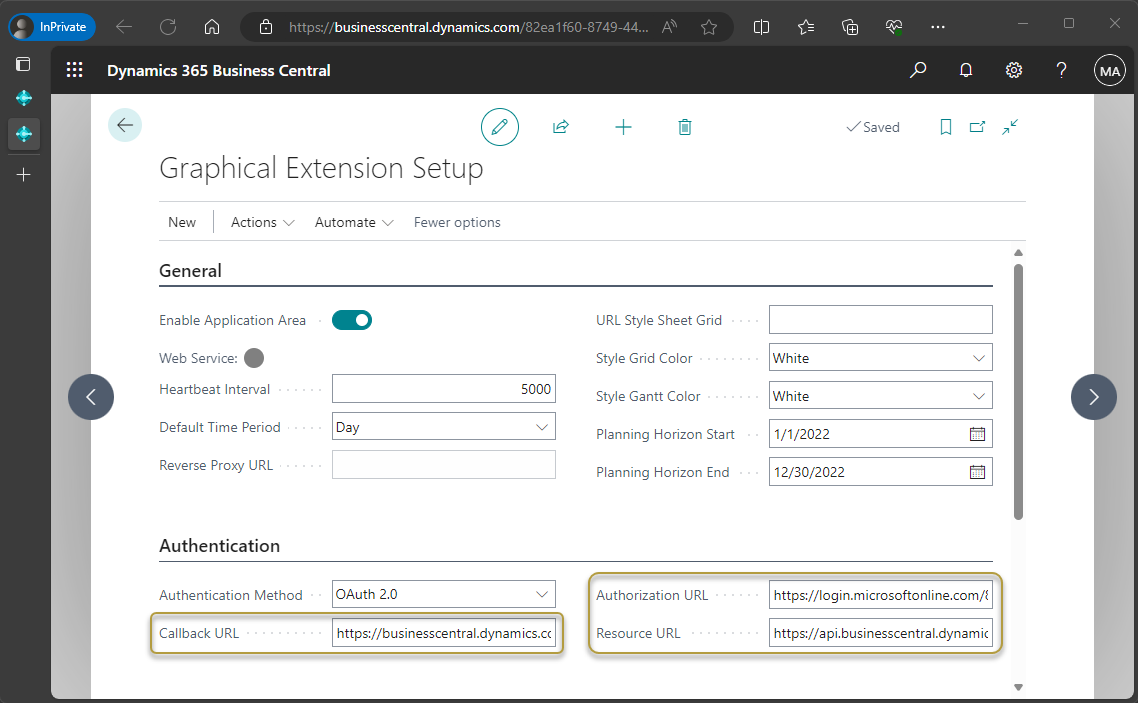
For On-Premises environments, in the Reverse Proxy URL field on the General FastTab, enter
http[s]://<hostname:port>/<instance>to specify the OData Service URL. You can find the OData path in the Web Services page.On the Actions menu, choose the Set OAuth Client ID & Secret action.
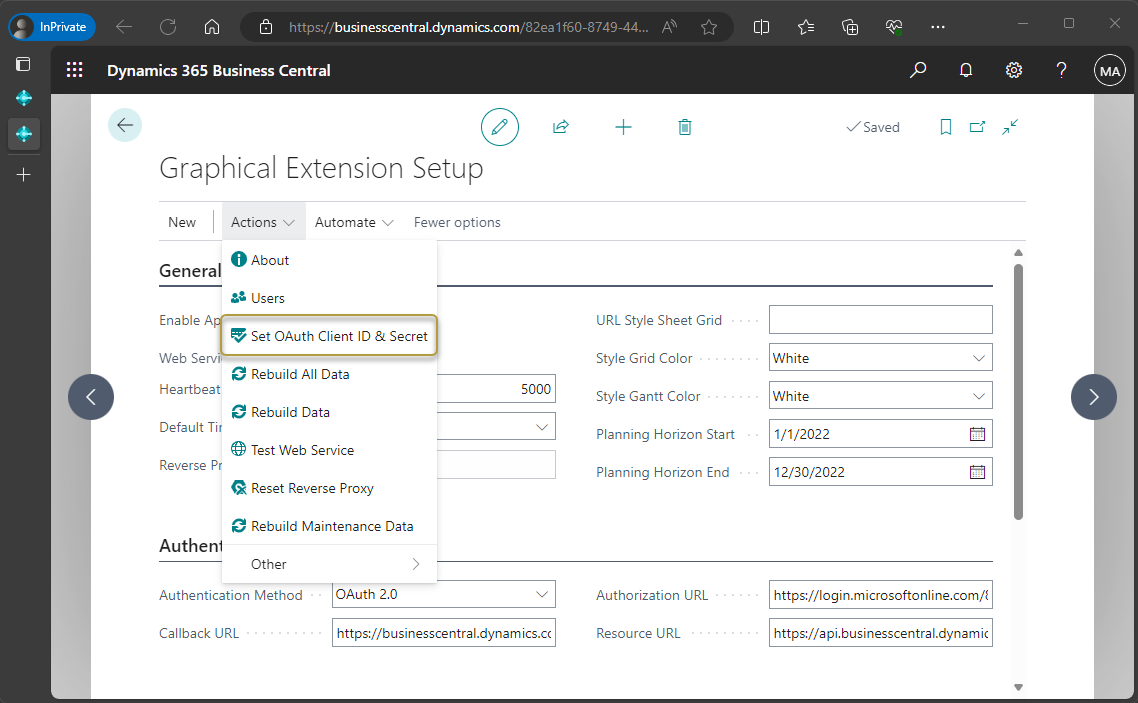
This tells Business Central where to find the authentication.
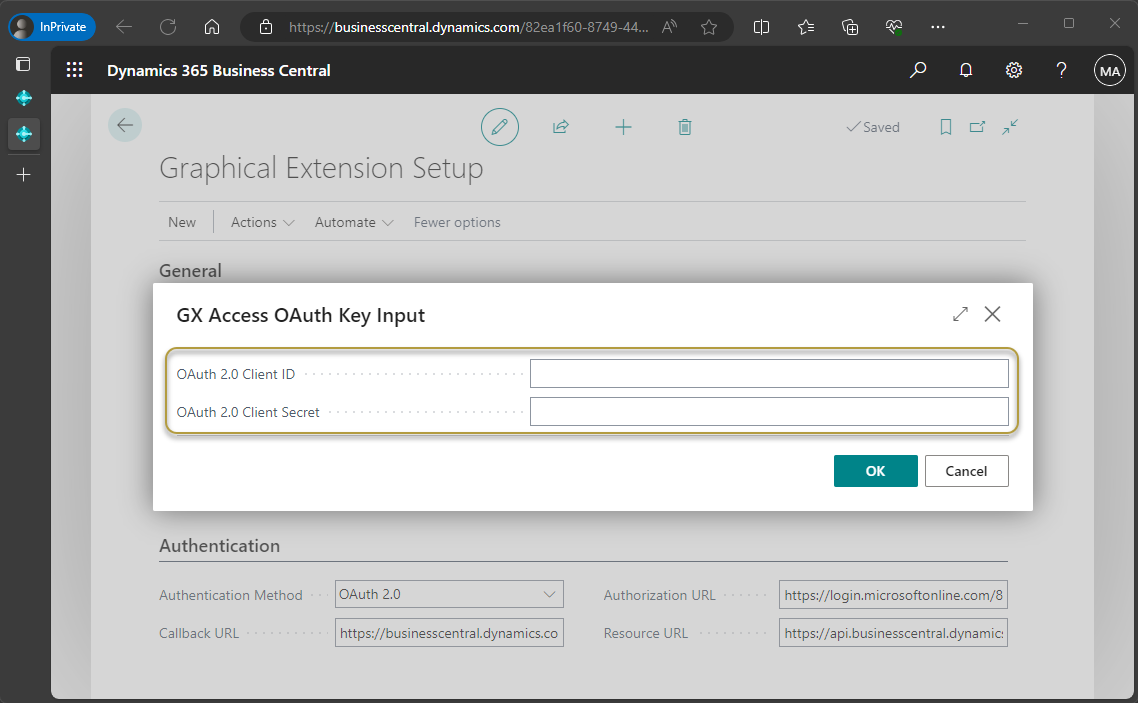
In the OAuth 2.0 Client ID field, enter the Application (client) ID saved in step 10 of the Microsoft Entra admin center or step 11 in the Azure Portal in To set up an app registration.
In the OAuth 2.0 Client Secret field, enter the client secret saved in step 22 of the Microsoft Entra admin center or step 23 in the Azure Portal in To set up an app registration.
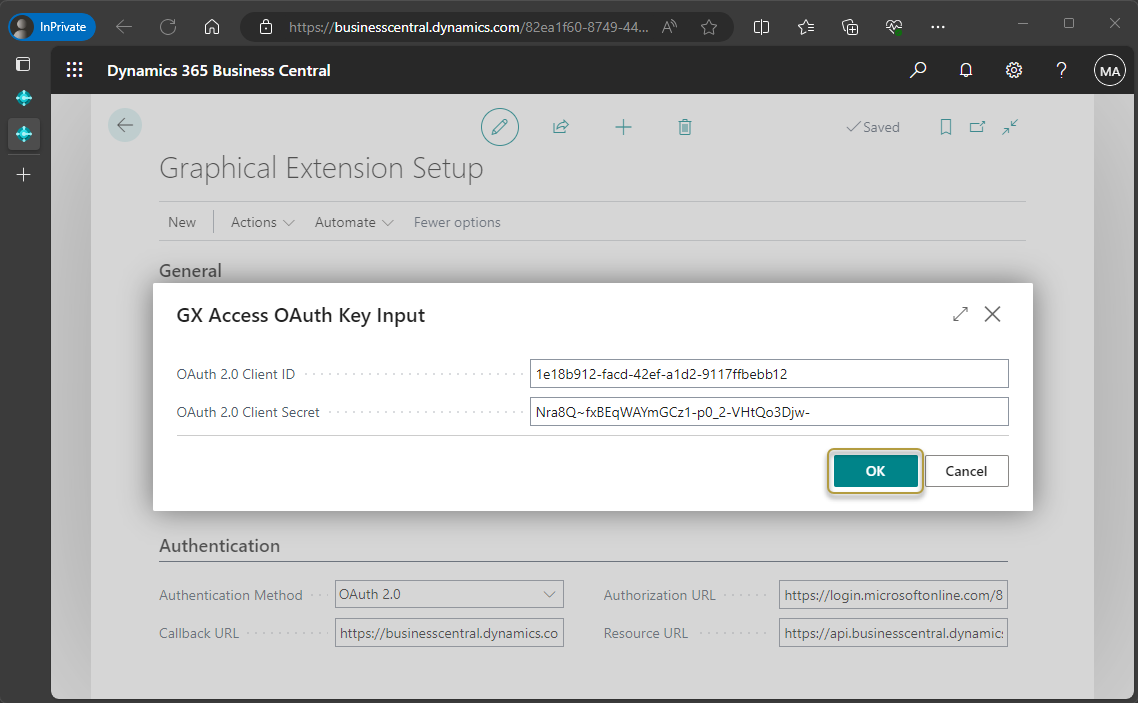
Choose the OK button.
To check if the authentication was set up successfully
On the Actions menu, choose the Test Web Service action.
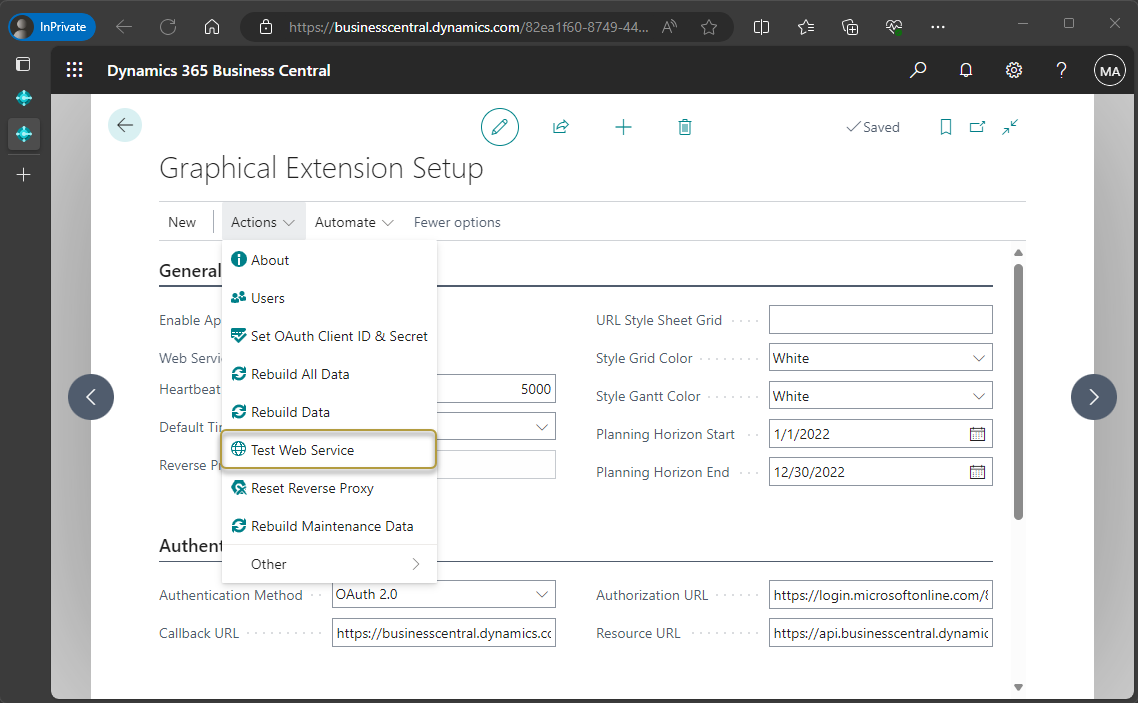
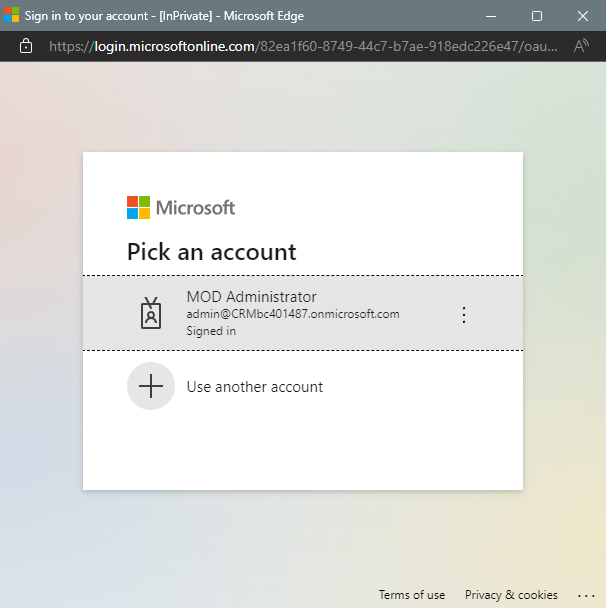
A Microsoft account login page opens. Choose the account to log into.
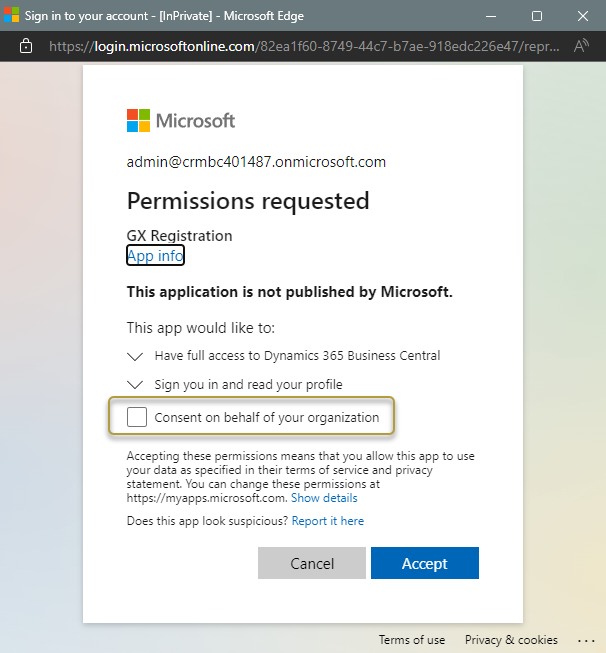
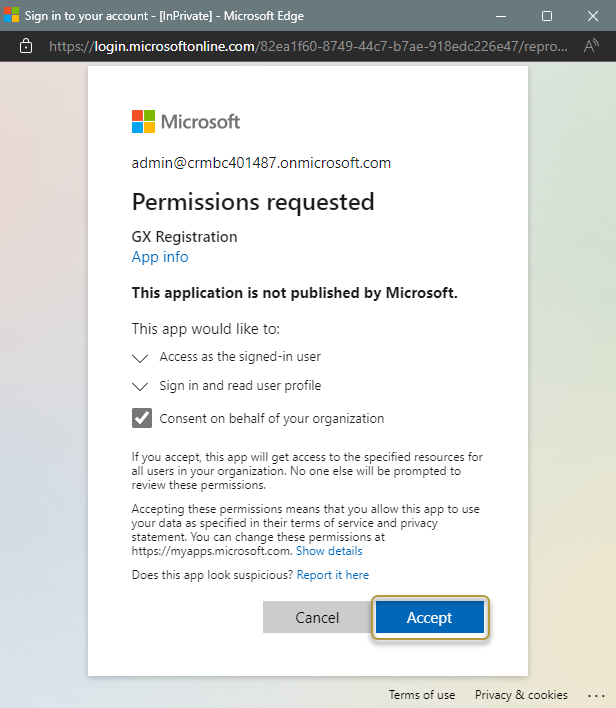
A new browser window opens. In the Permissions requested window, select the Consent on behalf of your organization check box.
Important
Only a domain administrator can give consent and approve the permission.
The browser closes and if setup was successful, a confirmation message opens and the icon is green in the Web Service field on the General FastTab.
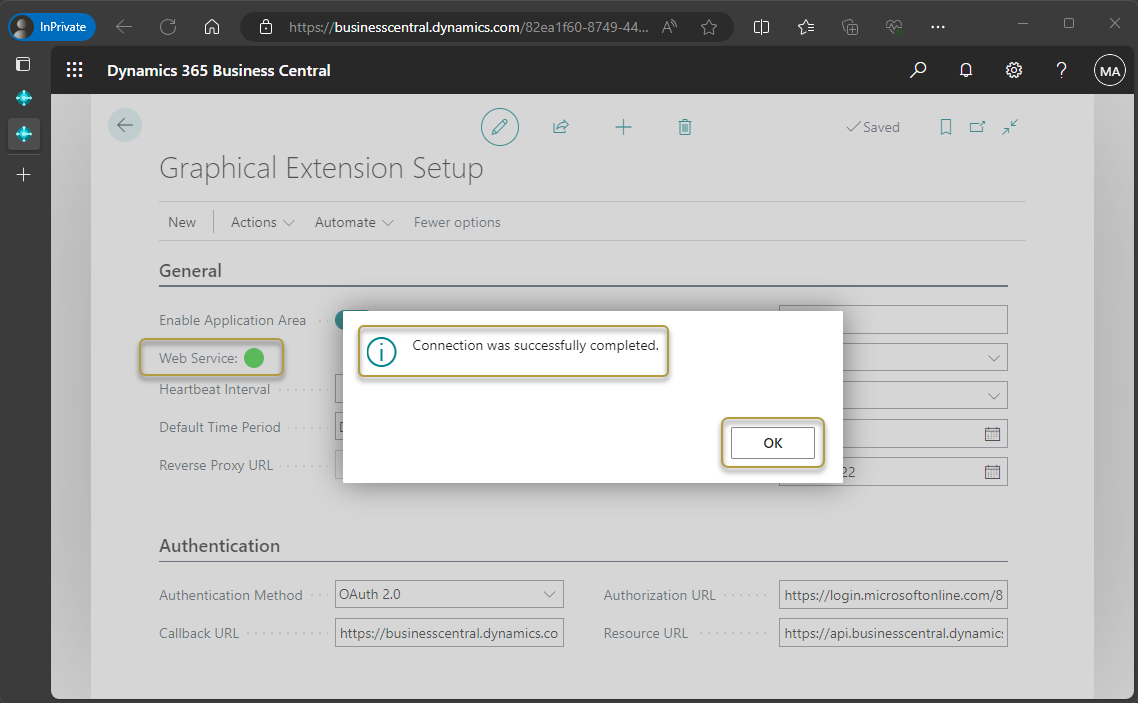
Choose the OK button to close the message.
If the test failed, a message opens and the Web Service icon will be red. You will need to revisit the steps listed in this topic to determine what was possibly missed to prevent a successful setup.
Feedback
Submit feedback for this page .
