OAuth Applications
An OAuth Application stores credentials and tokens to authenticate against a web service. OAuth 2.0 is an industry-standard protocol for authorization. For more information, see https://oauth.net/2/.
To create an OAuth application
- Choose the
 icon, enter OAuth Applications - Task-Based Scheduling, and then choose the related link.
 - Choose the New action.
- On the OAuth Application Card page, fill in the fields as necessary. Hover over a field to read a short description.
To register an app for a Business Central web service connection
Follow these steps to create an app to establish a connection from an OAuth Application in COSMO Task-Based Scheduling.
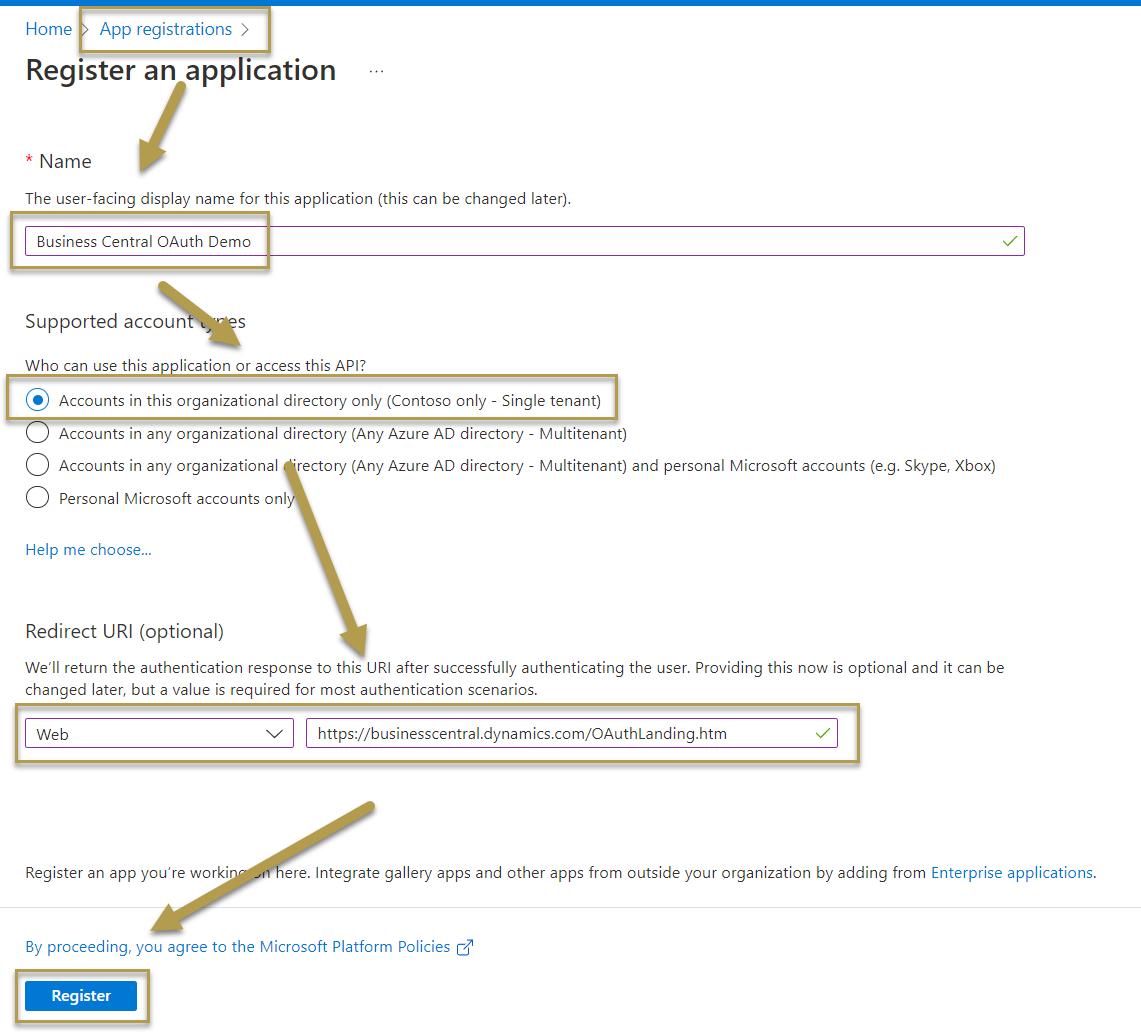
Register an app in Azure portal. For connecting to Business Central, add the endpoint
OAuthLanding.htm(for example, https://businesscentral.dynamics.com/[/]OAuthLanding.htm'). You might set the account type to Multitenant, if the app is shared across different Azure tenants.
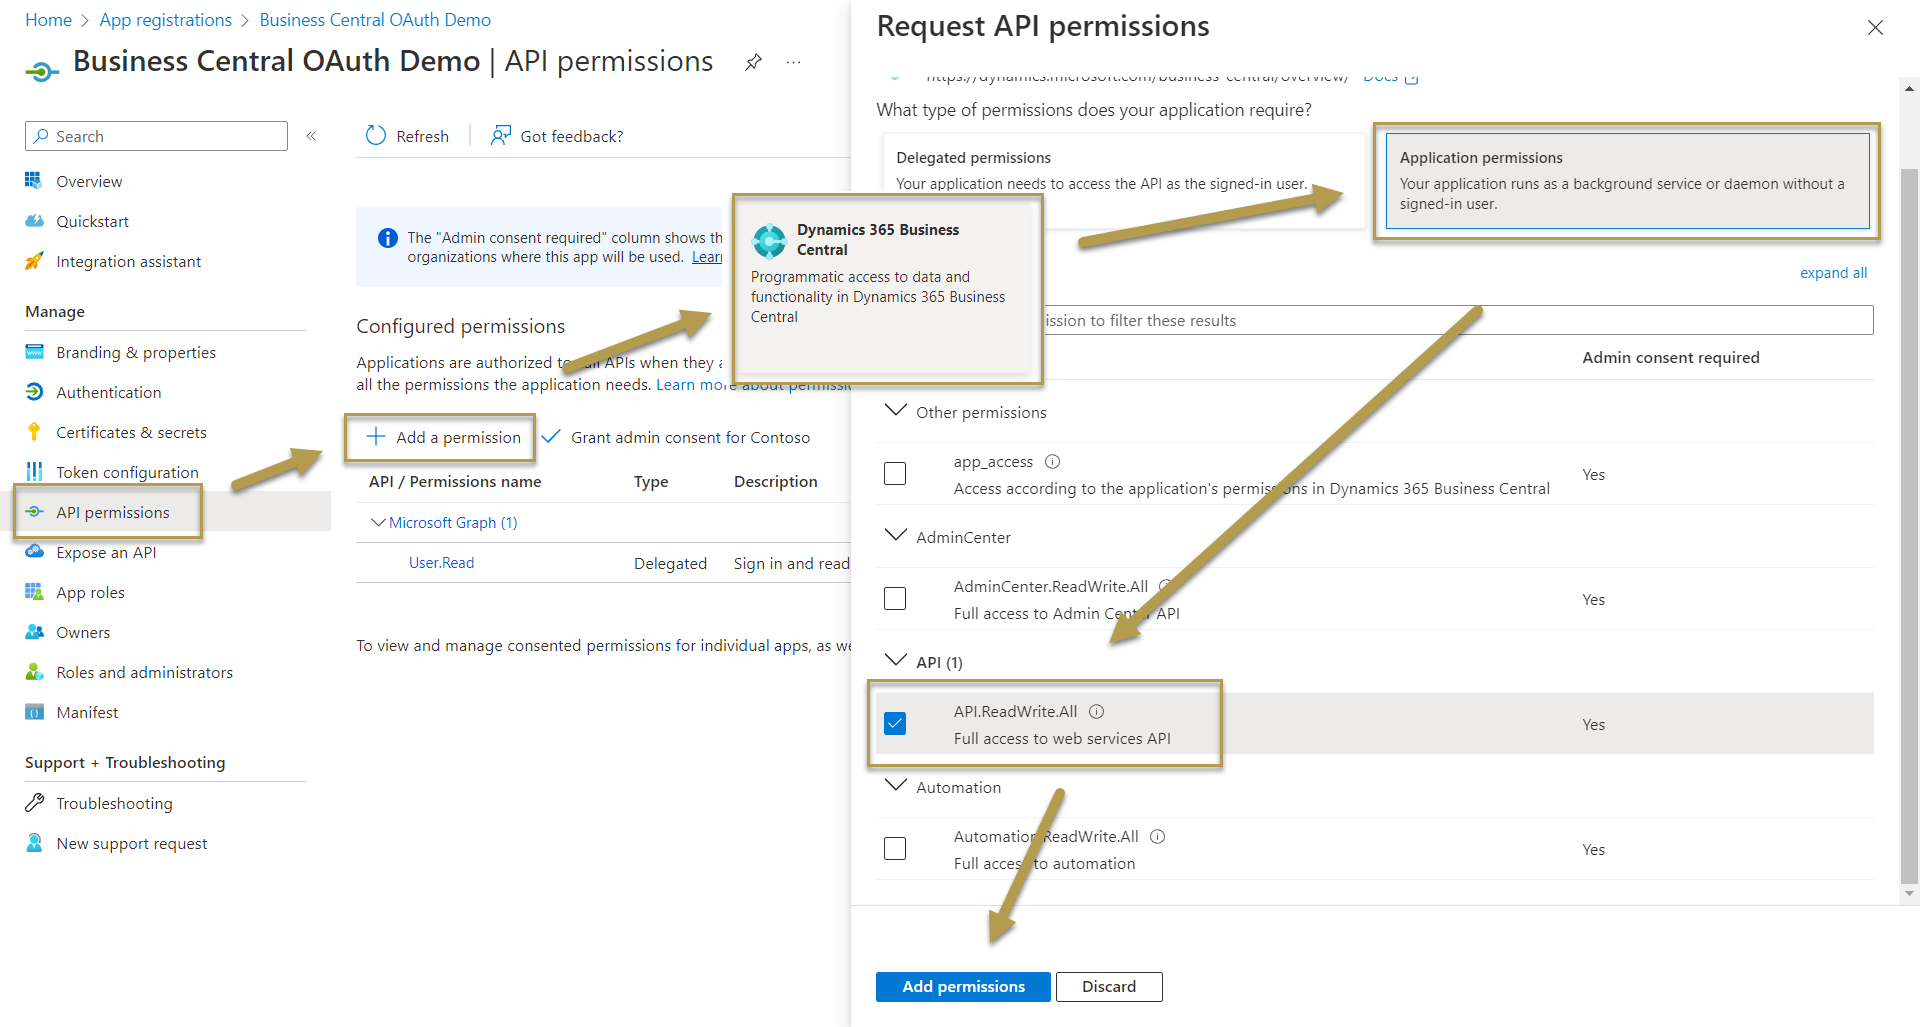
For Service to Service (S2S) authentication, create application permissions for Dynamics 365 Business Central and check API. ReadWrite.All. You may also use delegated permissions and check user_impersonation and Financial.ReadWrite.All, if a specific user is used for authentication.
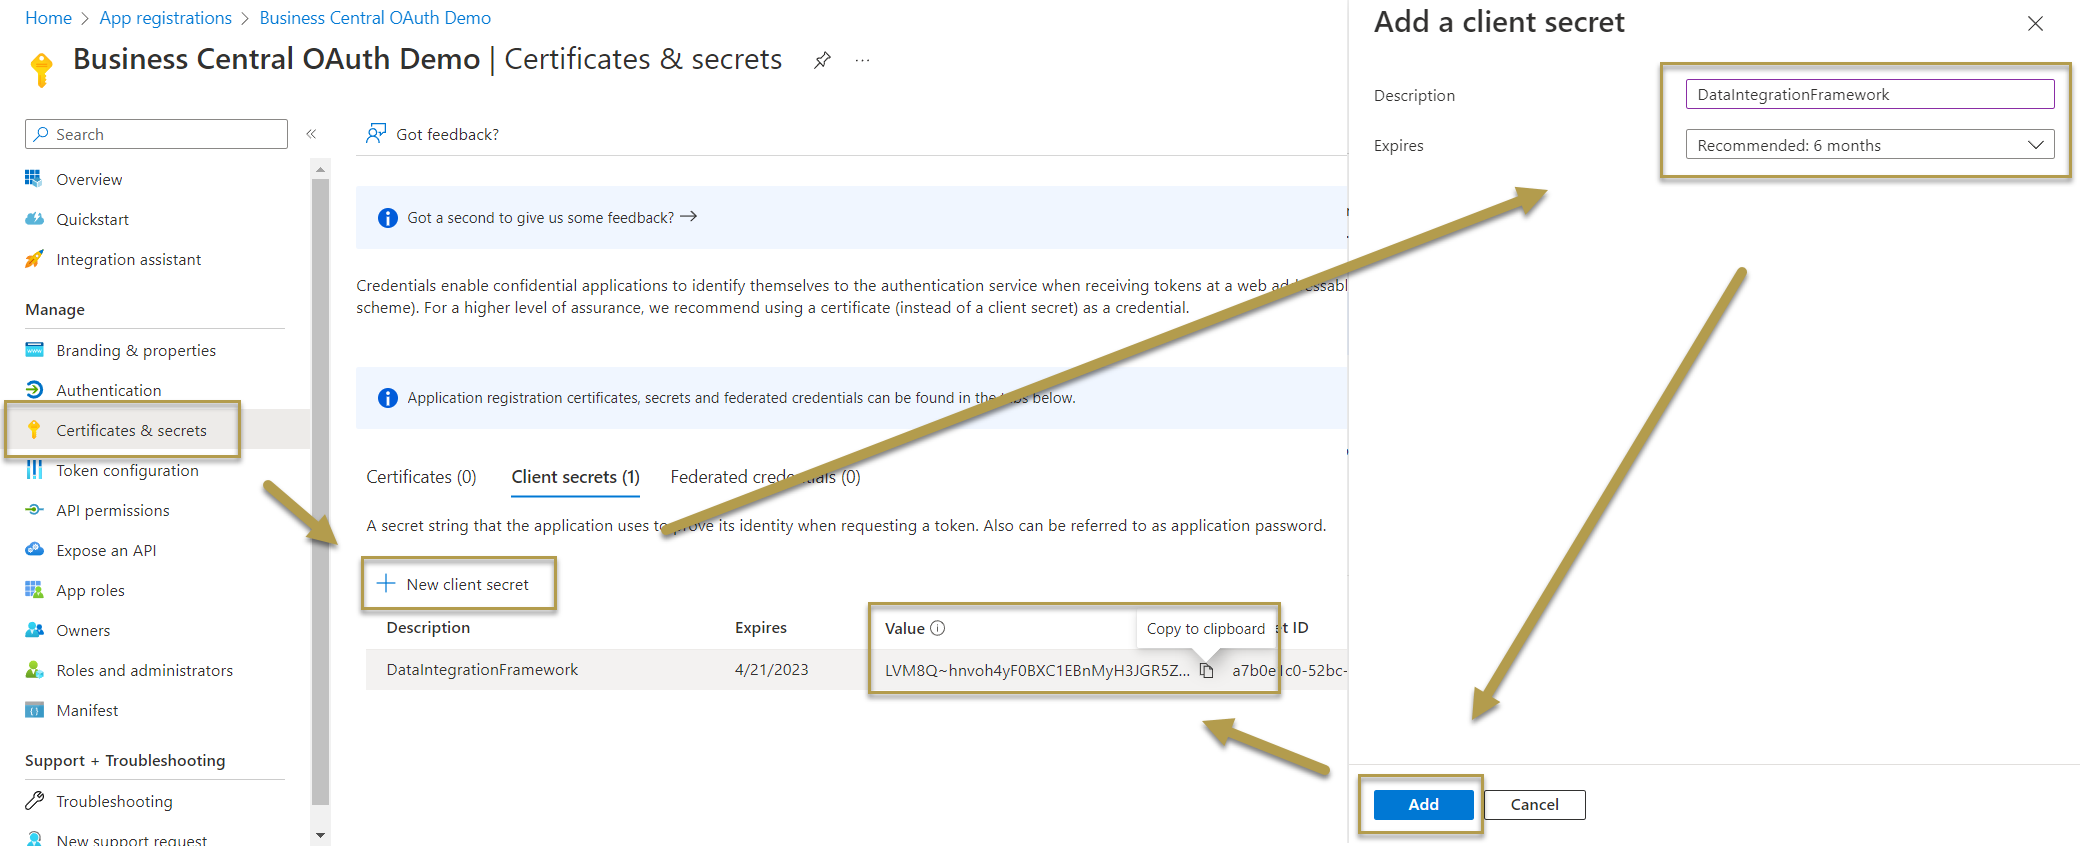
Create a client secret and copy the value for the next steps.
Find the client ID and Azure endpoints. Copy the values for the next steps. The endpoint version defines the used OAuth parameters, such as scope and resource. For Service to Service (S2S) authentication based on client credentials grant type, you will only need the OAuth 2.0 token endpoint (v2). For other grant types, you might also need the OAuth 2.0 authorization endpoint (v2).

Using administrator rights, grant consent to the registered app (API permissions > Grant admin consent for <company name>). You can also grant permissions from inside Business Central, but it's not recommended due to possible authentication errors.
To set application permissions in Business Central
For Service to Service (S2S) authentication, the previously created application needs permissions defined in Business Central.
Choose the
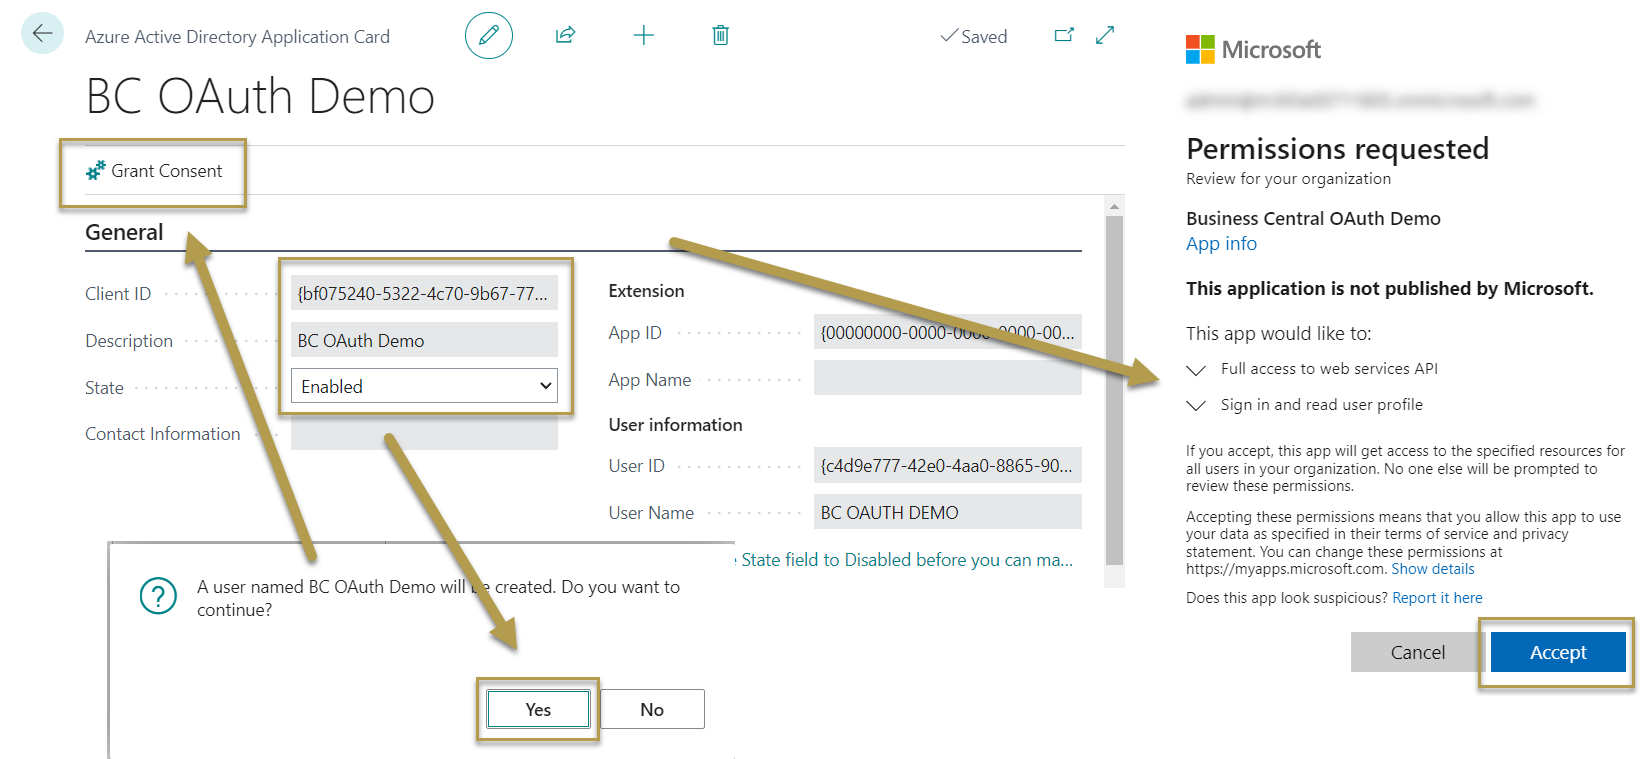
icon, enter Azure Active Directory Applications, and then choose the related link.Enter the client ID from the steps before and a description. The description will be used as User Name. Select State = Enabled and confirm the dialog. Then choose Grant Consent and accept the next dialog. If the Azure app has not already been granted consent in the Azure portal, an additional dialog might appear. The Azure application is now represented by a new user inside Business Central.
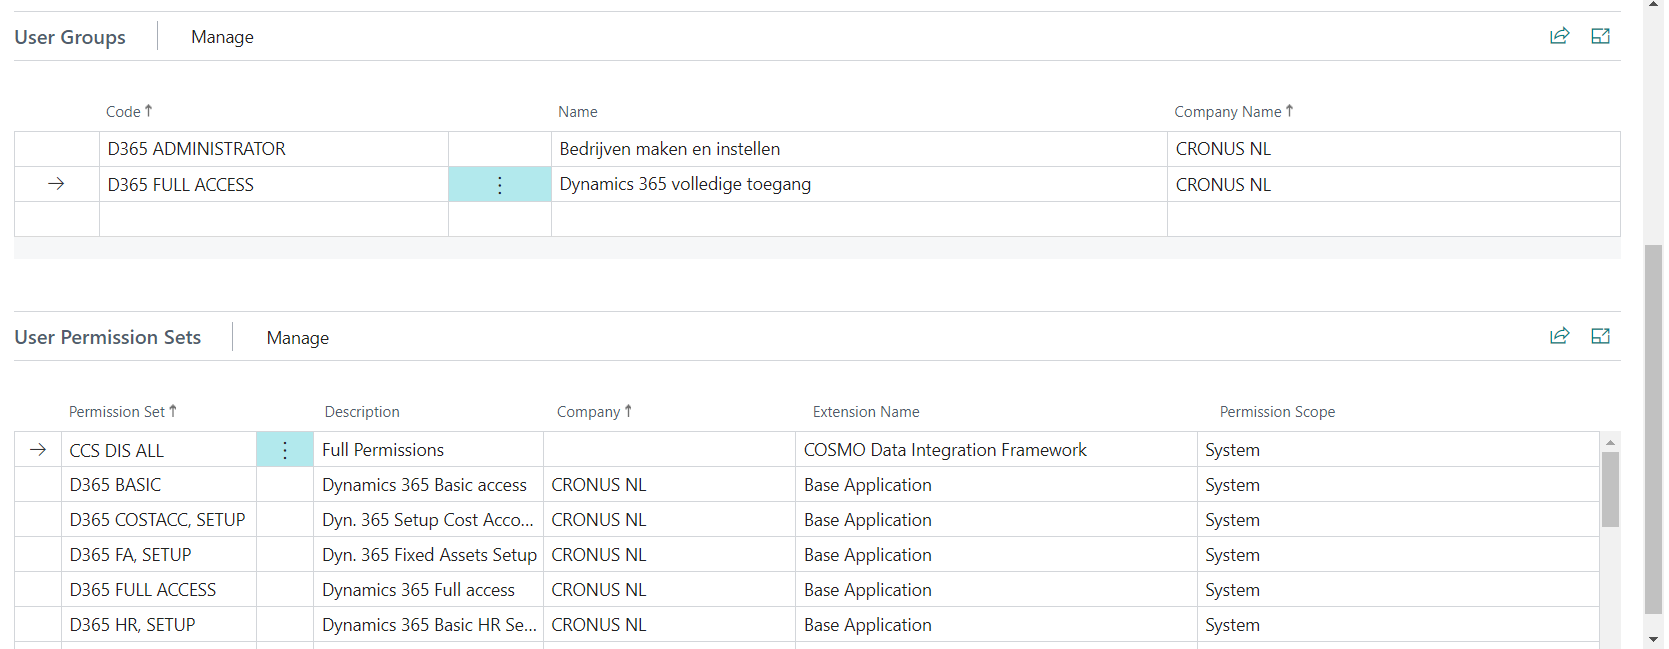
Scroll down the Azure Active Directory Applications page and set the desired permissions for the Azure application. The permission set SUPER must not be used. In this example, we use the D365 FULL ACCESS user group with sufficient permissions to transmit data into the Data Integration Framework app.
To create an OAuth Application to connect to Business Central
Create an OAuth Application in the sender company to authenticate on the target company. The values are based on a SaaS target environment.
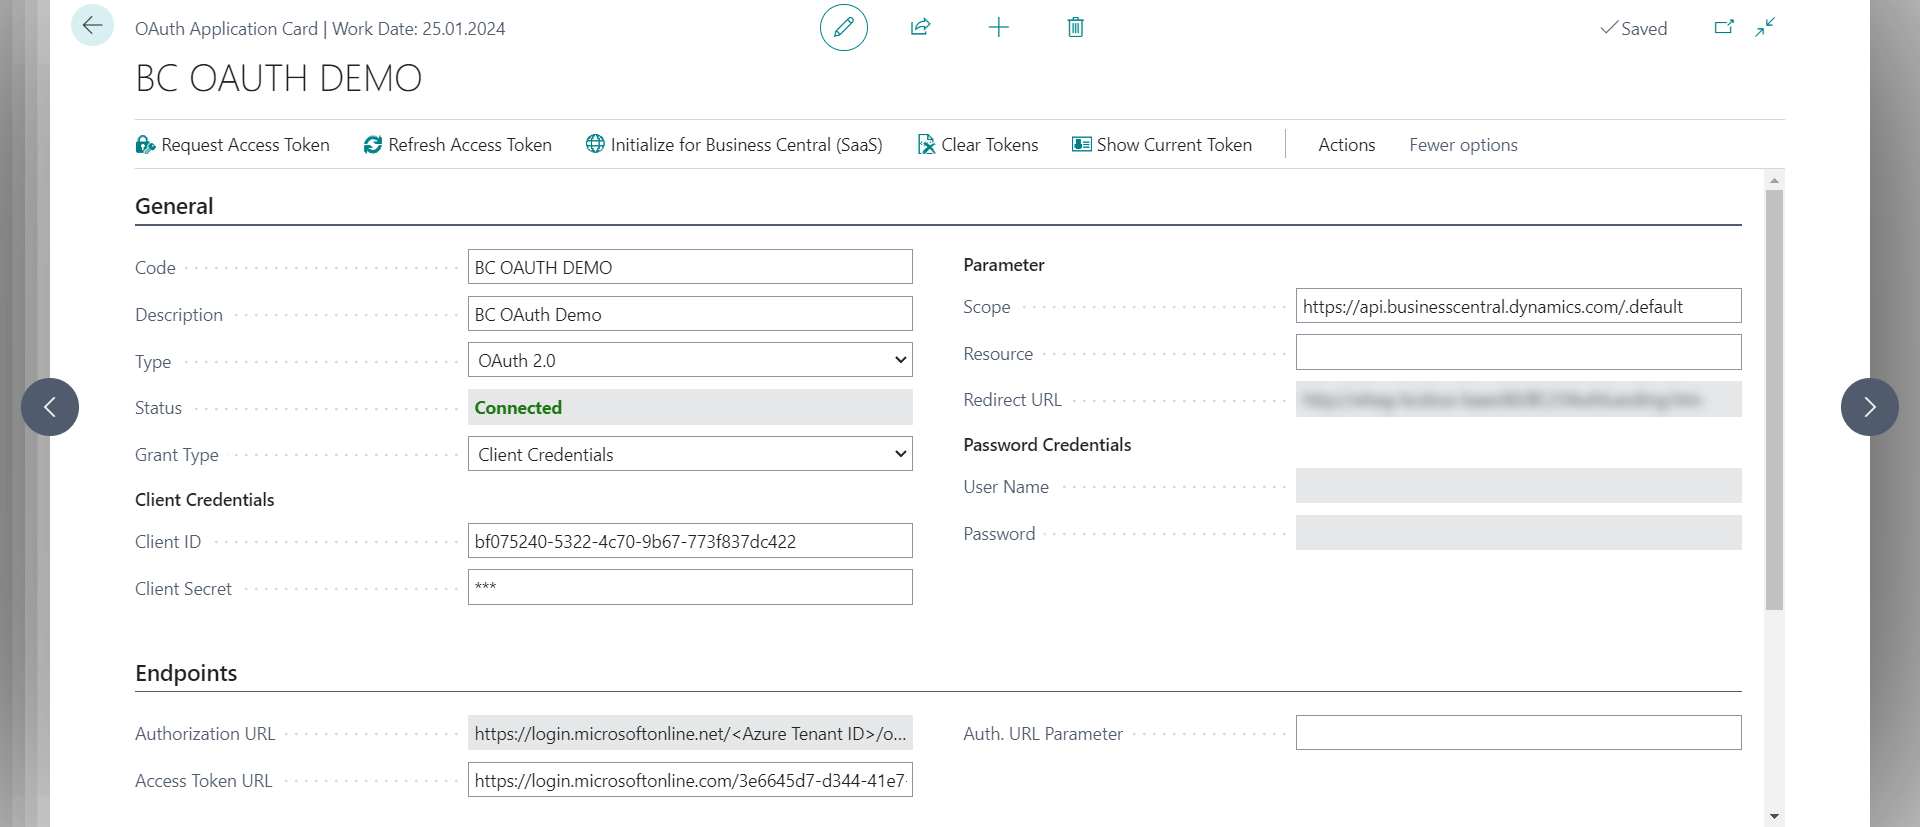
- Go to Business Central and create a new OAuth Application. Enter a Code, a Description, and choose Type = OAuth 2.0.
- Choose the Initialize for Business Central (SaaS) action to initialize some of the values based on the current environment.
- Enter the values from the previous steps in the Client ID, Client Secret and Access Token URL fields. For authentication types other than Service to Service, additional values are required.
- The Scope field must be https://api.businesscentral.dynamics.com/.default to address Business Central.
- The Grant Type field must be Client Credentials for Service to Service authentication.
- Choose the Request Access Token action to test the authentication. Depending on the Grant Type field, a consent dialog might pop up to log in with user credentials. The Status should be Connected.
- Optional: Choose the Clear Tokens action to remove the cached tokens. If you don't clear the token, the next authentication attempt will use the refresh token to create a new access token, similar to the Refresh Access Token action.
Tip
Select the Initialize for Business Central (SaaS) action to initialize some of the values based on the current environment. Be aware that these are the values for the sender company only. Choose the action on the target company and copy the values or change them respectively.
Tip
For v1 endpoints, the Resource field must be https://api.businesscentral.dynamics.com.
Tip
If you choose other grant types than Client Credentials, the Username, Password or Redirect URL fields must be set respectively to the type.
Tip
In sandbox environments, the Show Current Token action can be used to verify the Audience and Scope of the received token. For example, use https://jwt.io/ to decode the token and find detailed information.
Client Credentials
Choosing the Grant Type = Client Credentials will only use the Client ID, Client Secret, Scope and Resource for authentication. This type is best practice for an easy Service to Service connection with Business Central in SaaS.
Password Credentials
Choosing the Grant Type = Password Credentials requires to set the Username and Password fields of the user to be used for authentication in the target company. This is typically a service user. The password credential flow does not pop up a consent dialog every time, but is linked to a user. It can be used for user-based authentication.
Authorization Code
The Grant Type = Authorization Code requires you to set the Redirect URL field.
The authorization code flow may pop up a consent dialog for the user to log in with their credentials. UI dialogs are not allowed for background or automated tasks. This option should be used if Partner Mapping execution requires a user delegated authorization in the target company.
Implicit
The Grand Type = Implicit requires the Client ID but no Client Secret. Further, the Access Token URL field can be skipped, as the token will be retrieved from directly from the Authorization URL through a consent dialog. UI dialogs are not allowed for background or automated tasks. The Redirect URL field must be configured.
This option should be used if Partner Mapping execution requires a new login for each execution. The implicit flow does not have a refresh token and requires login for each request.
Redirect URL
Business Central offers a fixed endpoint to handle OAuth callbacks. This endpoint must be entered correctly in both the redirect URL of the OAuth Application and the registered app in Azure portal. The URL is defined as https://<server name>[:<port>]/[<aad tenant id>/][<environment name>/]OAuthLanding.htm. An example for a SaaS environment is https://businesscentral.dynamics.com/e1894b46-5483-4e16-a0c6-0d039b12b488/Production/OAuthLanding.htm.
Note
Using the http protocol for local environments can be difficult because Azure portal only allows http://localhost for unsecure connections. To connect from a local docker container, use an IIS and redirect the http://localhost:<your-port> calls by <httpRedirect enabled="true" destination="http://<your docker container>/bc/OAuthLanding.htm$Q" /> setting in your web.config to your docker container.
Feedback
Submit feedback for this page .