Team Setup
The following video will take you through the different steps, further down you find detailed step-by-step instructions.
After you have successfully initialized your app, your team members are named or roles are assigned to the respective persons. This is done before the actual solution is imported, so that the tasks can then be assigned directly to the roles.
For team setup, click TEAM in your role center.
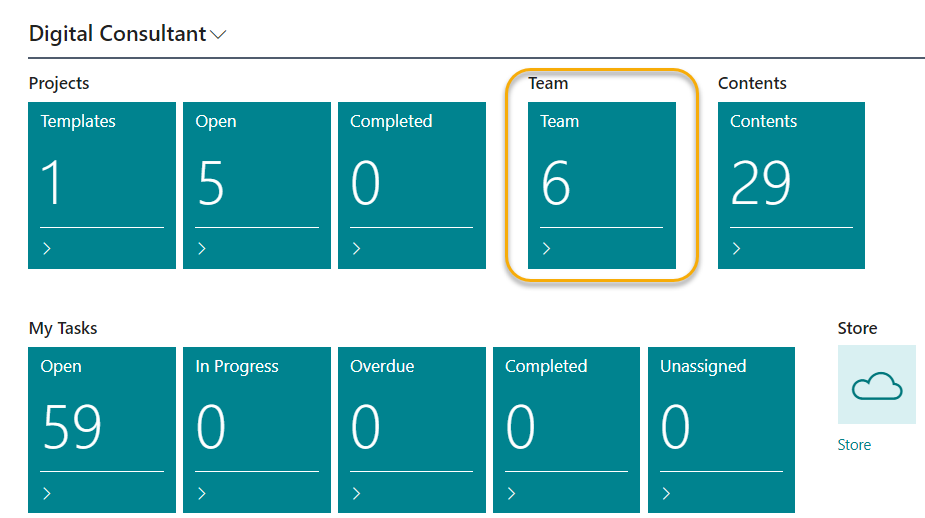
Visibility of users on the team map
If team members already use Business Central when setting up the team, they will also be displayed on the team map.
If users are not displayed, please use the "Create Team Members" function in the Digital Consultant setup menu, see System Setup.
To add new users, refer to System Setup and Add User.
Role-dependent Project Responsibility
Everyone in the company is responsible for the realization of their tasks within the project. There are three roles with corresponding responsibilities:
| Role | Responsibility |
|---|---|
| Project Manager | ..assigns the team members their roles and keeps the overall view of the project |
| Key User | ..works on its tasks to realize the implementation of the system. |
| End User | ..works on its tasks (training) in order to be able to use the system after its installation. |
Predefined Roles (Key User)
When the team map opens, you can see the roles already provided by the system.
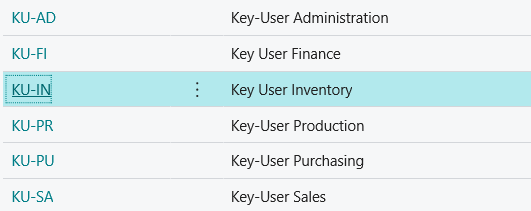
If team members already use Business Central when setting up the team, they will also be displayed on the team map.
If users are not displayed, use the "Create Team Members" function in the setup menu of the Digital Consultant, refer to System Setup.
To add new users, refer to the following instructions.
Team Member Card
If you click on the code of the team member (f. e. KU-FI), you will get to the Team Member Card.
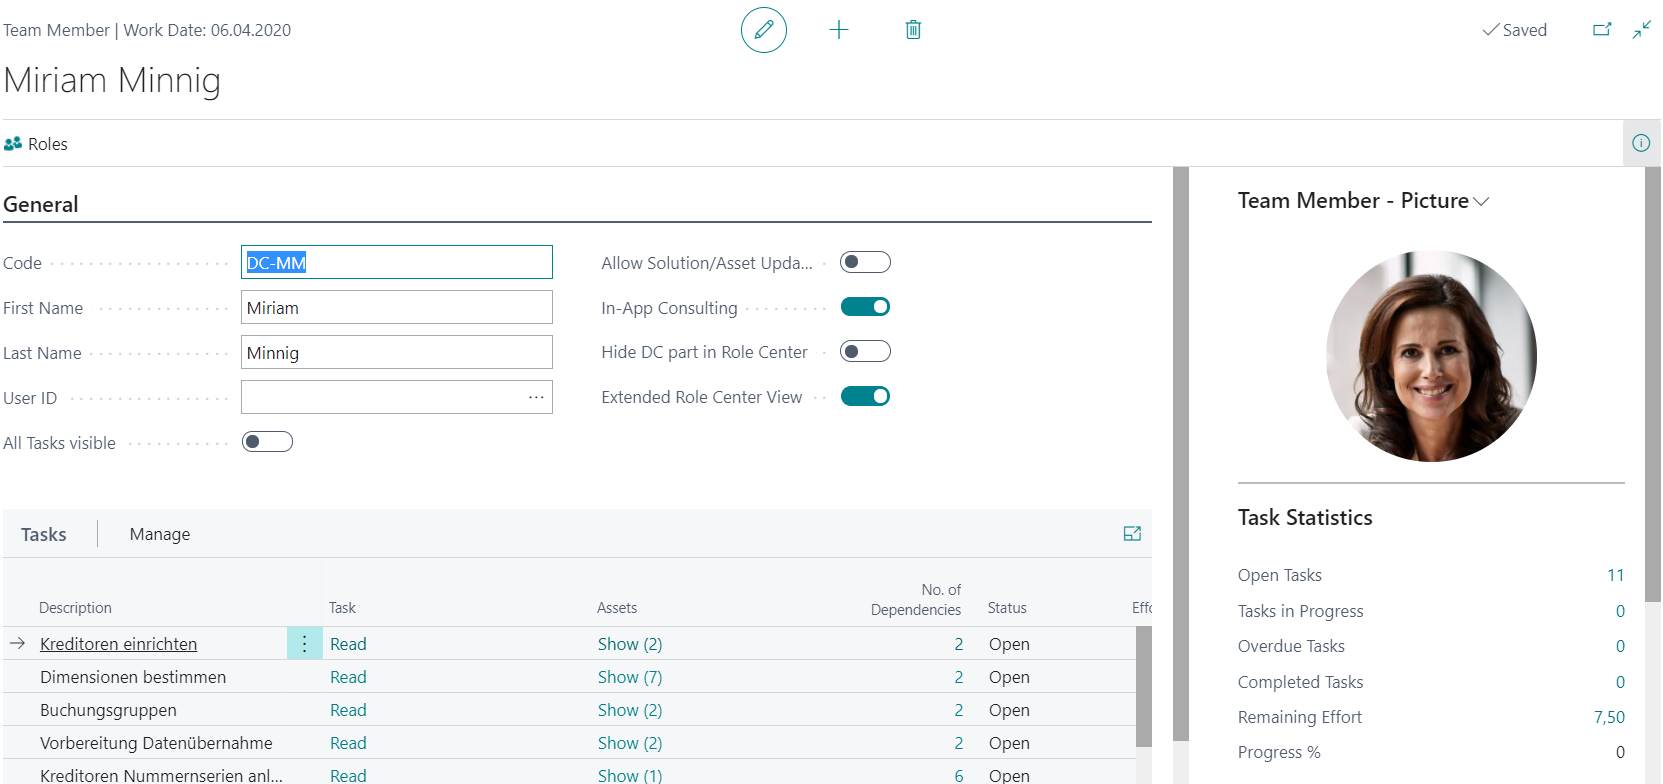
Next to the name of the team member the following fields should be filled in:
| Field | Description |
|---|---|
| Code | Unique code for this team member. |
| User-ID | User ID in the system. This field must be filled so the user can properly filter the task tiles in the role center. |
For the predefined roles, the code is already filled in. You replace the first name with the actual name of the person.
These settings are optional:
| Field | Description |
|---|---|
| All Tasks visible | Check this option if the system should not filter the tasks in the role center for the specific user. This might be relevant to Project Managers who are supposed to see and manage all tasks in the system. |
| Allow Solution/Asset Update | There is an update option for solutions and assets. For security reasons, those actions should only be performed by users who are clearly aware of the impact. Using this field, the update actions can be restricted to certain users. |
| Order Restriction | This field allows to determine which users can order items from the solution/asset catalog and works in conjunction with the field "Order Credit (LCY)" |
| In-App Consulting | In case the "main switch" is on in the Digital Consultant setup, the In-App Consulting can also be set individually for certain users. In case this field is switched to OFF users will not get hints about useful assets or solutions that are available in the solution/asset catalog or were previously purchased. |
| Hide DC part in Role Center | Switch this field to ON in case users do not want to view the Digital Consultant information in their role center. |
| Extended Role Center View | Switch this field to ON if users want to display the Digital Advisor information in their Role Centre. |
| Preferred Language | Set your preferred language for searching in the STORE of the Digital Consultant here (regardless of the system language). |
| Search Engine URL | Enter the path of your preferred search engine here as follows: 1. Open your preferred search engine (e.g. Bing) 2. Search for Business Central 3. Copy the path from the browser menu bar to the word "Business Central" and add a plus sign + to the end of the path (e. E.g. https://www.bing.com/search?q=business+central+) What can this function do? If you are on their task card and want to search for more information about this task on the web, clicking on "search the web" in the menu bar will give you more content about it. |
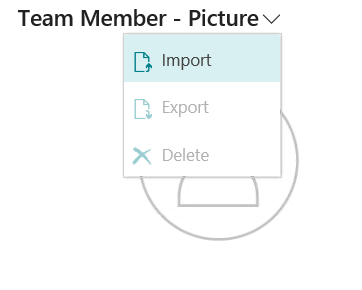
For inserting an image it is important to fill in the name fields (at least last name).
Use the small arrow to reach the input field and import your photo.
Role assignment
There are four main roles that must be assigned to the team in any case. One person can also have several roles.
- Admin
- Finance
- Sales
- Purchase
Klick on Roles in your Team Member Card.
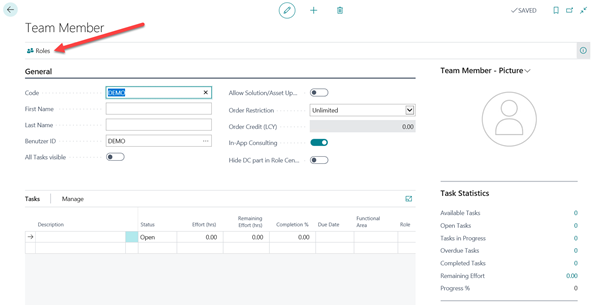
If you selected a predefined role, such as Key User Finance, it was automatically assigned.
You can select additional roles using the Role Code field. Click in the empty field. A selection window opens where the required role can be selected by clicking. If you move to the next line, the role description will be filled in automatically.
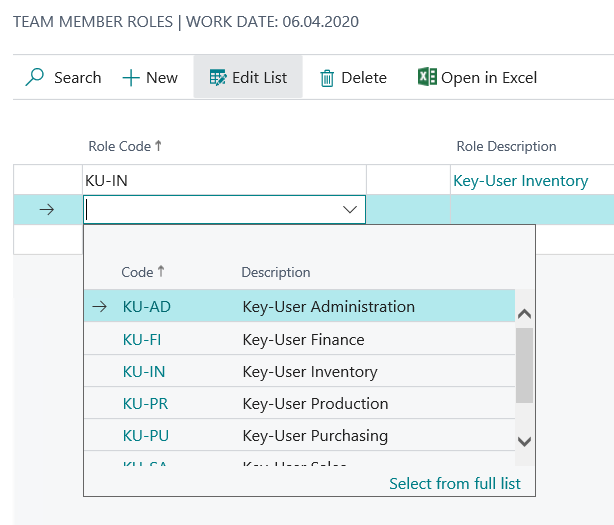
To correct incorrect role assignments, move to the relevant line and select Delete.